


REPOTTING MY OLD YEW WITH A LOT OF DEADWOOD.
5 posters
Page 1 of 1

 REPOTTING MY OLD YEW WITH A LOT OF DEADWOOD.
![]() Hans van Meer. Sun Apr 01, 2012 1:28 am
Hans van Meer. Sun Apr 01, 2012 1:28 am
Hi everybody,
today it finaly was time to take my old yew out off its ugly plastic container. I collected it in Wales in Nov 2007 with Tony Tickle and Enrico Savini and his student/friend/translator Ivo from (Italy). It was a yamadori find of exceptional quality and it was realy sad to see that it lost most of it's foliage during it's first years away from it's old home. But a small section did survive and over the last 3 years it got, with a lot of TLC, healthier and started to grow like crazy! So now it finaly was time to see what was hidden under the ground and to re plant it in a new (temporary) bonsai pot!
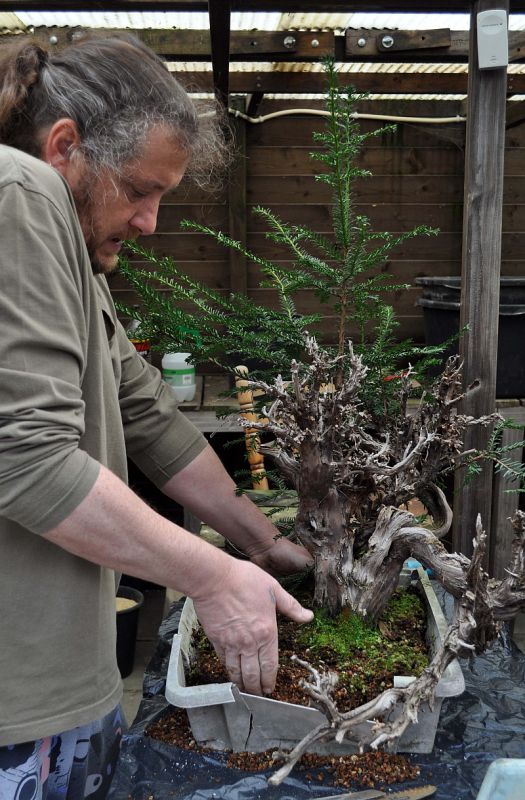
Below: The yew before I took it out off the plastic container! Look at all that amazing deadwood that I have to shape into a exciting and bold design!


Below: Here I carfully remove it from it's now opened old pot, making sure that the rootbal dont falls apart!
Below: Carefully removing the soil from the outer layers of the rootbal and removing all the thick and by now dead stumps, that were left from collecting the tree all those years ago.
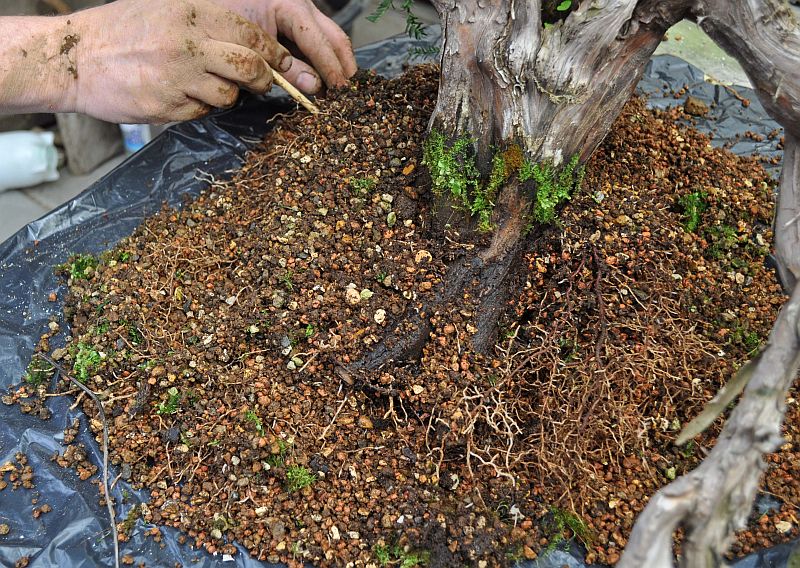
Below: Amazing deadwood and a very healthy rootbal!

Below: In it's new pot and working in the soil with a chopstick.
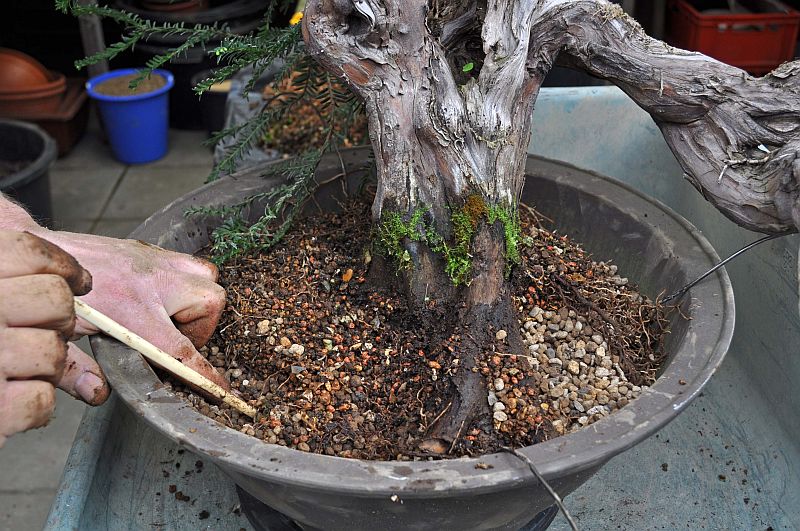
Below: Finer soil is put on as a top layer and that finished this transplant.

Below: The Yew in it's new (temporary) home for now. I think that this old yew will make a quit special fantasy tree with a lot of dramatic deadwood on it! I cant wait to start working on it's deadwood and foliage! But first the tree needs to get used to it's new home and I will only start to work, when I know for sure that it is safe to do! This tree is to precious to me to risk anything that could harm it's recovery! So I need some more foliage for it's first styling, so for now I only shortened the long branches before they get to thick to be bend any more. With a copper wire I pulled the main trunk more towards the center of the tree. This wire will be tightened bit by bit during the coming season!

Below: As you can tel from this picture, I am pretty happy with the outcome for now!


Hope you enjoyed this little impression of my fun day repotting with a very happy ending!
Cheers,
Hans van Meer.
today it finaly was time to take my old yew out off its ugly plastic container. I collected it in Wales in Nov 2007 with Tony Tickle and Enrico Savini and his student/friend/translator Ivo from (Italy). It was a yamadori find of exceptional quality and it was realy sad to see that it lost most of it's foliage during it's first years away from it's old home. But a small section did survive and over the last 3 years it got, with a lot of TLC, healthier and started to grow like crazy! So now it finaly was time to see what was hidden under the ground and to re plant it in a new (temporary) bonsai pot!
Below: The yew before I took it out off the plastic container! Look at all that amazing deadwood that I have to shape into a exciting and bold design!
Below: Here I carfully remove it from it's now opened old pot, making sure that the rootbal dont falls apart!
Below: Carefully removing the soil from the outer layers of the rootbal and removing all the thick and by now dead stumps, that were left from collecting the tree all those years ago.
Below: Amazing deadwood and a very healthy rootbal!
Below: In it's new pot and working in the soil with a chopstick.
Below: Finer soil is put on as a top layer and that finished this transplant.
Below: The Yew in it's new (temporary) home for now. I think that this old yew will make a quit special fantasy tree with a lot of dramatic deadwood on it! I cant wait to start working on it's deadwood and foliage! But first the tree needs to get used to it's new home and I will only start to work, when I know for sure that it is safe to do! This tree is to precious to me to risk anything that could harm it's recovery! So I need some more foliage for it's first styling, so for now I only shortened the long branches before they get to thick to be bend any more. With a copper wire I pulled the main trunk more towards the center of the tree. This wire will be tightened bit by bit during the coming season!
Below: As you can tel from this picture, I am pretty happy with the outcome for now!
Hope you enjoyed this little impression of my fun day repotting with a very happy ending!
Cheers,
Hans van Meer.
Last edited by Hans van Meer. on Sun Apr 01, 2012 3:50 pm; edited 2 times in total (Reason for editing : TYPO....or two!)

Hans van Meer.- Member


marcus watts- Member
Re: REPOTTING MY OLD YEW WITH A LOT OF DEADWOOD.
![]() Ed van der Reek Sun Apr 01, 2012 10:51 am
Ed van der Reek Sun Apr 01, 2012 10:51 am
I like it Hans,looking forward to see this tree development in the coming years 
Gr Ed
Gr Ed

Ed van der Reek- Member
Re: REPOTTING MY OLD YEW WITH A LOT OF DEADWOOD.
![]() Rui Marques Sun Apr 01, 2012 11:36 am
Rui Marques Sun Apr 01, 2012 11:36 am
Hi Hans,
Good to ear you again and with such a fine material.
BTW, what do you mean by TLC?
Nad if you decide to chop the long dead branch, please send it to me so i can put it in my living room.
Cheers.
Good to ear you again and with such a fine material.
BTW, what do you mean by TLC?
Nad if you decide to chop the long dead branch, please send it to me so i can put it in my living room.
Cheers.

Rui Marques- Member
Re: REPOTTING MY OLD YEW WITH A LOT OF DEADWOOD.
![]() JimLewis Sun Apr 01, 2012 12:46 pm
JimLewis Sun Apr 01, 2012 12:46 pm
TLC = Tender Loving Care

JimLewis- Member
» Juniperus squamata since 2010
» Why a Makita or Dremel will never create 'Natural' deadwood
» A deadwood yew
» Let's see close ups of ya Bark!
» juniperus Dragon fire
» Why a Makita or Dremel will never create 'Natural' deadwood
» A deadwood yew
» Let's see close ups of ya Bark!
» juniperus Dragon fire
Page 1 of 1
Permissions in this forum:
You cannot reply to topics in this forum|
|
|