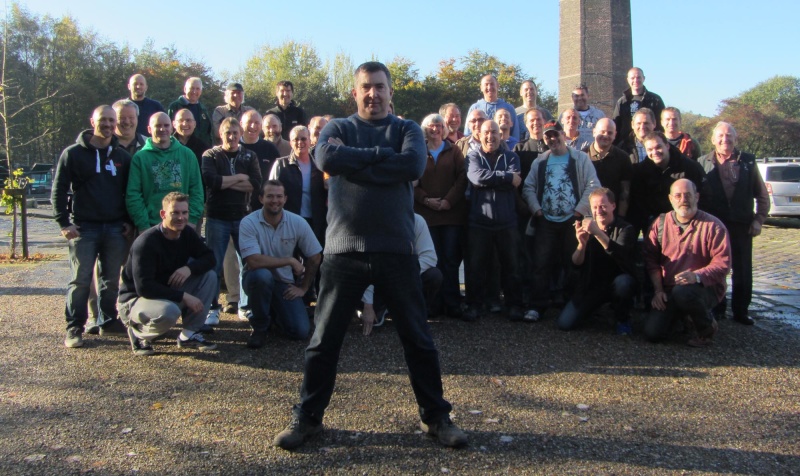
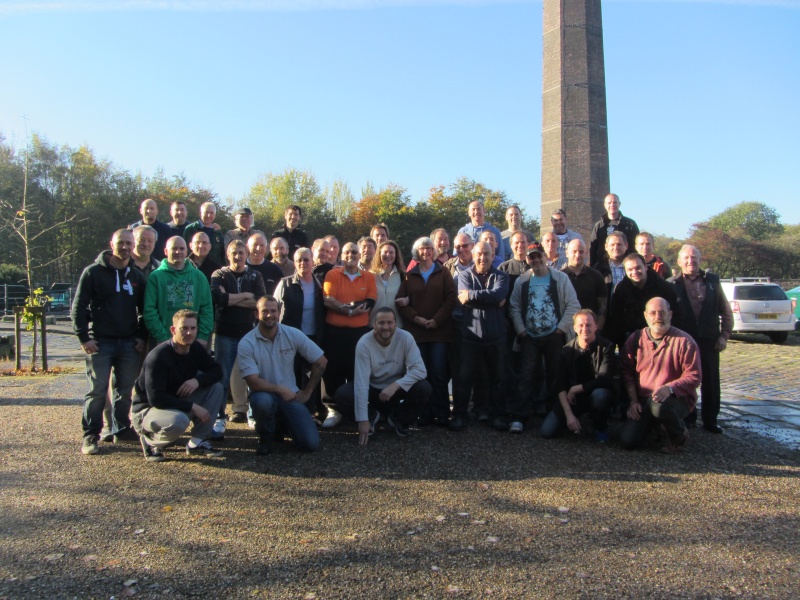
BURRS 2013
+12
chris
-Daniel-
Pavel Slovák
Fore
my nellie
yamasuri
jtay123
DangerousBry
Andrew Campbell
Jerry Meislik
Mitch Thomas
Hans van Meer.
16 posters
Page 2 of 2
Page 2 of 2 •  1, 2
1, 2
 Re: BURRS 2013
A great event. I can't remember the last time I laughed so much! Pavel and I worked on a Mugo Pine collected by Pavel.


More on my blog, including a video of Pavel's work: http://yamadoriartuk.blogspot.co.uk/


More on my blog, including a video of Pavel's work: http://yamadoriartuk.blogspot.co.uk/

Lee Brindley- Member
 Re: BURRS 2013
There's so much going on and so many trees being finished you forget to click the camera on everything else:-


DangerousBry- Member
 Re: BURRS 2013
Bry why does it look like Tony is telling you off in the last pic? Did he tell you to stop being so god damn dangerous all of the time?
Andrew Campbell- Member
 Re: BURRS 2013
thanks for all the nice comments guys and all great potographers
and did not take any photos i was to engrossed in my work,
SPECIAL thanks go to tony for putting on another great weekend
and allowing me to work on his tree it was amazing also thanks
to all the artists who made it special for everyone and also
tonys wife and friend who kept us all well fed what an achievment
and also last but not least thanks to everyone who took part.
BURRS 2013. AMAZING.

robatkinson- Member
 Re: BURRS 2013
Awesome! Thank You Nellie, and Thank You Hans! I'll read it tonight when I have the time to sit and relaxmy nellie wrote:So, here you go Fore A rock planting that shows it all for empty spaces.
And Hans, Andrew's pine was fantastic material, but you did a stunning job on it! The finished pine is, for me, the show stopper (not that I didn't like everyone elses
Beautiful lines. I saw you drawing out the tree, do you come up with the design and then sketch, or do you play around with poss. designs while sketching, then deciding upon the final styling?
Congratulations Tony on a very fun looking event!
Chris

Fore- Member
 Re: BURRS 2013
Hi Chris,Fore wrote:Awesome! Thank You Nellie, and Thank You Hans! I'll read it tonight when I have the time to sit and relaxmy nellie wrote:So, here you go Fore A rock planting that shows it all for empty spaces.
And Hans, Andrew's pine was fantastic material, but you did a stunning job on it! The finished pine is, for me, the show stopper (not that I didn't like everyone elses)
Beautiful lines. I saw you drawing out the tree, do you come up with the design and then sketch, or do you play around with poss. designs while sketching, then deciding upon the final styling?
Congratulations Tony on a very fun looking event!
Chris
thanks for you kind comments and I hope that you will find the link that Nellie posted interesting (thanks Nellie!)? THose day's I had a few ideas that I put into a few post on my blog....but as that goes with me, I stopped halfway!
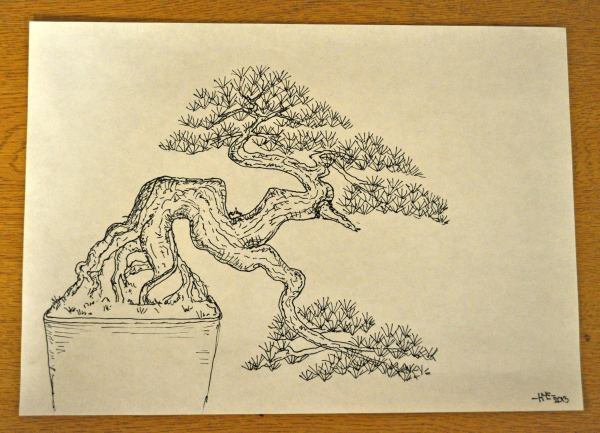
Here is the drawing that I made on the Saturday evening for Steward. He was working on another off his trees and the Pine stood beside him on the table, I asked him is it OK that I make a design option for your Pine? He sad: yes please! So I grabbed my sketchpad and started to draw the outlines of tree and the beginning off the main branches that I was planning to use. When those outlines are more or less similar that the actual tree, well then I start to draw the rest of the main branches and than the smaller branches until they are about the length that feels or seems right! Than the bundles of needles are made quickly until the outline off each foliage pad has reached more or less the right outline that feels right. More needles are drawn until everything is more or less in balance to me...that's it really?! I have found out that by drawing your design on to paper or pc is very helpful to check if is looks all right and possible. And by setting your image with your hands in to a drawings you will always remember them! You have created a blueprint in your head with the use of your hands. In this case the drawing also helps the student to see with his own eyes what you are seeing as a possible future for his tree! This makes it all clearer and easier to understand and helps them to make a well thought decision about the future of their own trees! And it is a nice souvenir as well!
Here is the drawing I made for Steward.
More pictures will follow tomorrow!
Cheers,
Hans van Meer.

Hans van Meer.- Member
 Re: BURRS 2013
Dear Tony, it's not that I don't like the first photo, but with you stepping aside in the 2nd one we can clearly see among those gentle boys two women participants instead of one!!!Tony wrote:OOOOPS THIS is the 'Official' Team photo
Will I ever be number xx???

my nellie- Member
 Re: BURRS 2013
Dear Alexandramy nellie wrote:Dear Tony, it's not that I don't like the first photo, but with you stepping aside in the 2nd one we can clearly see among those gentle boys two women participants instead of one!!!Tony wrote:OOOOPS THIS is the 'Official' Team photo

Will I ever be number xx???
Burrs is for everyone, men and women, who has material to work on, and the desire to be there...and if you do not have anything interesting to work on, am I sure you can buy, just ask Tony, he knows.
Kind regards Yvonne
Guest- Guest
 Re: BURRS 2013
[/quote]Hi Chris,
thanks for you kind comments and I hope that you will find the link that Nellie posted interesting (thanks Nellie!)? THose day's I had a few ideas that I put into a few post on my blog....but as that goes with me, I stopped halfway!

Here is the drawing that I made on the Saturday evening for Steward. He was working on another off his trees and the Pine stood beside him on the table, I asked him is it OK that I make a design option for your Pine? He sad: yes please! So I grabbed my sketchpad and started to draw the outlines of tree and the beginning off the main branches that I was planning to use. When those outlines are more or less similar that the actual tree, well then I start to draw the rest of the main branches and than the smaller branches until they are about the length that feels or seems right! Than the bundles of needles are made quickly until the outline off each foliage pad has reached more or less the right outline that feels right. More needles are drawn until everything is more or less in balance to me...that's it really?! I have found out that by drawing your design on to paper or pc is very helpful to check if is looks all right and possible. And by setting your image with your hands in to a drawings you will always remember them! You have created a blueprint in your head with the use of your hands. In this case the drawing also helps the student to see with his own eyes what you are seeing as a possible future for his tree! This makes it all clearer and easier to understand and helps them to make a well thought decision about the future of their own trees! And it is a nice souvenir as well! Stward was very happy with the drawing....I was plessently surpriced that next day he asked me if I please would help him to style his pine! That was a brave dissision from him because for my intended design some major branches needed to be cut off or made into a Jin! So that puts a little bid of presure onto your shoulders...but thats feels nise!
Here is the drawing I made for Steward.
More pictures will follow tomorrow!
Cheers,
Hans van Meer.[/quote]
Thank You Hans for walking me thru your work process! But I'd hate to ask if Steward didn't choose this one to work on first, how much better can it get?
I read your blog last night. Very informative, and creative using the 'bones' of a real tree, reducing leaves and forming pads w. open spaces. I kept going back to the orig. tree just to make sure what I was seeing was real lol
And I totally agree, having a drawing would be a great long term guideline to the design! And from what you described, it's very similar to that blog post. Draw out the major branching, and then play around with secondary branching to come up with the final design. And the cherry on top, so to speak, is putting the approp. amt. of foliage and size of foliage.
Well, this certainly gives me a good starting point Hans! Thanks again for the explanation!
Chris
thanks for you kind comments and I hope that you will find the link that Nellie posted interesting (thanks Nellie!)? THose day's I had a few ideas that I put into a few post on my blog....but as that goes with me, I stopped halfway!
Here is the drawing that I made on the Saturday evening for Steward. He was working on another off his trees and the Pine stood beside him on the table, I asked him is it OK that I make a design option for your Pine? He sad: yes please! So I grabbed my sketchpad and started to draw the outlines of tree and the beginning off the main branches that I was planning to use. When those outlines are more or less similar that the actual tree, well then I start to draw the rest of the main branches and than the smaller branches until they are about the length that feels or seems right! Than the bundles of needles are made quickly until the outline off each foliage pad has reached more or less the right outline that feels right. More needles are drawn until everything is more or less in balance to me...that's it really?! I have found out that by drawing your design on to paper or pc is very helpful to check if is looks all right and possible. And by setting your image with your hands in to a drawings you will always remember them! You have created a blueprint in your head with the use of your hands. In this case the drawing also helps the student to see with his own eyes what you are seeing as a possible future for his tree! This makes it all clearer and easier to understand and helps them to make a well thought decision about the future of their own trees! And it is a nice souvenir as well!
Here is the drawing I made for Steward.
More pictures will follow tomorrow!
Cheers,
Hans van Meer.[/quote]
Thank You Hans for walking me thru your work process! But I'd hate to ask if Steward didn't choose this one to work on first, how much better can it get?
I read your blog last night. Very informative, and creative using the 'bones' of a real tree, reducing leaves and forming pads w. open spaces. I kept going back to the orig. tree just to make sure what I was seeing was real lol
And I totally agree, having a drawing would be a great long term guideline to the design! And from what you described, it's very similar to that blog post. Draw out the major branching, and then play around with secondary branching to come up with the final design. And the cherry on top, so to speak, is putting the approp. amt. of foliage and size of foliage.
Well, this certainly gives me a good starting point Hans! Thanks again for the explanation!
Chris

Fore- Member
 Re: BURRS 2013
I first took this Larch to BURRS last year for wiring and first styling and it liked it so much in wanted to go back this year for trimming and its final styling under the fantastic guidance of Pavel.
Having picked up some stunning pots from John Pitt on the way up to Manchester I just had to match it with one of them when I returned home.
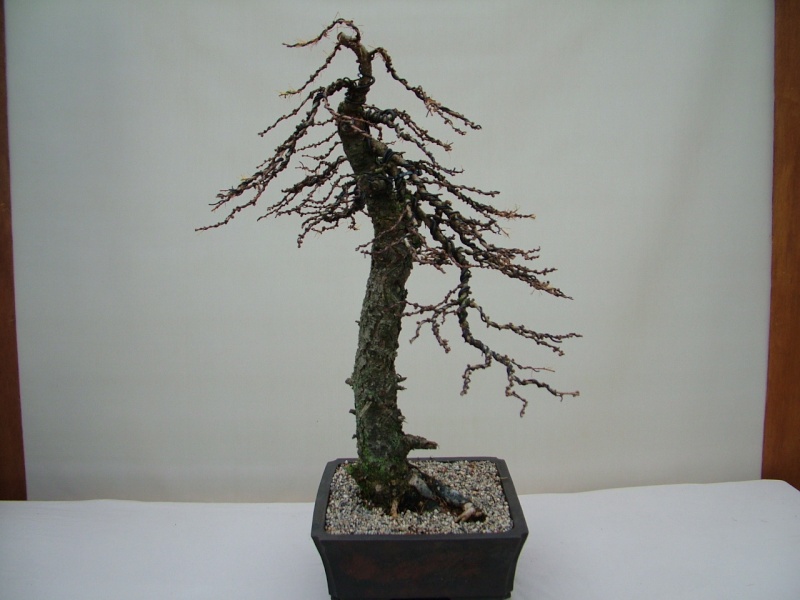
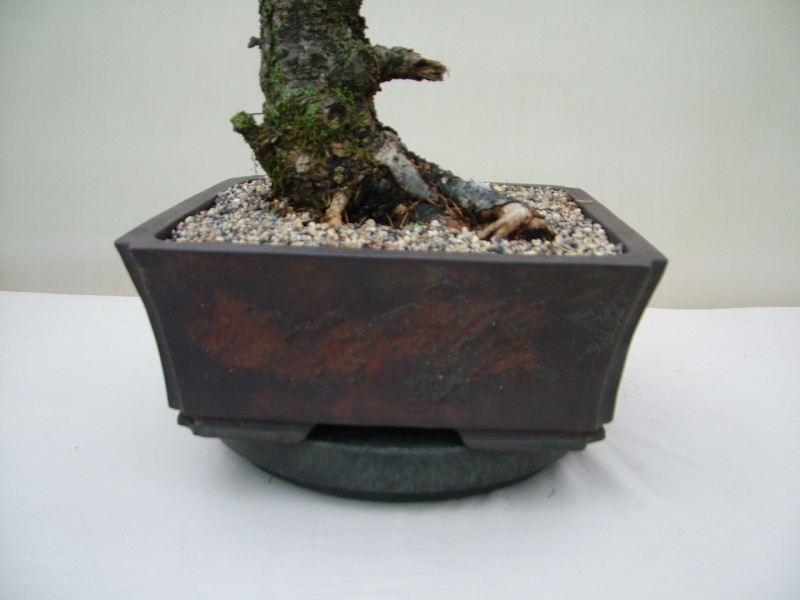
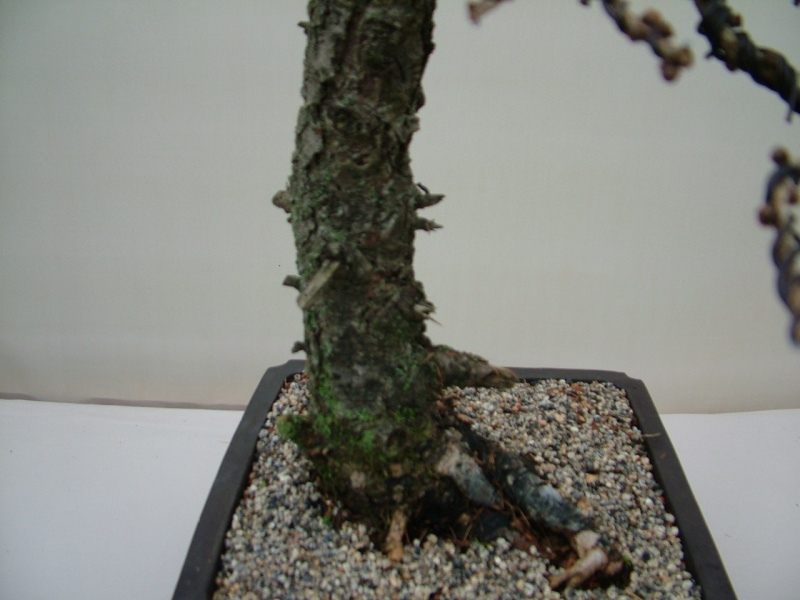
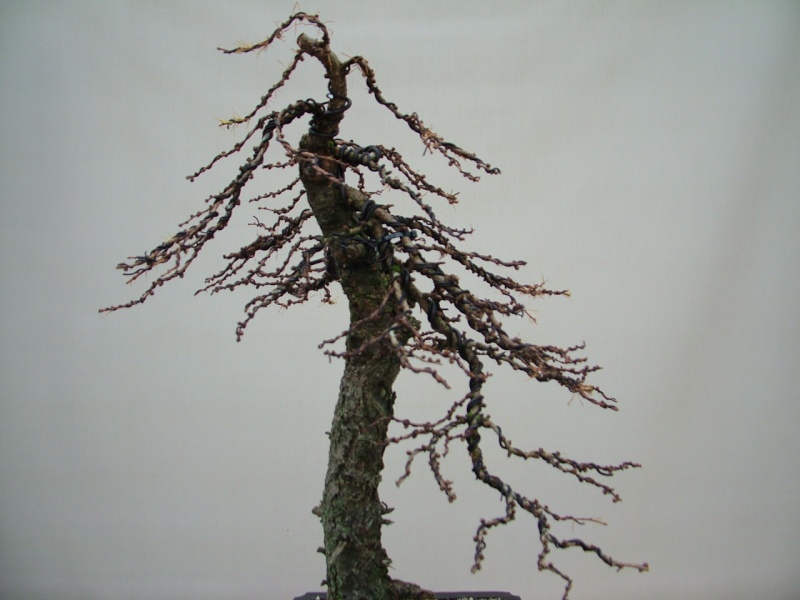
Regards Chris
Having picked up some stunning pots from John Pitt on the way up to Manchester I just had to match it with one of them when I returned home.


Regards Chris
chris- Member
 Re: BURRS 2013
Nice Larch an all Chris. Lovely bark and stunning styling by Pavel. Just a shame it had to be cordoned off

Andrew Campbell- Member
 Re: BURRS 2013
It was funny though!!!! ;)Andrew Campbell wrote:Nice Larch an all Chris. Lovely bark and stunning styling by Pavel. Just a shame it had to be cordoned off

DangerousBry- Member
Page 2 of 2 •  1, 2
1, 2
 Similar topics
» Burrs 2013 4 places have been made available
» Burrs 2011 and so it begins
» Bonsai Triennale 2013 Decin Czech Republic 13-15 september 2013
» Burrs 2009
» BUXUS WORKSHOP AT TONY'S (10-10-09)
» Burrs 2011 and so it begins
» Bonsai Triennale 2013 Decin Czech Republic 13-15 september 2013
» Burrs 2009
» BUXUS WORKSHOP AT TONY'S (10-10-09)
Page 2 of 2
Permissions in this forum:
You cannot reply to topics in this forum


