BUXUS WORKSHOP AT TONY'S (10-10-09)
+24
flor1
fiona
bonsai monkey
Bear
Justin Hervey
Lee Kennedy
Kev Bailey
Jeremy
Erik Križovenský
Ed van der Reek
NeilDellinger
Peter Thorne
Rob Kempinski
Ian Warhurst
anttal63
Cees
waway
jjbacoomba
Stone Monkey
landerloos
bigsteve
Nik Rozman
matt addie
Harleyrider
28 posters
Page 1 of 2
Page 1 of 2 • 1, 2 
 BUXUS WORKSHOP AT TONY'S (10-10-09)
INTRODUCTION
Early in October, I got a phone call from Tony asking if I'd like to join him and Matt at Tickle Towers to help work on a Buxus stump. Obviously, I had to think about it for several nanoseconds before jumping at the chance. I mean, come on, how often do you get asked by a bonsai genius to participate in the creation of a potential show-winner?
So, early the following Saturday, I met up with Matt near my local Maccy-D's and we drove the 20-odd miles to Tony's, both of us full of nervous anticipation at showing our meagre skills to The Master.
Having recieved the customary warm welcome/cup of coffee, we were ushered straight into the garden where we were greeted by the sight of several new trees we had never seen before. This is becoming something of a recurring theme, as every time I visit I fall over rows of yamadori that weren't there last time!
Anyway, on the stone workbench in the center of the garden were several fine examples of raw material, amongst which we spied the object of today's 'lesson'. After discussing what we each thought of the potential of these new acquisitions, Tony cleared the decks, leaving the Buxus stump in pride of place. I can't be sure, but I'm sure I saw it looking round the three of us nervously as we approached.
Tony began to explain what his vision for the tree was, and what he hoped to achieve during the course of the day. It went something like this. "Shorten the stump by a good 6 inches, remove this branch, that branch, that branch and possibly this one, create a 'keyhole' channel from the base right up to here, hollow out the trunk from the top all the way down to here, possibly remove this stump and hollow it through to the main trunk, tidy up all the small spurs where old branches once lived, remove any sign of man having touched the tree at all by several devious means, fully wire the remaining branches then give them an initial styling. Right, any questions?"
Matt and I just stared at each other open-mouthed. Surely it can't be possible to do this amount of work in 5 hours?
Wanna bet?
This article is intended to show newbie and old pro alike what can be achieved using just a well-thought out plan, a few simple tools and a top piece of material. Oh, and any spare apprentices you happen to have lying about the place.
PREPARATION
As with all good workshop sessions, we began with a hot brew and by giving Tony's new trees a good dose of looking at. After 20 minutes of discussion about styling, possible fronts etc (you know the drill), it was time to begin the lesson for today. We'd just like to mention at this point that we chose a slightly different front for the Buxus than Tony, but modesty prevents us from revealing which one he eventually settled on. See Tony, we're learning!
Like lambs to the slaughter!

This is the tree we will be working on.


Tony spent a while going over his plans for the tree, explaining in detail what we would be doing to achieve each step in the transformation. You've gotta have a plan, but be prepared to be flexible.


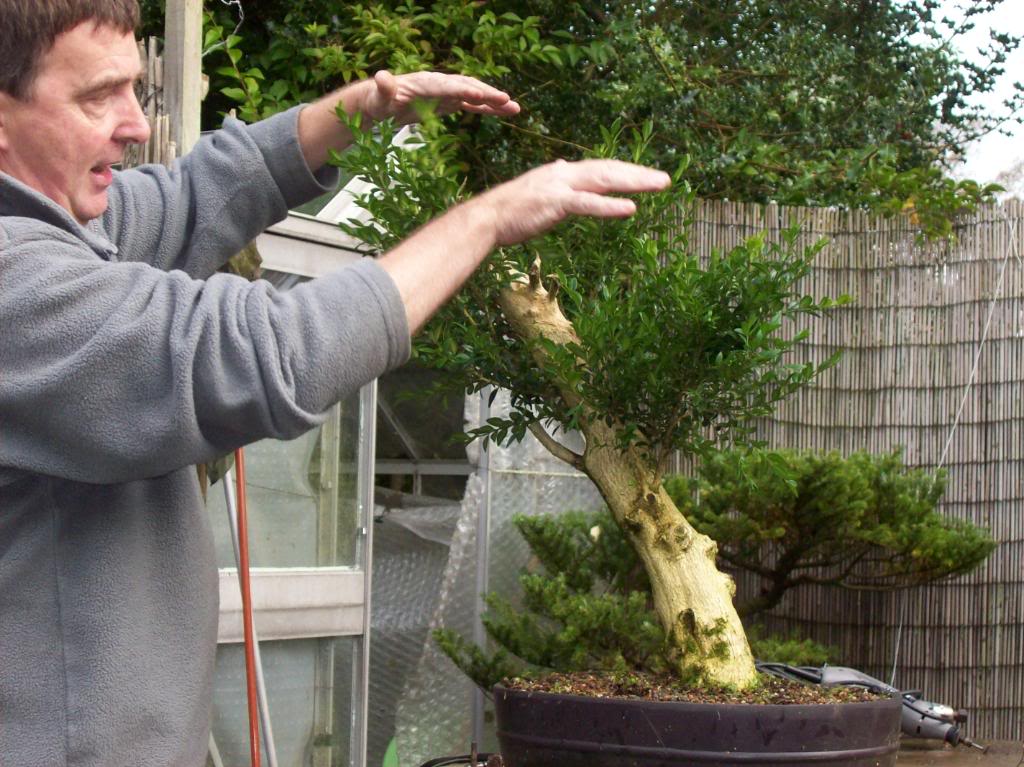
First order of the day is a little basic housekeeping. Tying up the branches we want to keep will lessen the risk of accidental damage as well as give us more room to work.
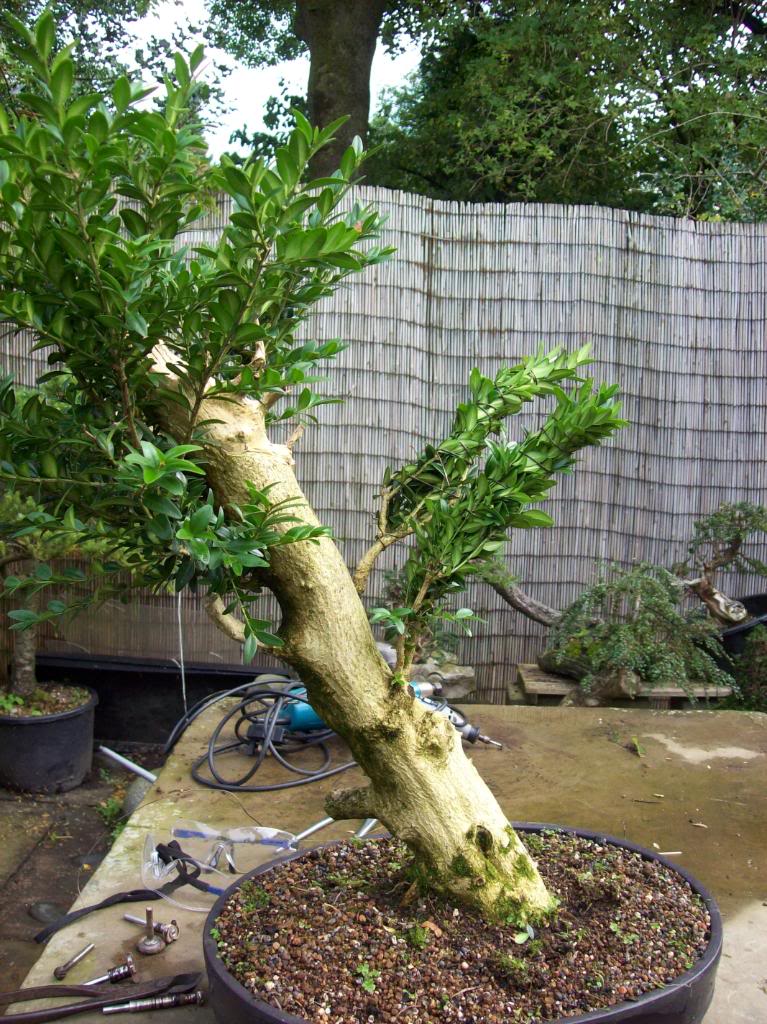
Next, Tony removed the rest of the branches leaving what appears to be very little in the way of foliage. Fear not, dear reader, all will become clear.....
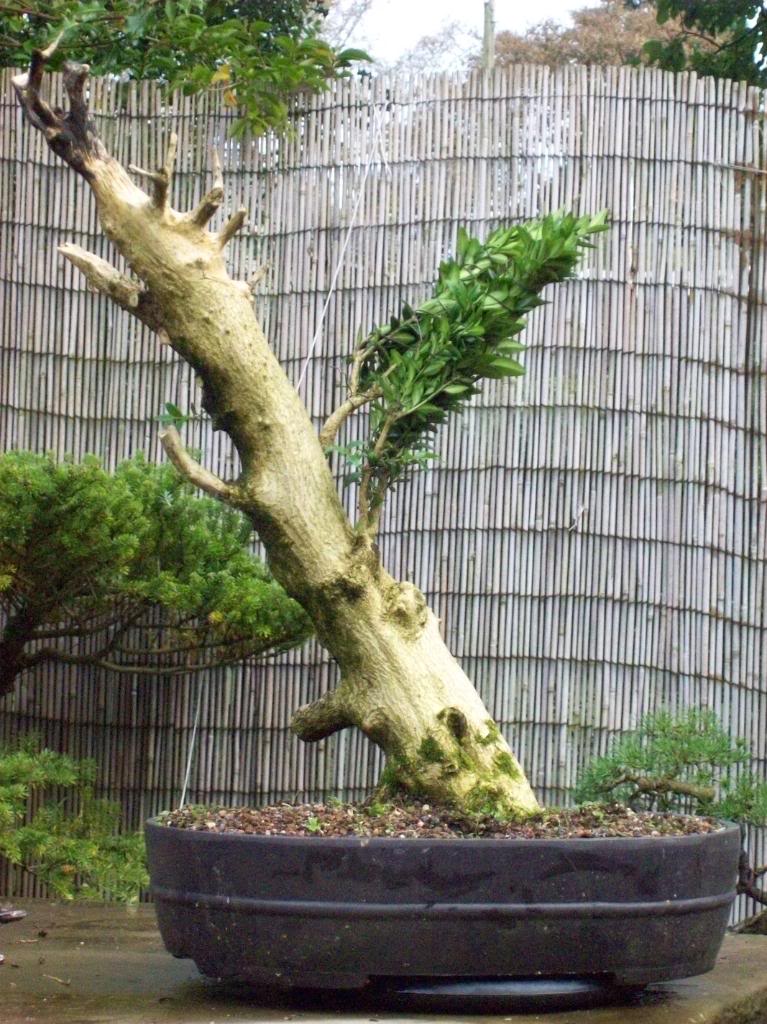
Next, using a marker pen, an outline of the channel was created to ensure our carving didn't go astray.
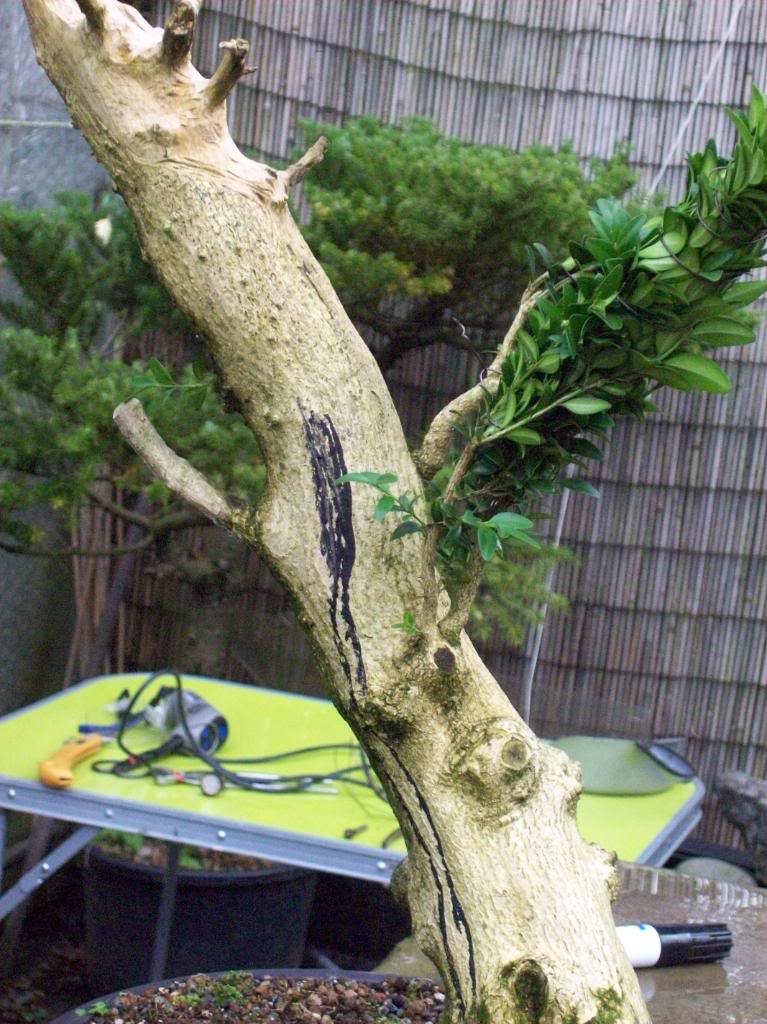
With the basic preparation finished, it's time for another coffee before the real work begins!
Early in October, I got a phone call from Tony asking if I'd like to join him and Matt at Tickle Towers to help work on a Buxus stump. Obviously, I had to think about it for several nanoseconds before jumping at the chance. I mean, come on, how often do you get asked by a bonsai genius to participate in the creation of a potential show-winner?
So, early the following Saturday, I met up with Matt near my local Maccy-D's and we drove the 20-odd miles to Tony's, both of us full of nervous anticipation at showing our meagre skills to The Master.
Having recieved the customary warm welcome/cup of coffee, we were ushered straight into the garden where we were greeted by the sight of several new trees we had never seen before. This is becoming something of a recurring theme, as every time I visit I fall over rows of yamadori that weren't there last time!
Anyway, on the stone workbench in the center of the garden were several fine examples of raw material, amongst which we spied the object of today's 'lesson'. After discussing what we each thought of the potential of these new acquisitions, Tony cleared the decks, leaving the Buxus stump in pride of place. I can't be sure, but I'm sure I saw it looking round the three of us nervously as we approached.
Tony began to explain what his vision for the tree was, and what he hoped to achieve during the course of the day. It went something like this. "Shorten the stump by a good 6 inches, remove this branch, that branch, that branch and possibly this one, create a 'keyhole' channel from the base right up to here, hollow out the trunk from the top all the way down to here, possibly remove this stump and hollow it through to the main trunk, tidy up all the small spurs where old branches once lived, remove any sign of man having touched the tree at all by several devious means, fully wire the remaining branches then give them an initial styling. Right, any questions?"
Matt and I just stared at each other open-mouthed. Surely it can't be possible to do this amount of work in 5 hours?
Wanna bet?
This article is intended to show newbie and old pro alike what can be achieved using just a well-thought out plan, a few simple tools and a top piece of material. Oh, and any spare apprentices you happen to have lying about the place.
PREPARATION
As with all good workshop sessions, we began with a hot brew and by giving Tony's new trees a good dose of looking at. After 20 minutes of discussion about styling, possible fronts etc (you know the drill), it was time to begin the lesson for today. We'd just like to mention at this point that we chose a slightly different front for the Buxus than Tony, but modesty prevents us from revealing which one he eventually settled on. See Tony, we're learning!
Like lambs to the slaughter!

This is the tree we will be working on.


Tony spent a while going over his plans for the tree, explaining in detail what we would be doing to achieve each step in the transformation. You've gotta have a plan, but be prepared to be flexible.


First order of the day is a little basic housekeeping. Tying up the branches we want to keep will lessen the risk of accidental damage as well as give us more room to work.

Next, Tony removed the rest of the branches leaving what appears to be very little in the way of foliage. Fear not, dear reader, all will become clear.....

Next, using a marker pen, an outline of the channel was created to ensure our carving didn't go astray.

With the basic preparation finished, it's time for another coffee before the real work begins!
Last edited by Harleyrider on Mon Nov 02, 2009 8:06 pm; edited 1 time in total
Harleyrider- Member
 Re: BUXUS WORKSHOP AT TONY'S (10-10-09)
What follows is a pictorial of the extensive carving and refining work carried out on Tony's Buxus. This was a lengthy exercise, not least because of the hardness of the wood we were dealing with. A range of sizes of Beaver cutting tools were used for the carving. Most of the heavy work was carried out using a Makita and the refining work done with a Dremel.
After the careful preparation detailed earlier, it was finally time for the major surgery to begin.
Firstly, carving out the "keyhole" channel previously marked out - using a Makita and mid-size Beaver carving piece - from which all other carving work would stem.


Then came the moment to chop the trunk to something like the final height of the tree. It had already been decided that the tree was too tall and straight for it's final design and the existing top was not Tony's vision for the tree, so this chop was well planned and considered. Thus, it was somewhat unceremoniously removed...


Oh no, I liked it better before! Quick, stick it back on...!

Only joking! Now it was time hollow out the trunk, starting out the point of the chop. This time a larger Beaver piece was used, the keyhole channel was enlarged in the trunk hollowed out


Not all methods used were that subtle ... here's MC Hammer (or is it TT Hammer?!)

Ever seen a tree spill it's guts before?!

Here's a view DOWN the newly hollowed trunk...

Now the bulk of the carving/hollowing had been done it was time for some REFINEMENT - this involved creating character and intrigue and most importantly, a lot of work to disguise the "work of the hand of man", in other words, trying to create as natural a look as possible. Firstly, work was carried out at the top of the tree...


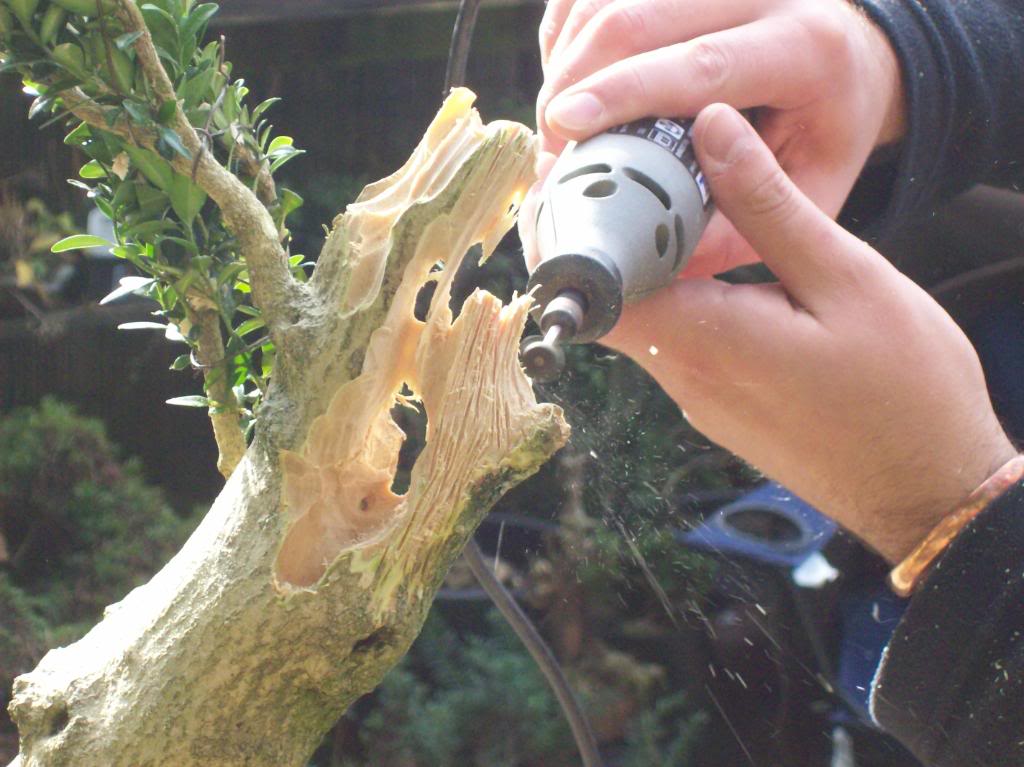
Here, Harleyrider refines whilst Tony hoovers....!

Then normal service is resumed! The Master at work...

Some flame work was carried out to "soften the edges"

Here, work is carried out to refine the edges of the hollowed channel, again trying to create the natural look. The bark was peeled back from the edge of the channel and a very small Beaver piece in a Dremel was used followed by a wire brush and some elbow grease!

Some other fine detailing work was carried where old branches had long since departed, again trying to create an aged and natural look. However, there remained a rather large stump near the base of the tree...

It was decided that this would be removed and hollowed through into the existing main hollow of the trunk. Again, it was important to mark out the outline required so that we didn't get carried away...

The stump is shortened simply by sawing it off....

The remainder is then hollowed out right through to the hollow trunk...


Again, some refining work is required to remove as much evidence as possible that Man had a hand in this...

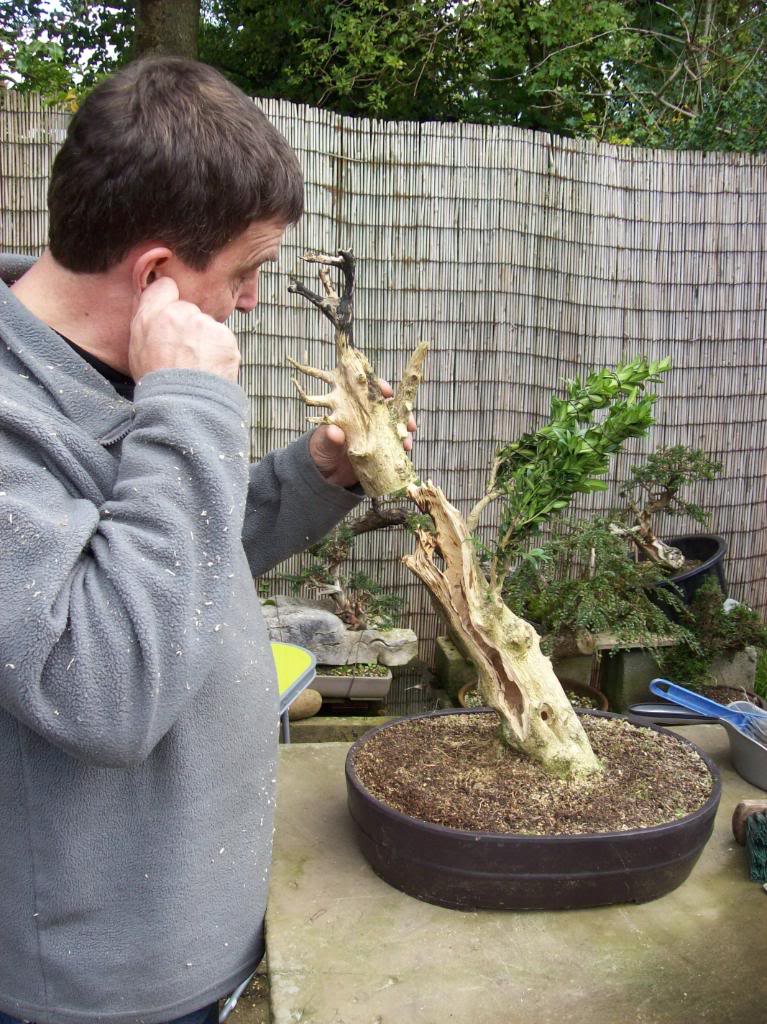
This was pretty much the end of carving and refining process before we embarked on the wiring and styling. Despite all the pictures, this is only a brief overview of a few hours work during which time the future shape of the tree emerged. The following picture shows how far we have come...
After the careful preparation detailed earlier, it was finally time for the major surgery to begin.
Firstly, carving out the "keyhole" channel previously marked out - using a Makita and mid-size Beaver carving piece - from which all other carving work would stem.


Then came the moment to chop the trunk to something like the final height of the tree. It had already been decided that the tree was too tall and straight for it's final design and the existing top was not Tony's vision for the tree, so this chop was well planned and considered. Thus, it was somewhat unceremoniously removed...


Oh no, I liked it better before! Quick, stick it back on...!

Only joking! Now it was time hollow out the trunk, starting out the point of the chop. This time a larger Beaver piece was used, the keyhole channel was enlarged in the trunk hollowed out


Not all methods used were that subtle ... here's MC Hammer (or is it TT Hammer?!)

Ever seen a tree spill it's guts before?!

Here's a view DOWN the newly hollowed trunk...

Now the bulk of the carving/hollowing had been done it was time for some REFINEMENT - this involved creating character and intrigue and most importantly, a lot of work to disguise the "work of the hand of man", in other words, trying to create as natural a look as possible. Firstly, work was carried out at the top of the tree...


Here, Harleyrider refines whilst Tony hoovers....!

Then normal service is resumed! The Master at work...

Some flame work was carried out to "soften the edges"

Here, work is carried out to refine the edges of the hollowed channel, again trying to create the natural look. The bark was peeled back from the edge of the channel and a very small Beaver piece in a Dremel was used followed by a wire brush and some elbow grease!

Some other fine detailing work was carried where old branches had long since departed, again trying to create an aged and natural look. However, there remained a rather large stump near the base of the tree...

It was decided that this would be removed and hollowed through into the existing main hollow of the trunk. Again, it was important to mark out the outline required so that we didn't get carried away...

The stump is shortened simply by sawing it off....

The remainder is then hollowed out right through to the hollow trunk...


Again, some refining work is required to remove as much evidence as possible that Man had a hand in this...

This was pretty much the end of carving and refining process before we embarked on the wiring and styling. Despite all the pictures, this is only a brief overview of a few hours work during which time the future shape of the tree emerged. The following picture shows how far we have come...


matt addie- Member
 Re: BUXUS WORKSHOP AT TONY'S (10-10-09)
So, after a lengthy session of carving and refining, we were left with the wiring and styling of the remaining branches.
Initially, three main branches were retained for styling the tree. The uppermost branch was kept as an "insurance policy" should one of the other two break during bending or not give the desired effect. Rather than secure the wiring of the main branches by coiling wire around the newly created hollow trunk, the main branches were wired to each creating a much neater piece of work.


After wiring he main branches, Tony took a well deserved rest (and went to make the butties!) whilst leaving the Men In Black to wire the remaining branches!
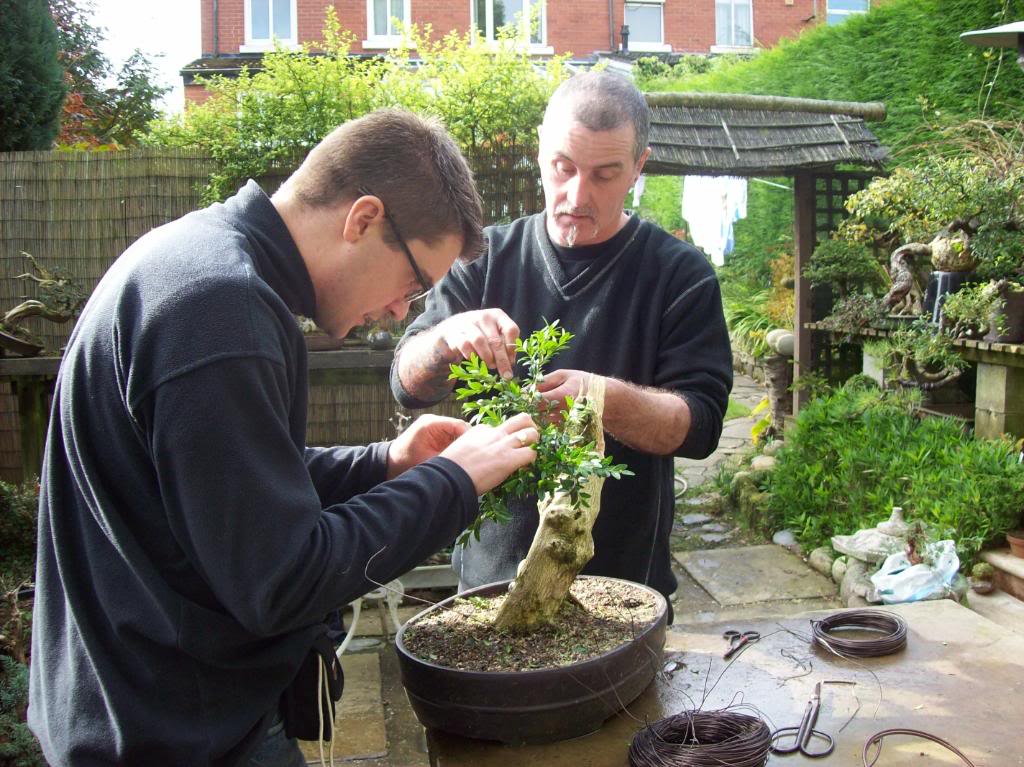
After we had wired, scoffed lunch (in about 30 seconds!) - Tony examined the wiring of myself and HR and then pointed out our deficiencies ... all part of the learning process! In a few cases, Steve and I had wired "textbook style", wiring opposite/proximal branches together. However, in the case of the weakest/youngest branches, we had often wired two branches of equal "flimsiness" together - thus not offering much hope of successful styling. Once corrections were made (by wiring back "the extra distance" to a stronger branch), the tree was ready to style.

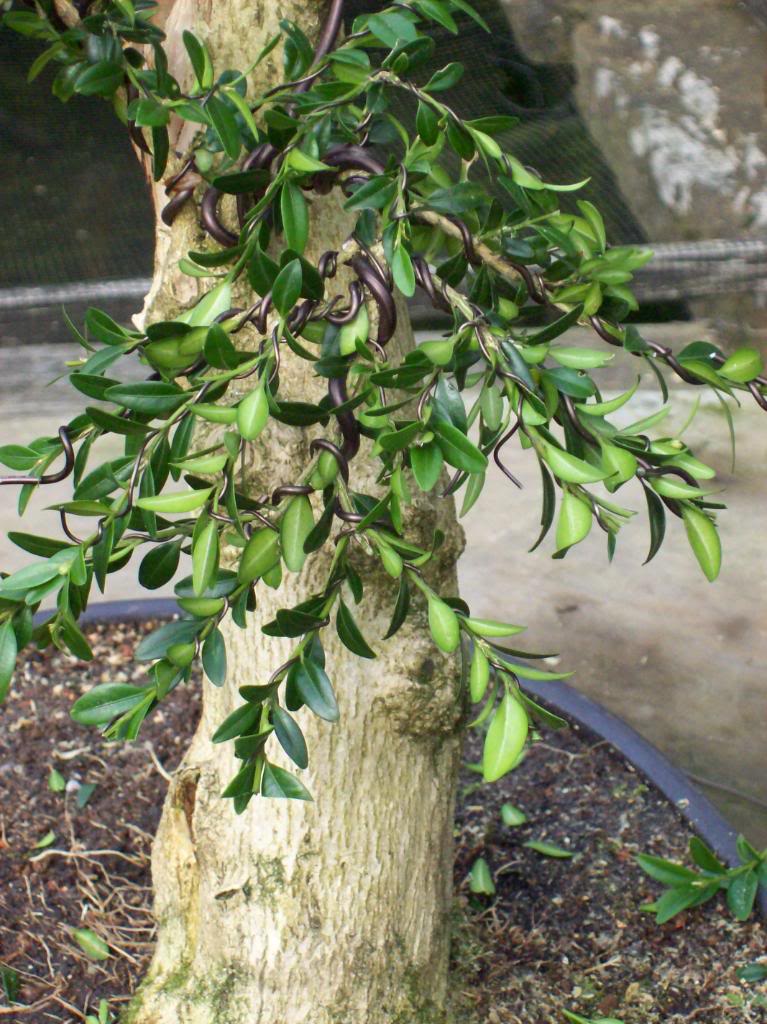
It was soon decided that styling with the two lower branches would work well and the decision was taken to remove the now defunct top branch, whilst leaving a stump to anchor the wire.

Before the final styling took place, the inside of the newly hollowed trunk was stained with watered down ink to give depth and intrigue which really brought the trunk to life.

Finally, Tony took the reins and speedily (we were running out of time after nearly 5 hours!) gave the tree it's first styling.

The tree had reached it's conclusion for the day and would now be left to recover and develop. Here is a reminder of where we started:

And here are 4 sides of the tree after a days work.
Front

Left side

Back

Right side

And who are these two charlatans trying to pass off the work of an international artist as their own?!!

And last but by no means least, a huge thanks to Tony ... for the opportunity, his time, hospitality, enthusiasm and patience. A fantastic day of learning!
Next stop, Burrs 2009 this weekend!!
Initially, three main branches were retained for styling the tree. The uppermost branch was kept as an "insurance policy" should one of the other two break during bending or not give the desired effect. Rather than secure the wiring of the main branches by coiling wire around the newly created hollow trunk, the main branches were wired to each creating a much neater piece of work.


After wiring he main branches, Tony took a well deserved rest (and went to make the butties!) whilst leaving the Men In Black to wire the remaining branches!

After we had wired, scoffed lunch (in about 30 seconds!) - Tony examined the wiring of myself and HR and then pointed out our deficiencies ... all part of the learning process! In a few cases, Steve and I had wired "textbook style", wiring opposite/proximal branches together. However, in the case of the weakest/youngest branches, we had often wired two branches of equal "flimsiness" together - thus not offering much hope of successful styling. Once corrections were made (by wiring back "the extra distance" to a stronger branch), the tree was ready to style.


It was soon decided that styling with the two lower branches would work well and the decision was taken to remove the now defunct top branch, whilst leaving a stump to anchor the wire.

Before the final styling took place, the inside of the newly hollowed trunk was stained with watered down ink to give depth and intrigue which really brought the trunk to life.

Finally, Tony took the reins and speedily (we were running out of time after nearly 5 hours!) gave the tree it's first styling.

The tree had reached it's conclusion for the day and would now be left to recover and develop. Here is a reminder of where we started:

And here are 4 sides of the tree after a days work.
Front

Left side

Back

Right side

And who are these two charlatans trying to pass off the work of an international artist as their own?!!

And last but by no means least, a huge thanks to Tony ... for the opportunity, his time, hospitality, enthusiasm and patience. A fantastic day of learning!
Next stop, Burrs 2009 this weekend!!

matt addie- Member
 Re: BUXUS WORKSHOP AT TONY'S (10-10-09)
I still think my original idea for a title was better. Tickling Tony's Buxus. 

Harleyrider- Member
 Re: BUXUS WORKSHOP AT TONY'S (10-10-09)
Man. That's some report on the work you carried out. And I like it very much. Some comeback of the buxus that didn't promise much.

Nik Rozman- Member
 Re: BUXUS WORKSHOP AT TONY'S (10-10-09)
nice work - love the hawthorn in the box on pictures 2 and 3 as well !!
steve
steve
Last edited by bigsteve on Mon Nov 02, 2009 8:46 pm; edited 1 time in total (Reason for editing : same word twice looked daft !)

bigsteve- Member
 Re: BUXUS WORKSHOP AT TONY'S (10-10-09)
That Hawthorn is actually Escallonia-zilla, Bigsteve.

Harleyrider- Member
 Re: BUXUS WORKSHOP AT TONY'S (10-10-09)
of course yeahHarleyrider wrote:That Hawthorn is actually Escallonia-zilla, Bigsteve.
the penny has just dropped its one of tony,s garden yamadori,s
thanks
steve

bigsteve- Member
 Re: BUXUS WORKSHOP AT TONY'S (10-10-09)
Yes the beaver in action once again,
Question why did you burn the dead wood areas?
Tony told me not to do it on mine!
Nice outcom though
Peter
Question why did you burn the dead wood areas?
Tony told me not to do it on mine!
Nice outcom though
Peter

landerloos- Member
 Re: BUXUS WORKSHOP AT TONY'S (10-10-09)
Excellent photo shoot Steve and Matt. I am green with envy 
Look forward to seeing you both this weekend for another Burrs Bonsai Bonanza, and the odd drop of falling down water
All the best
Andy
Look forward to seeing you both this weekend for another Burrs Bonsai Bonanza, and the odd drop of falling down water

All the best
Andy

Stone Monkey- Member
 Re: BUXUS WORKSHOP AT TONY'S (10-10-09)
Nice job on the buxus guys.
I like the carving lessons it really means a lot to me on how to make a natural look.
Thanks Tony, Steve and Matt for sharing.
Warren
I like the carving lessons it really means a lot to me on how to make a natural look.
Thanks Tony, Steve and Matt for sharing.
Warren
waway- Member
 Re: BUXUS WORKSHOP AT TONY'S (10-10-09)
Thanks for sharing.
I appreciate it.
I wonderful lesson for free
Greetings,
Cees.
I appreciate it.
I wonderful lesson for free
Greetings,
Cees.

Cees- Member
 Re: BUXUS WORKSHOP AT TONY'S (10-10-09)
Matt and Steve... great report...
Steve... how am I to live up to the expectation in your intro!
Matt... its hard to think that this was 5 intensive hours.
The Buxus was styling came about after Bobby Little wanted to know what work was need to make this stump into a bonsai?
The consideration is that the material is not actually 'great' material but it was a good starting point... it was very healthy, had been in the pot at least 3 years and was relatively mature.
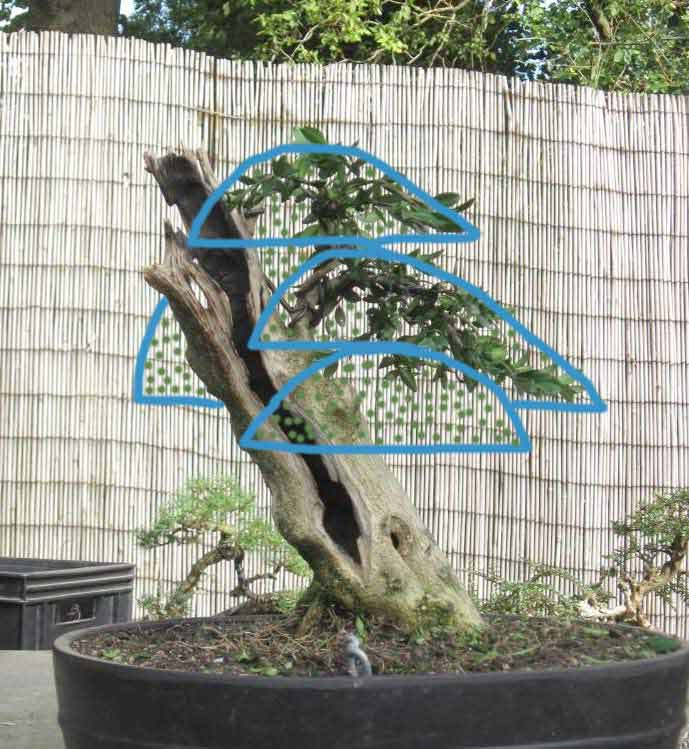
The introduction of the shari/hollowing was to create interest in a trunk that displays almost NO TAPER, the foliage canopy will be at least 200% larger than displayed here. Thereby covering the top of the deadwood part of the tree.
For those visiting my garden this weekend you will see the tree has been 'potted' onto a slab...
Again...Steve and Matt... great report
Tony
Guest- Guest
 Re: BUXUS WORKSHOP AT TONY'S (10-10-09)
beautiful transformation fellas. thankyou for documenting and sharing! 

anttal63- Member
 Re: BUXUS WORKSHOP AT TONY'S (10-10-09)
Nice carving Tony. By the way when are we going to finish the escallonia. I wish I was going to Burrs 
Ian
Ian
Ian Warhurst- Member
 Re: BUXUS WORKSHOP AT TONY'S (10-10-09)
Tony wrote:Matt and Steve... great report...
The introduction of the shari/hollowing was to create interest in a trunk that displays almost NO TAPER, the foliage canopy will be at least 200% larger than displayed here. Thereby covering the top of the deadwood part of the tree.
Tony
Great point - electric termites can improve relatively boring material. Nice work. But the best lesson from this is that great trees start from great material.

Rob Kempinski- Member
 Re: BUXUS WORKSHOP AT TONY'S (10-10-09)
Guys, this is a great example of the kind of information exchange that I think the forumm should be used for. I would love to see a computer image of how you would like to see the tree develop in a few years time.
Would any of the styling experts like to make some suggestions?
Would any of the styling experts like to make some suggestions?

Peter Thorne- Member
 Re: BUXUS WORKSHOP AT TONY'S (10-10-09)
Excellent demo you three!! You've conjured movement power and age from a relatively uninteresting bit of material. But most of all you did it together!!!!
Guest- Guest
 This is great!
Guys,
This is excellent. Not so much because of the work you did. But, because an experienced & generous bonsai friend invited the two of you over to work on his trees and have some fun together.
This is great, its one of the things I miss since moving to Tulsa from Illinois.
More people should be doing this. Hats off to you Tony for sharing your time, trees and your know how.
Great job guys.
Neil
NeilDellinger- Member
 Re: BUXUS WORKSHOP AT TONY'S (10-10-09)
Hi Peter Thorne,I made a virtual how the tree can look like in a couple off years 
Greetings Ed
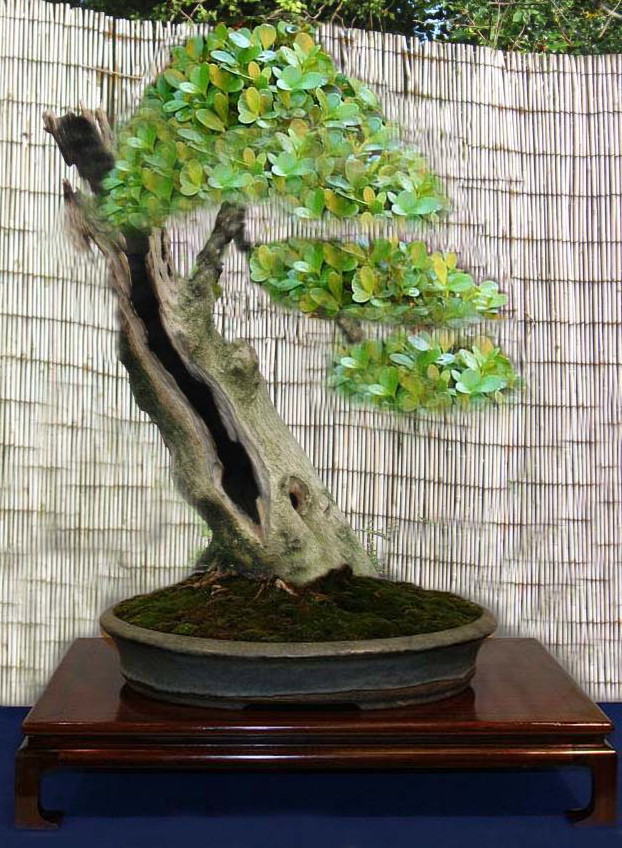
Greetings Ed


Ed van der Reek- Member
 box for Burrs
Hi,
Looks like you have a good session guys. Good result as well.
I am planning to bring a few of my box to work on, (mainly carving), this w/e at Burrs so sharpen up you beaver.
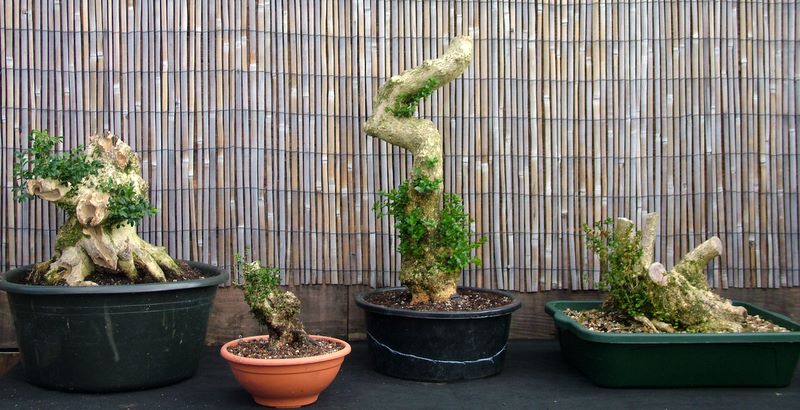
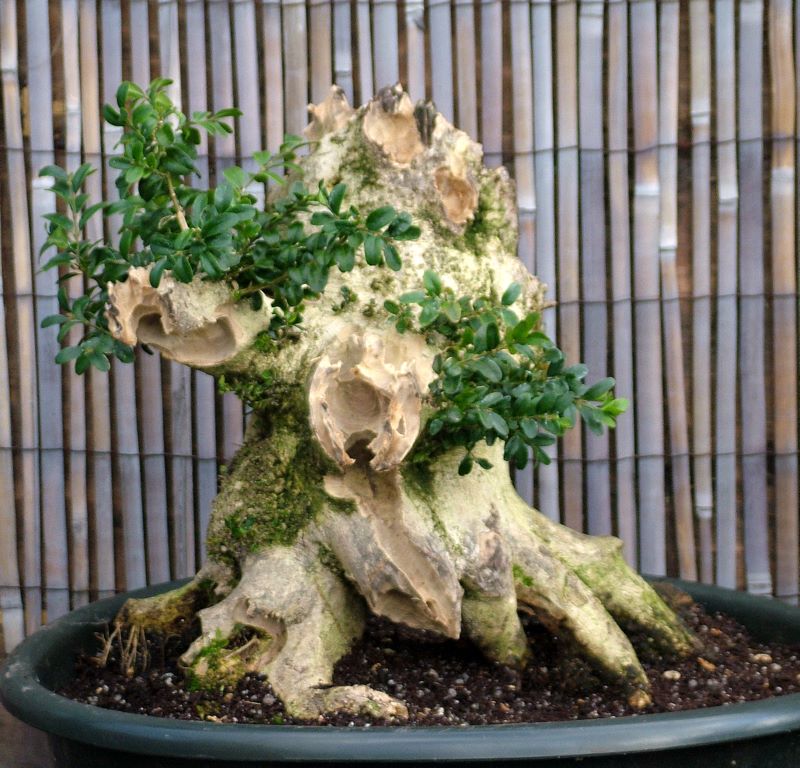
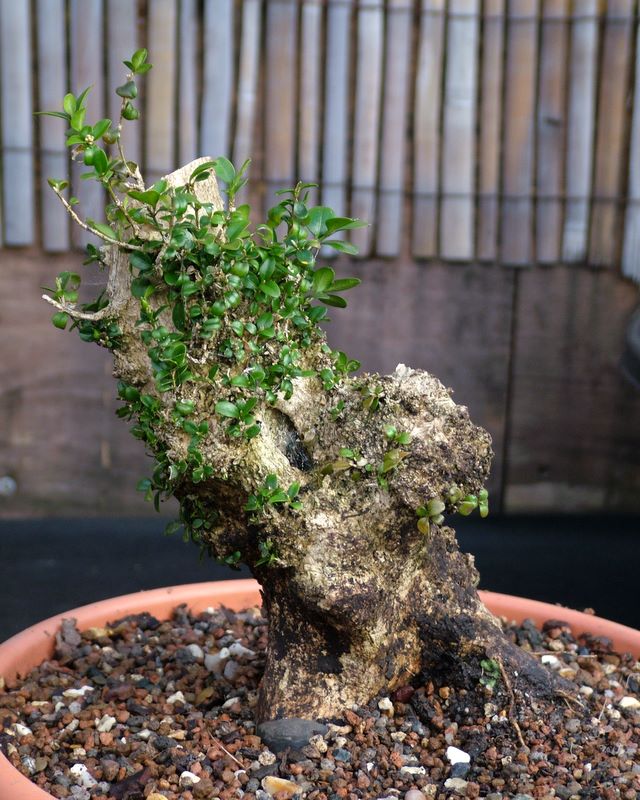

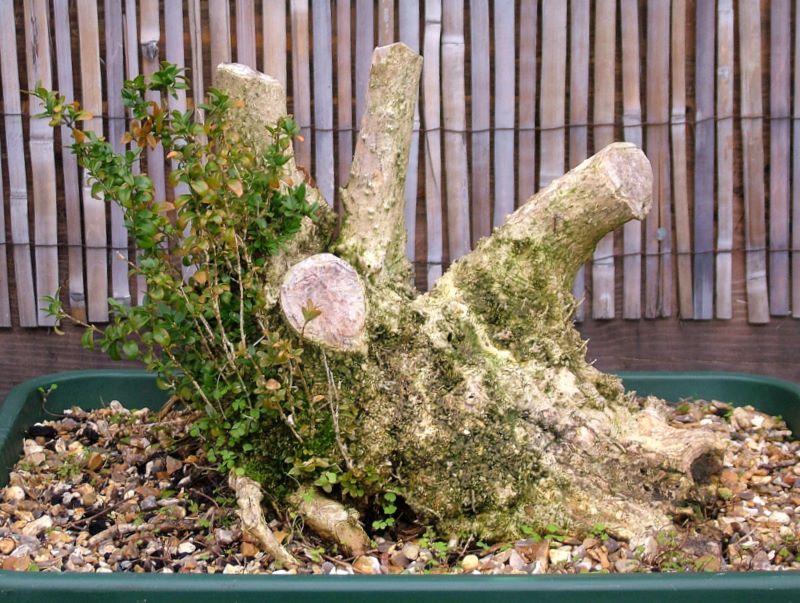
We are planning to visit Steve Tolley on our way up on Friday, if he offers me one or two of his fine mugo pines in trade for a box or four ,then perhaps not all will make it to Burrs.
Looks like you have a good session guys. Good result as well.
I am planning to bring a few of my box to work on, (mainly carving), this w/e at Burrs so sharpen up you beaver.


We are planning to visit Steve Tolley on our way up on Friday, if he offers me one or two of his fine mugo pines in trade for a box or four ,then perhaps not all will make it to Burrs.
It's Burrs this weekend 


Jeremy- Member
 Re: BUXUS WORKSHOP AT TONY'S (10-10-09)
Jerry, bring a big brolly if you are power carving! The forecast is awful and I'm pretty sure I heard that Makitas and Dremels are outside this time. (Hides behind fridge)

Kev Bailey- Admin
 Re: BUXUS WORKSHOP AT TONY'S (10-10-09)
Right thats it then i aint goingKev Bailey wrote: I'm pretty sure I heard that Makitas and Dremels are outside this time. (Hides behind fridge)

Lee Kennedy- Member
Page 1 of 2 • 1, 2 
 Similar topics
» Buxus microphylla 'japonica' vs. Buxus harlandii
» buxus composition....the dragon blowing buxus
» Pinus mugo yamadori from Tonys garden
» little buxus
» tree identification
» buxus composition....the dragon blowing buxus
» Pinus mugo yamadori from Tonys garden
» little buxus
» tree identification
Page 1 of 2
Permissions in this forum:
You cannot reply to topics in this forum


