Repotting and preparing The Raft for exhibition at Swindon 2011
+23
fiona
nailsari
my nellie
Jonny D
gm.it.seacom
DangerousBry
Harry Harrington
Bob Brunt
newzealandteatree
Mike Jones
xuan le
stephen clarke
Ian Young
Ian Warhurst
Pavel Slovák
peter keane
moyogijohn
Russell Coker
Paul B [Swindon]
bonsapien
JimLewis
jupp
Harleyrider
27 posters
Page 1 of 2
Page 1 of 2 • 1, 2 
 Repotting and preparing The Raft for exhibition at Swindon 2011
The week of the Swindon show, I got a phone call from Tony asking if I wanted to go round to his garden on the Saturday to help re-pot and prepare three trees for display at the show, namely The Fat Guy, The Tall Guy and The Raft. Like any sane individual offered an opportunity like that, I immediately cancelled my weekend overtime, postponed my shopping-carrying duties (but not the paying for it part, unfortunately) and badgered a friend into giving me a lift over to Bury. Well, it’s not often you get the chance to play with three such prestigious trees all in the same day, is it!
Anyway, when I arrived at Tickle Towers, Stuart was already there, having spent the morning working on a lovely Hawthorn raft he had recently acquired from His Nibbs (I have no doubt we will be seeing that tree appearing at shows in the future.) After a brief pause for an introductory coffee, a plan of action was decided upon and work on the trees began. Tony had already prepared The Fat Guy on Friday, so we were left with just 2 trees to re-pot, root work, re-dress and clip ready to appear in the show 200 miles away that we had to be at by 9am. Easy peesy, lemon squeezy!
I quickly realised that too many cooks get in each others way and decided that my role for the day would be to document events step-by-step in the hope that this post may be of use to anyone who hasn’t done this kind of thing before, or for those who have done it before it will allow you to share in the experience of working on these famous trees.
As pretty much the same process was carried out on both The Tall Guy and The Raft, I have decided to concentrate this first post on The Raft as it presented us with the more interesting challenge, and because it is a tree everyone knows. I shall post a separate photo-sequence with notes for The Tall Guy later.
First, for those of you who haven’t seen The Raft before, or just want the chance to see it again, here is the tree before any work was done.
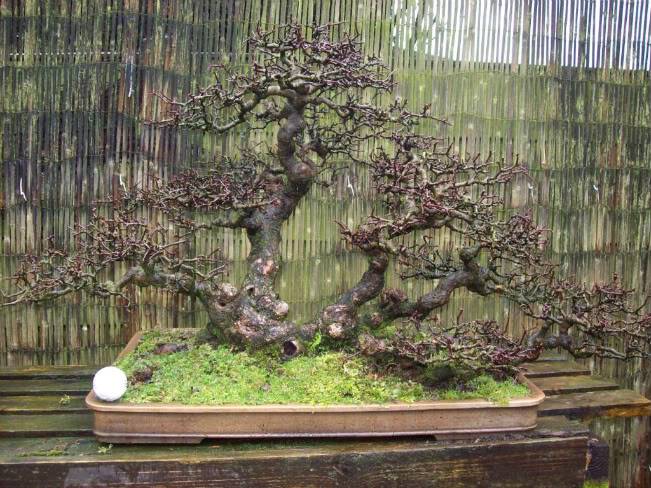
Not much needs doing there, right? Wrong! The tree had been sitting in that soil for 8 years before we started work, and although it was healthy and growing strongly, it was undoubtedly time for a change. Tony also wanted to change the potting angle slightly, trim the roots, give the tree a slight haircut and redress the fresh soil with new moss.
The first job (as well as the most nerve-wracking) was to remove the tree from its pot. It was at this point that we cleaned the trunk and main branches of moss using old toothbrushes. At least I think they were old ones.....


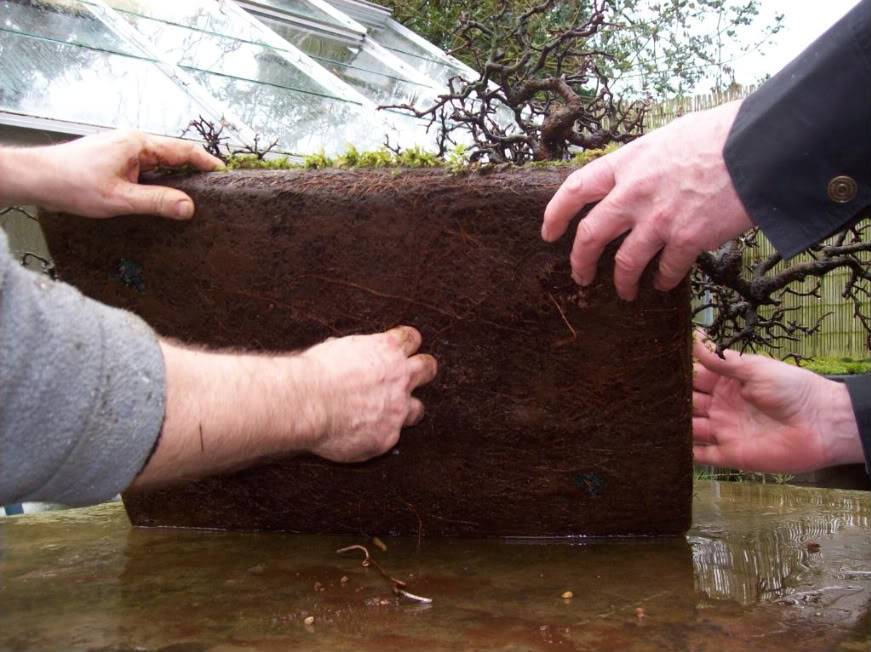
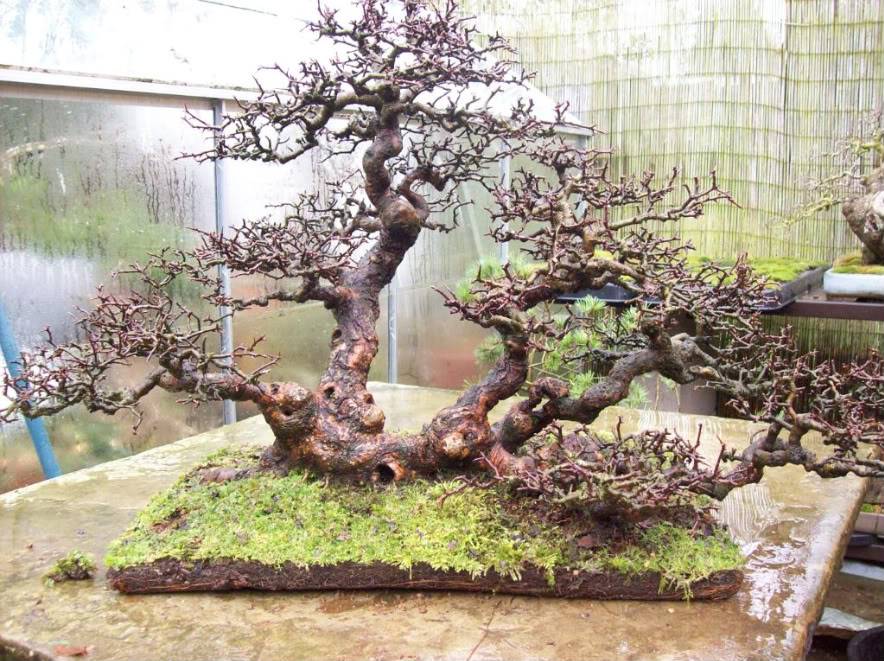
The more observant amongst you will have noticed that my hands were replaced in the 3rd picture by a set of stunt hands specially flown in for the day. My hands are under contractual obligation not to partake in any activity which may lead to them getting dirty. And believe me, this was going to be one dirty job, as you will see later.
Having manhandled thousands of pounds worth of tree from its pot and unceremoniously dumped it atop Tony’s sacrificial altar, it was time to start work. The first job was to remove all the old moss and comb away as much of the old soil as we could. It soon became clear just how well the tree had been growing for the last 8 years!
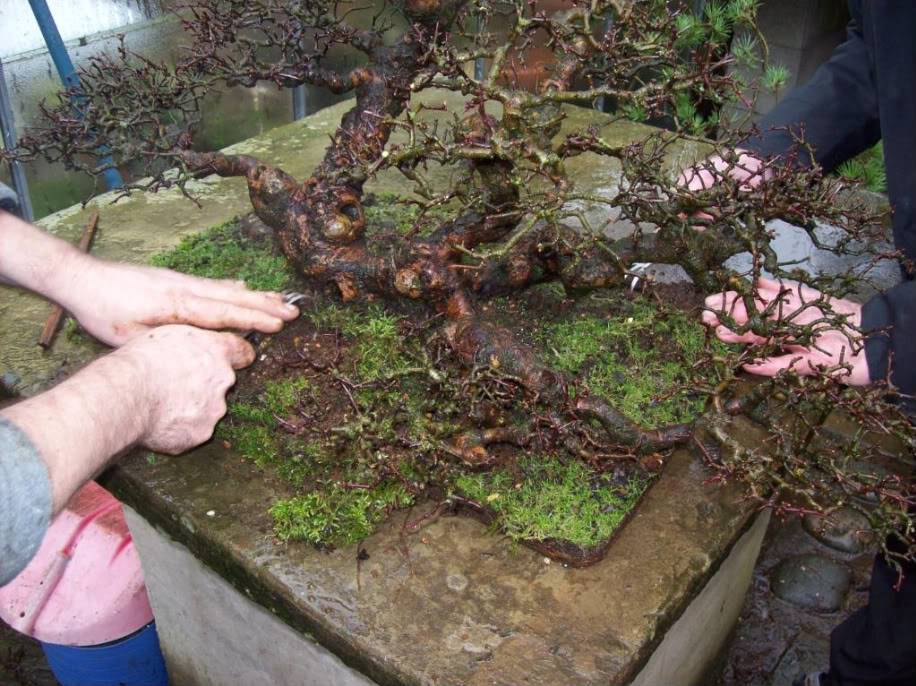
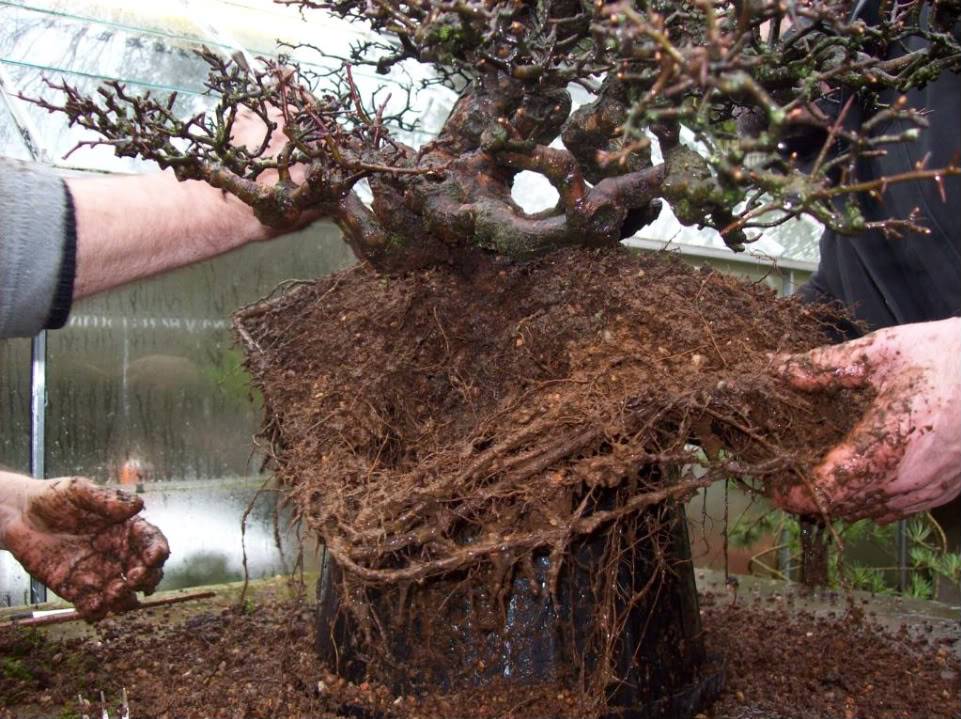
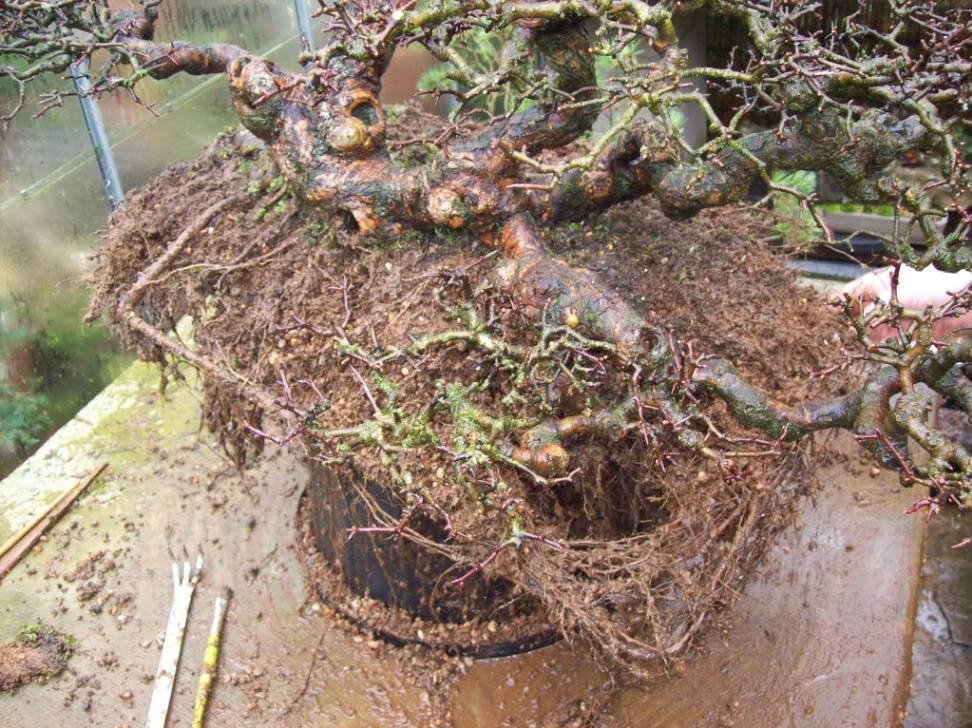
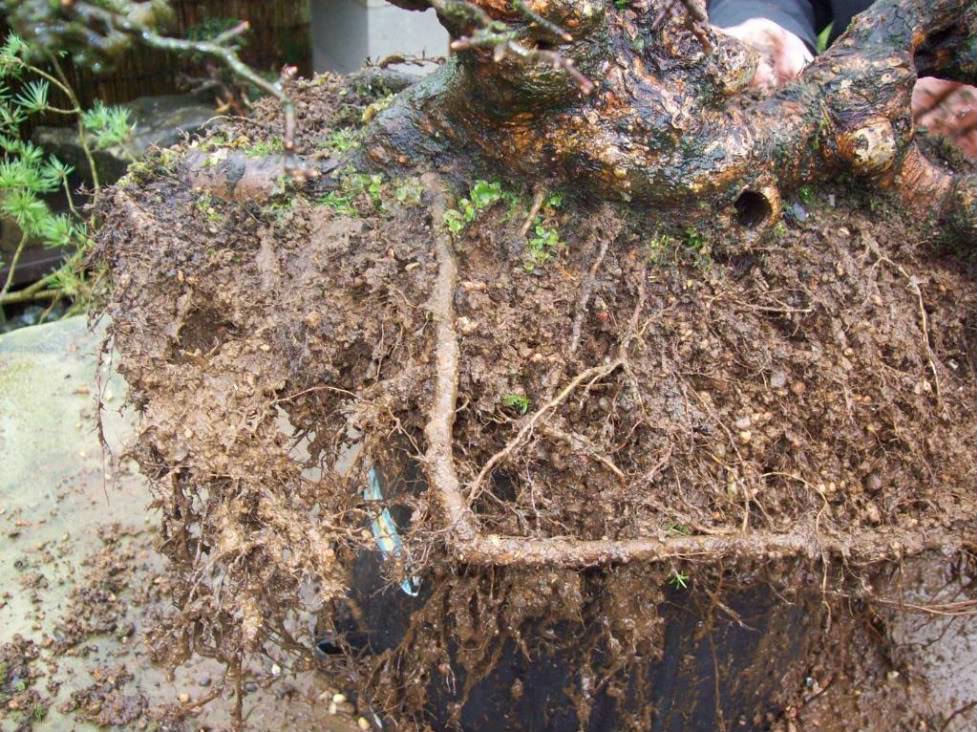
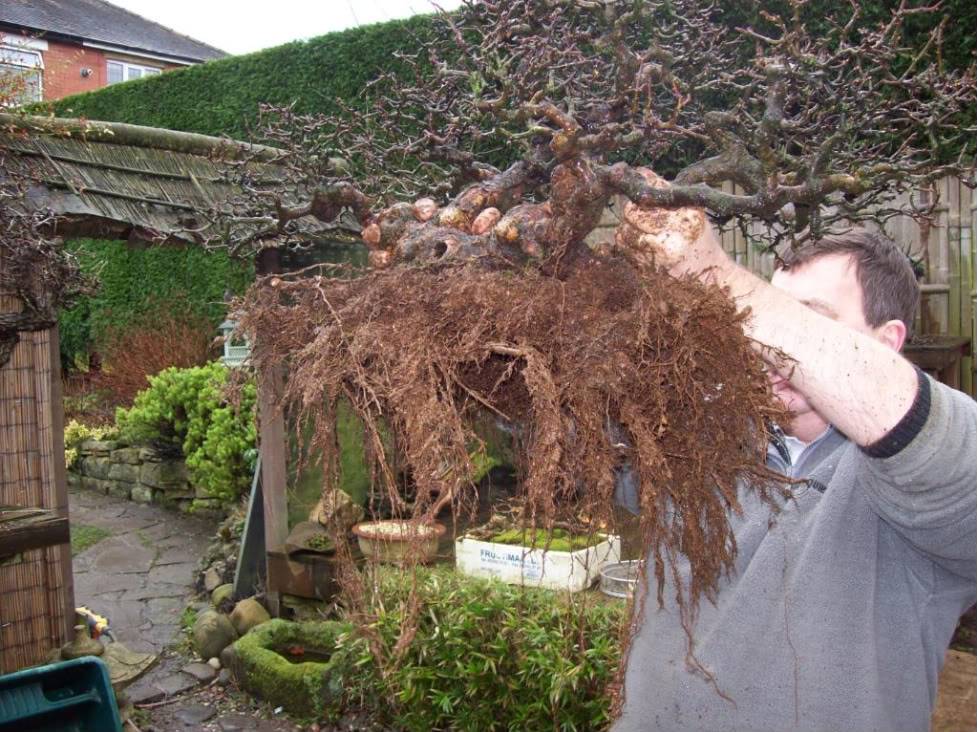
There was an unbelievable amount of roots crammed into the shallow pot, and 8 years of fallen leaves, old moss, berries and assorted detritus had rotted down nicely into what appeared to be a never ending supply of nutrient rich organic compound. It was a helluva job to remove it all by hand so Tony drafted in the hosepipe to finish the job.


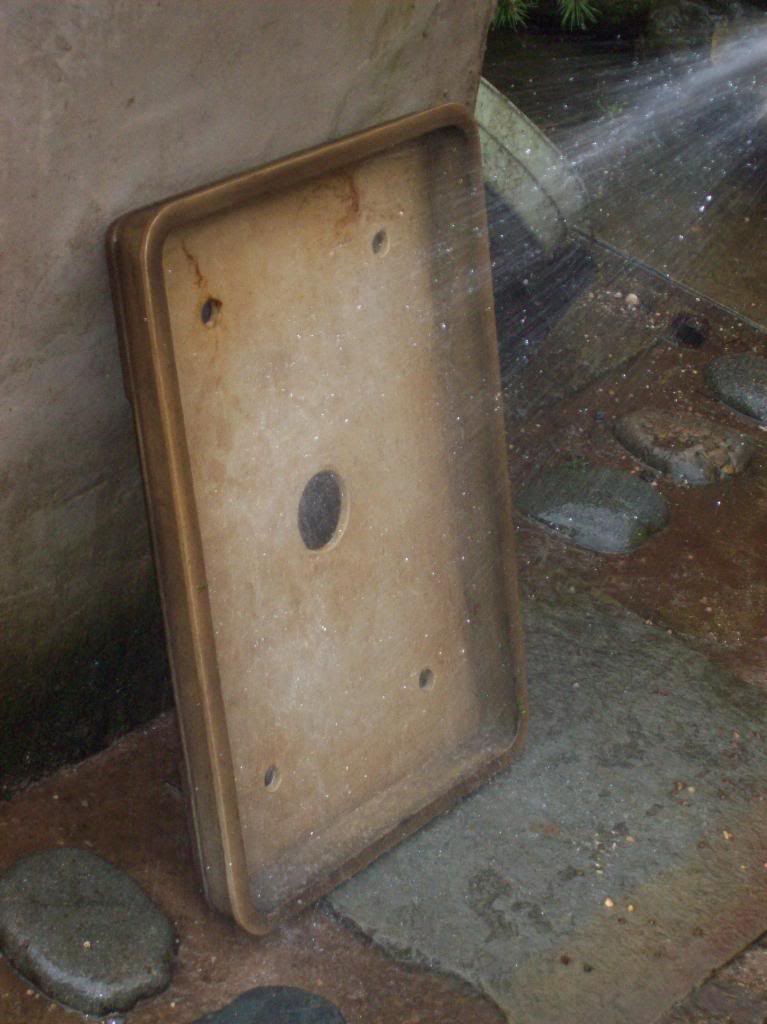
While the hosepipe was out, the pot was given a good rinsing as well.
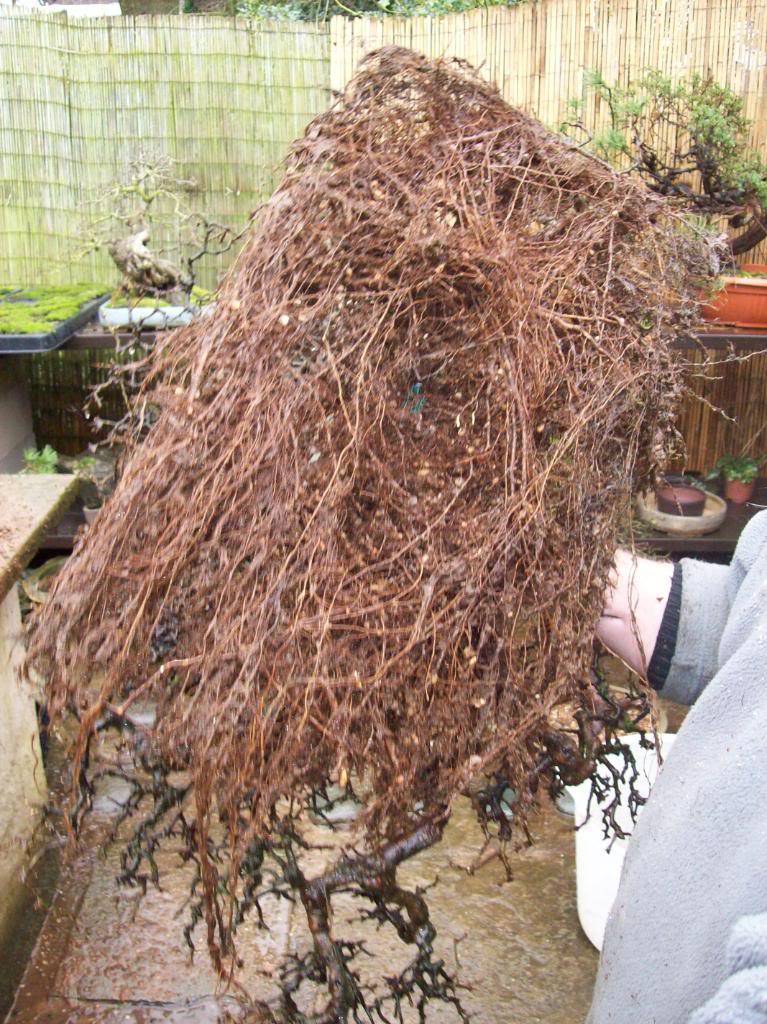
After a jetwash and a quick prune and comb, the rootball was looking much neater and instead of two of us straining to lift the tree, Tony was able to hold it easily in one hand.
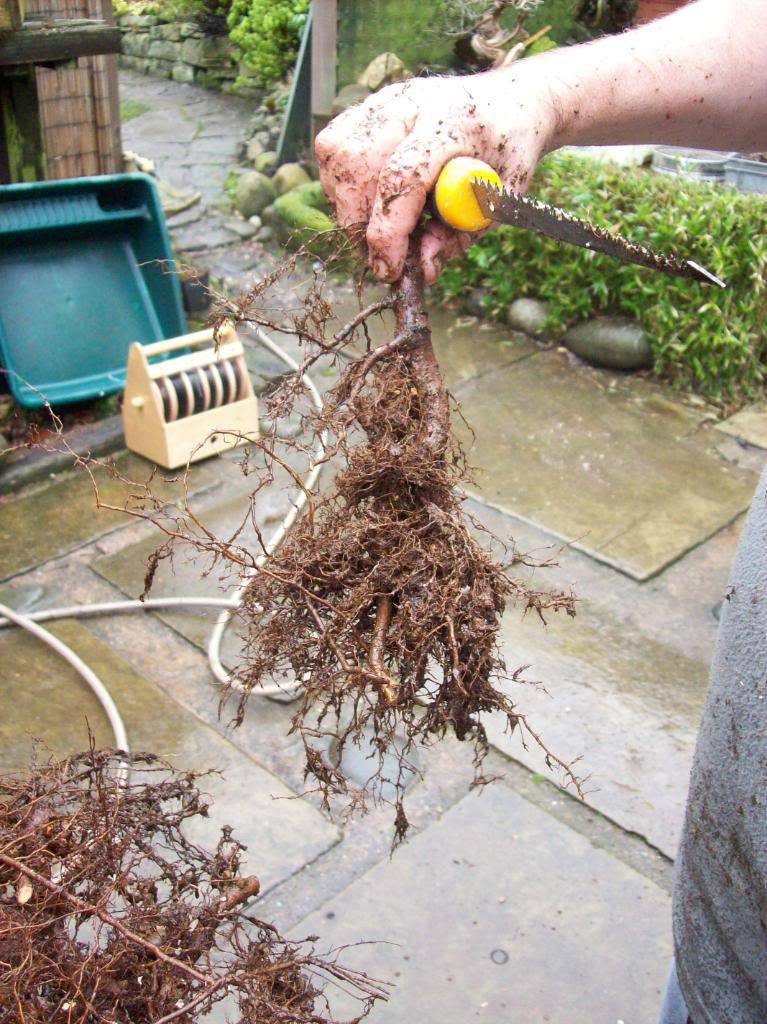
We now found that there was a thick root growing from the main trunk that hadn’t been there the last time the tree was out of the pot. Normally this wouldn’t be an issue, but it was growing just below the soil surface and followed the direction of the main trunk/branch. As it thickened, there was a danger it could start to lift the tree out of the soil and not only spoil the image, but cause possible root damage by creating an air pocket below the tree. Stuart and I took a step backwards while Tony pondered on the best course of action. Well, wouldn’t you?
In a perfect illustration of the kind of bum-twitching things you get used to when you work with Tony, it took him precisely 2 seconds to whip out his saw and hack the offending root off!

OMG! Did he really just cut off all that root? I've got whole trees with less root than that!
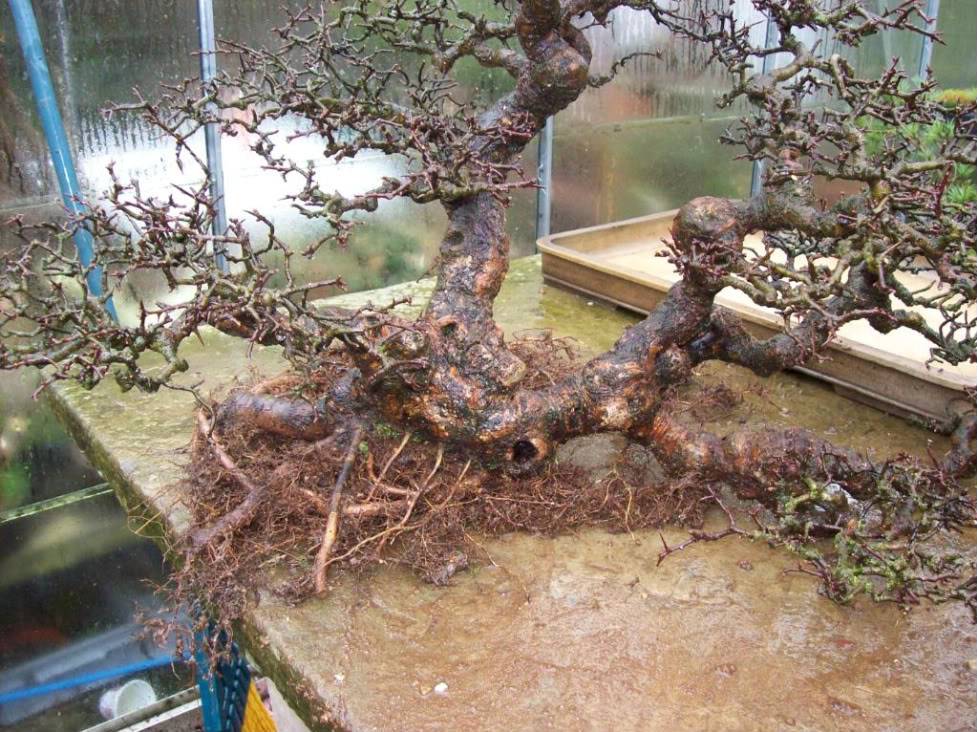
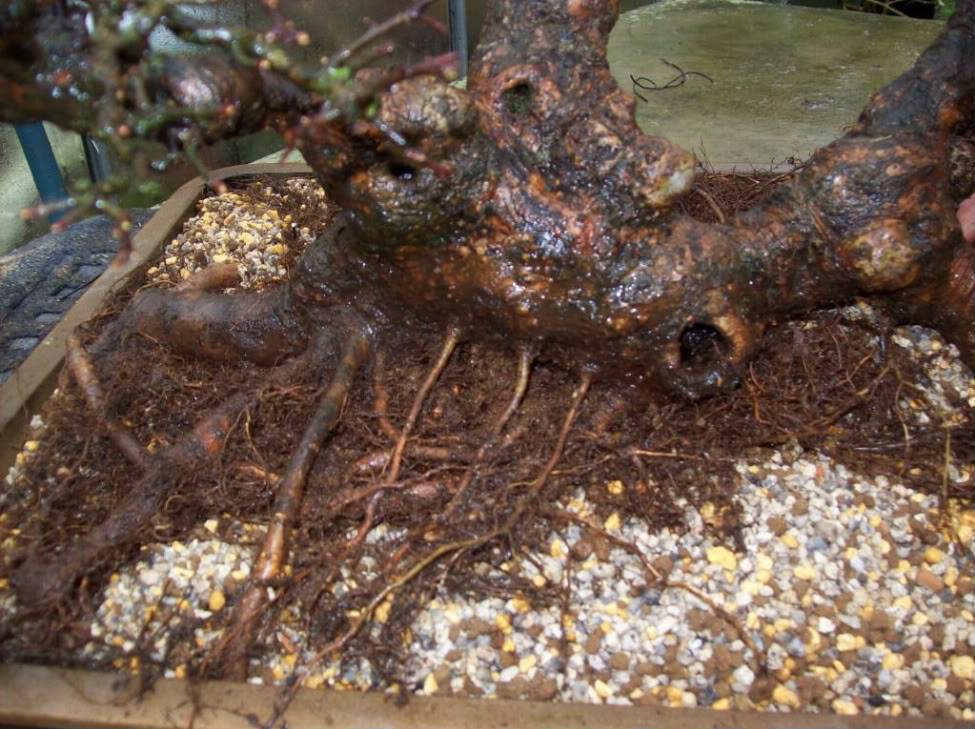
So, after a quick snip at the excess rootage, this is what we were left with. Much tidier, I’m sure you’ll agree. Note how little fine feeder root is actually supporting the far right of the tree. We expected much more than that.

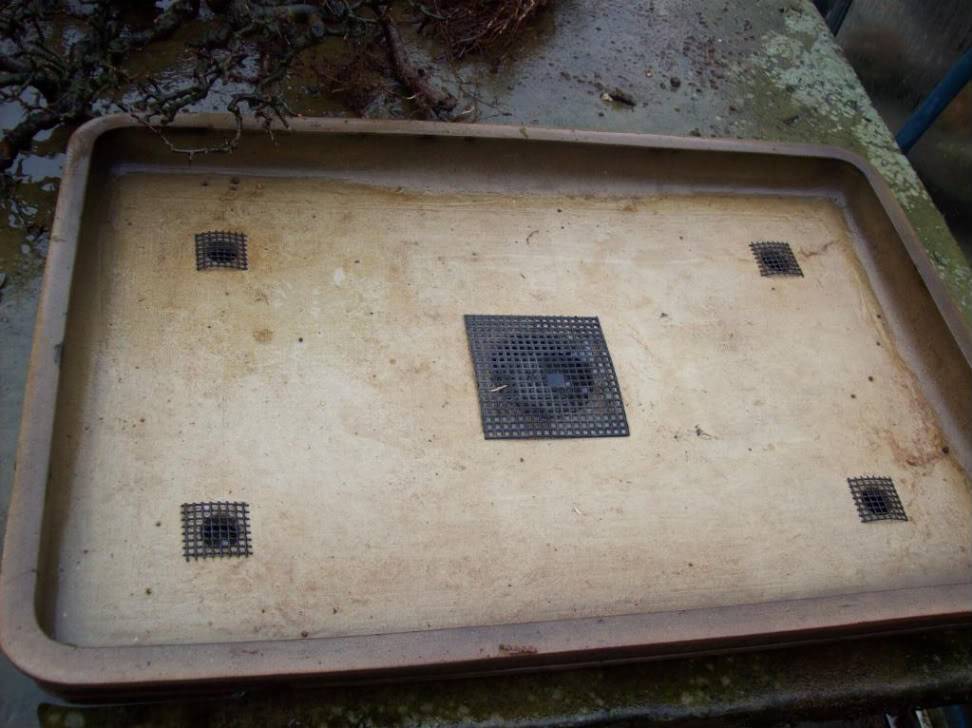
Whilst all the hacking and chopping had been going on, Stuart had busied himself with re-meshing the pot’s drainage holes. Far be it from me to suggest he may be a little on the miserly side, but have you ever seen such perfectly cut mesh? We even had the set-square out when he wasn’t looking and you won’t be surprised to hear that each mesh was perfectly square with the edges of the pot! The guy is an artist, I tell you.
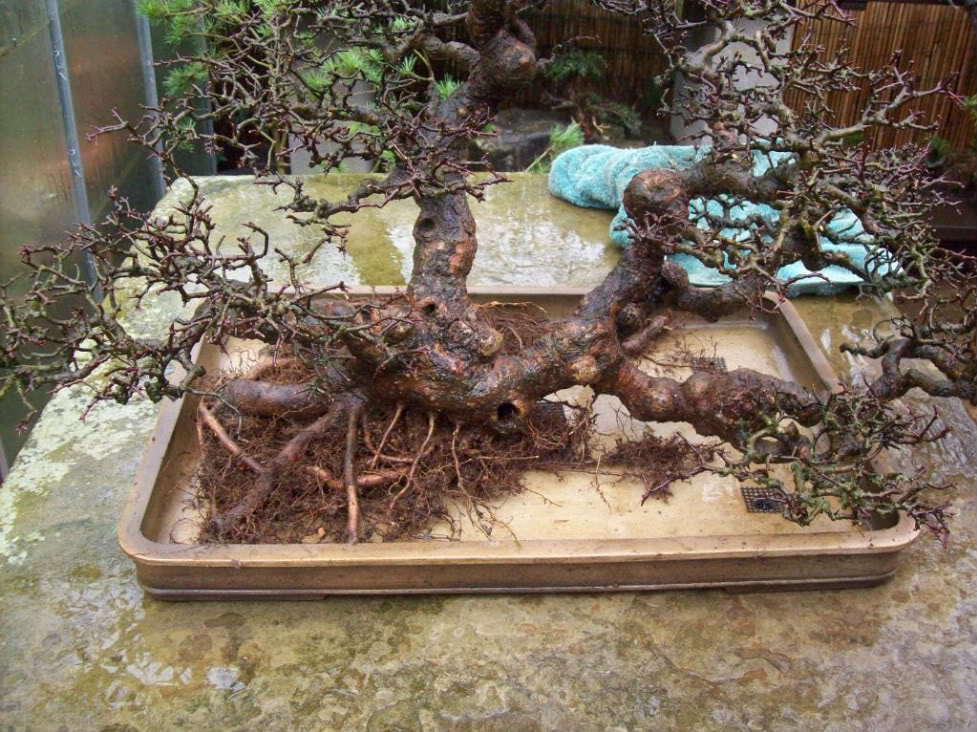
Now we were ready to test fit the tree in the pot to see where the newly trimmed rootball would sit and to allow Tony to decide on the new potting angle. Plenty of room for new growth now!

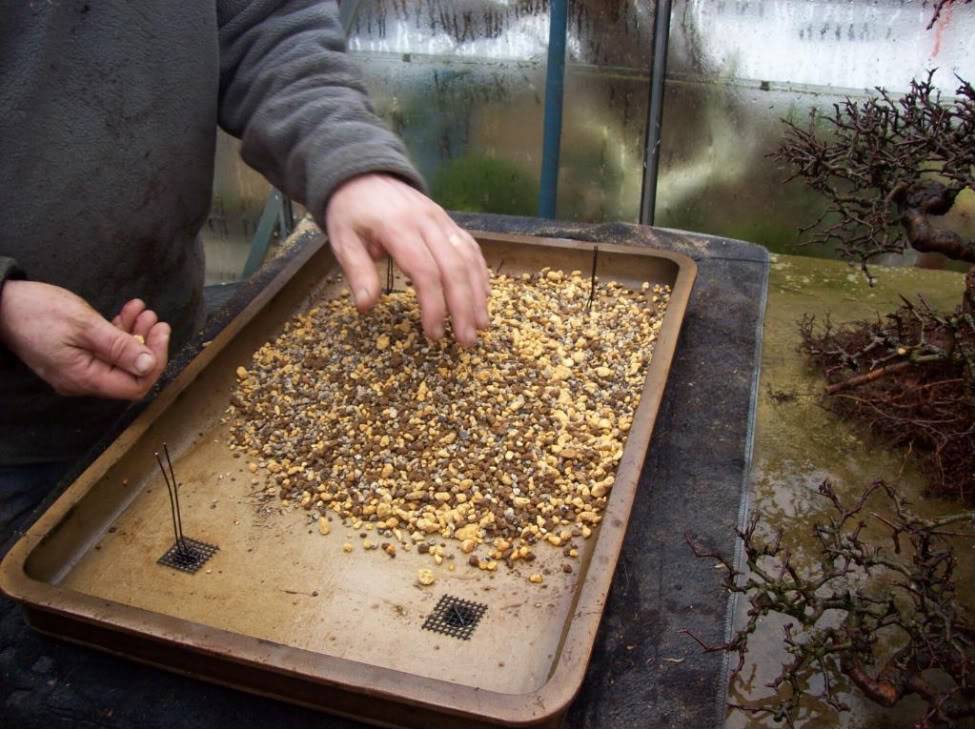
A layer of freshly prepared soil mix was used to make a bed for the tree, after all the bigger lumps had been removed due to someone neglecting to sieve it, coughTonycough. Don’t forget to leave a mound below where the main trunk will be to allow proper ‘bedding in.’
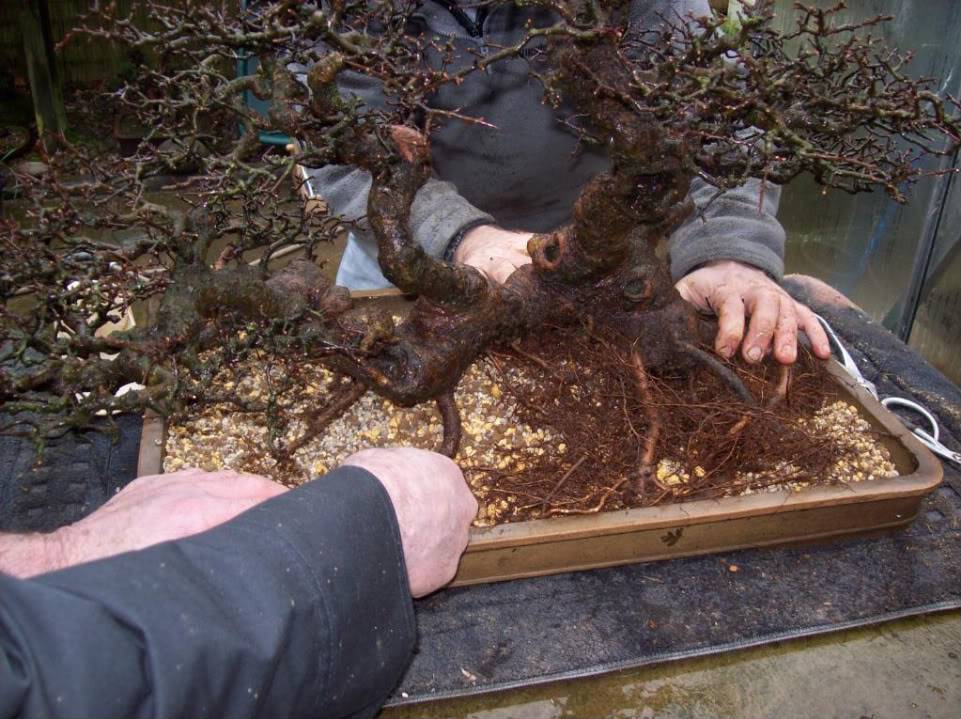
So, now came the time to put the tree back into the pot, tie her in and add more soil mix. Don’t forget to make sure you fill up all those pesky air pockets! It never ceases to amaze me just how much soil you can cram into such a small space.

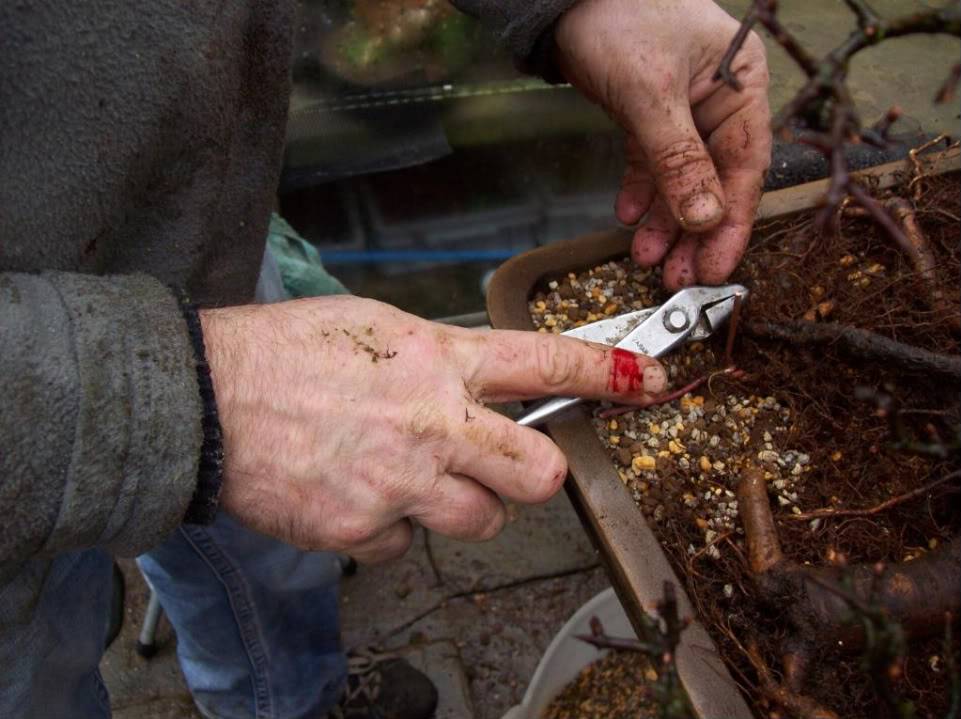
Tony was keen that I show you this picture as an illustration of just how much he suffers for his art. Personally, I still think it was ketchup.
After tying the tree into the required position, the lowest branch of the tree (far right) was resting on the rim of the pot (not good). Tilting the tree slightly to the left was a no-no as this entirely changed the image of the tree, and bending the branch upwards with guy wires wasn’t even an option. The solution was quite simple: A small block of wood was placed below the branch to raise it just high enough to clear the pot rim, then a wire was used to pull the tree downwards, thus causing the branch to be forced upwards over the block. Simples! I knew those physics lessons at school would come in handy one day. The block and wire would be hidden by carefully mounded soil and moss.

This next picture is included purely to allow me to say “Here’s Stuart, wiggling his dibber in the soil.”
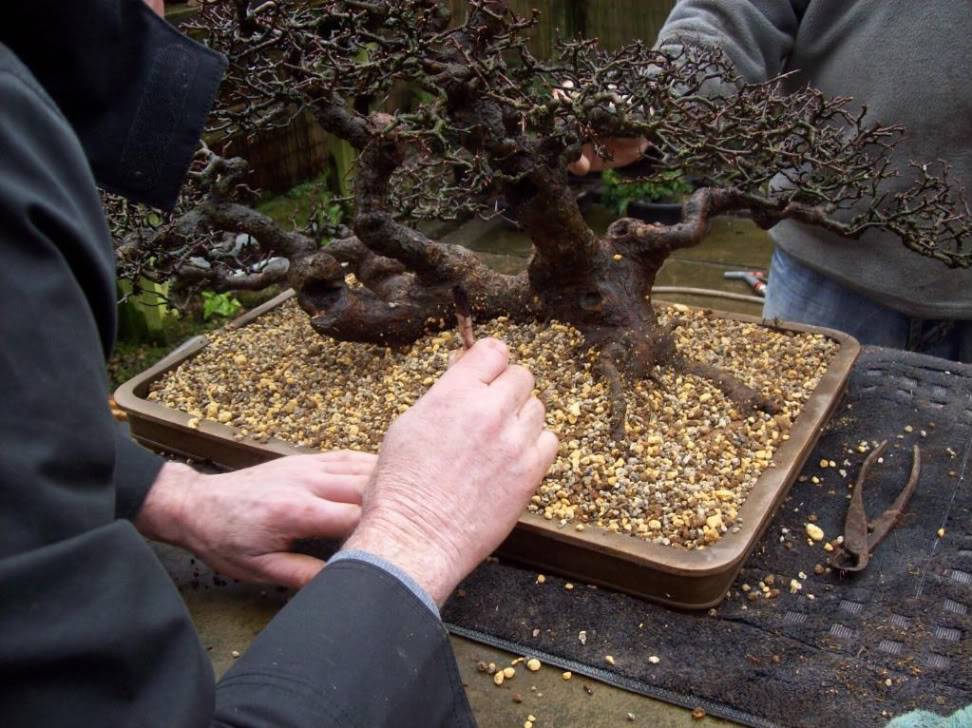
Actually, for those of you who have never repotted a tree, what he’s doing is using a chopstick (or toothbrush or similar) to push down the soil into those hard to reach places. This is important to remove air pockets that could cause root dieback.
Those of you who have been lucky enough to visit Tony’s garden, or Burrs for that matter, will know that the main attraction is not getting up close and personal with some of the best trees around, nor is it his hilarious jokes and witty repartee. No, what we all go for is Carolyn’s amazing cooking. Especially the homemade soup! It was decided at this juncture that we should partake of said repast before the final dressing of the tree commenced. Well, it was bloody cold out there, tha knows!
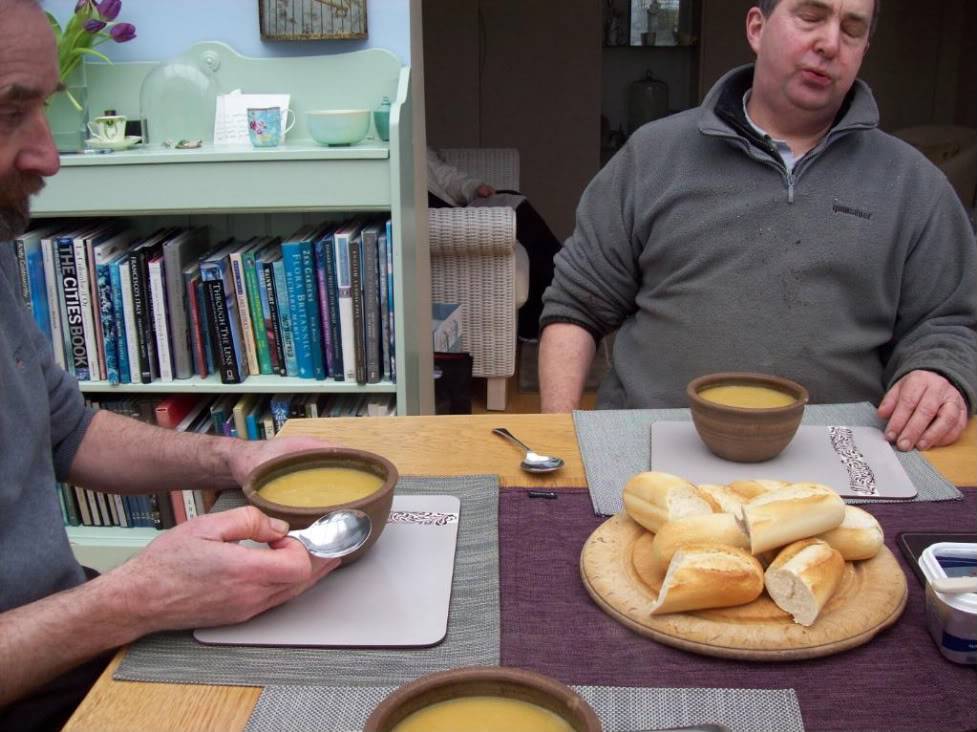
Now, being a softy southerner, Stuart’s delicate digestive system isn’t attuned to the man-sized, hearty broths we rufty-tufty northerners consume, and the results were not pretty. Here’s Tony’s reaction to a particularly cacophonous expulsion emanating from Stuart’s nether regions. Notice Stuart’s suitably apologetic visage.
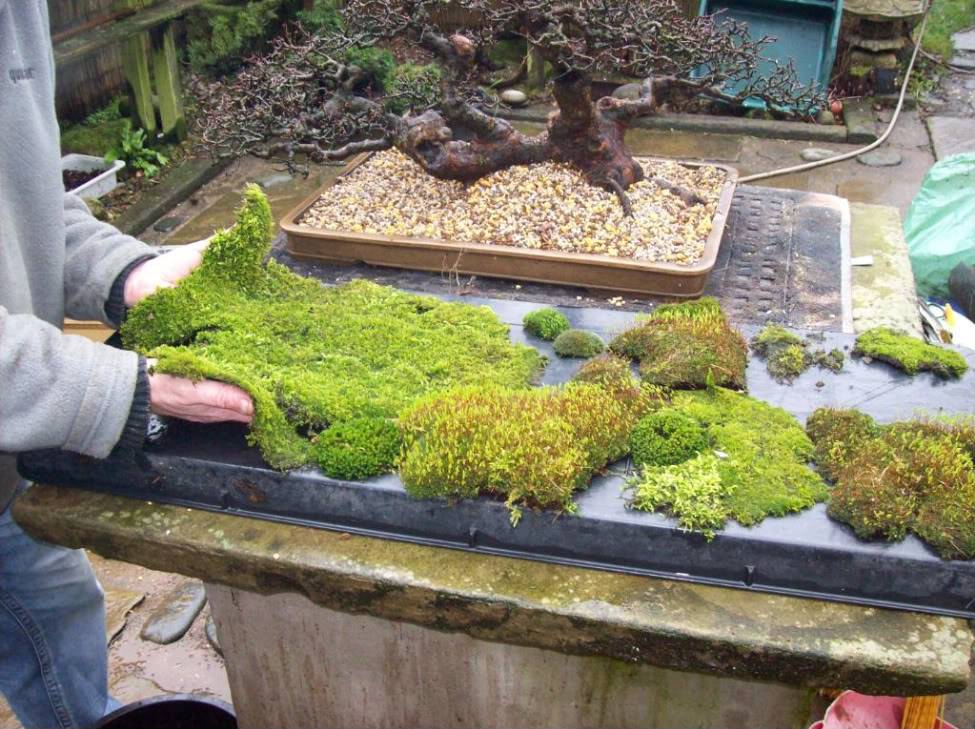
Having consumed our delicious lunch (and opened all the windows), we headed back into the garden/fresh air to finish preparing the tree. Next job up was adding a new covering of freshly collected moss to the soil, courtesy of the local graveyard.
It is worth mentioning at this point that when collecting moss it is a good idea to find as many different types/colours/textures as possible to allow you plenty of freedom of choice when it comes to dressing the soil. Also, where you place each different type of moss can have a dramatic affect on the final image you create, so don’t just shove it on any old how, try different height, colours and textures in different places until you’re happy with the result. If you ever come across a particularly attractive or unusual variety, it’s worth collecting it and keeping it in a small pot or slab on stone for use later on.
Anyway, here we are redressing the tree. The first sheet you see going on covered over half the soil surface in one go and with very little trimming! Tony reckoned he did that on purpose. Yeah, right!

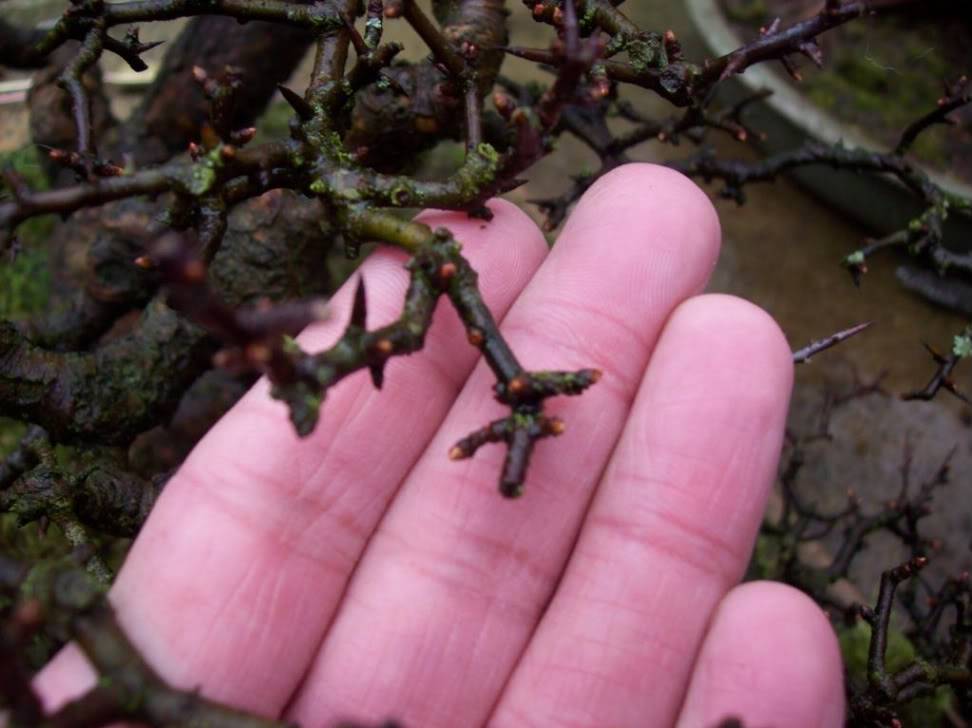
Finally, Tony went round the tree with his scissors removing any ‘stars’. This is where several small branches have formed around the site of an old cut and are growing in all directions. If left in place, these will not only spoil the image of the tree, but they will eventually form a large lump where they emerge from. Not nice. Best to deal with them straight away.
A star before……….
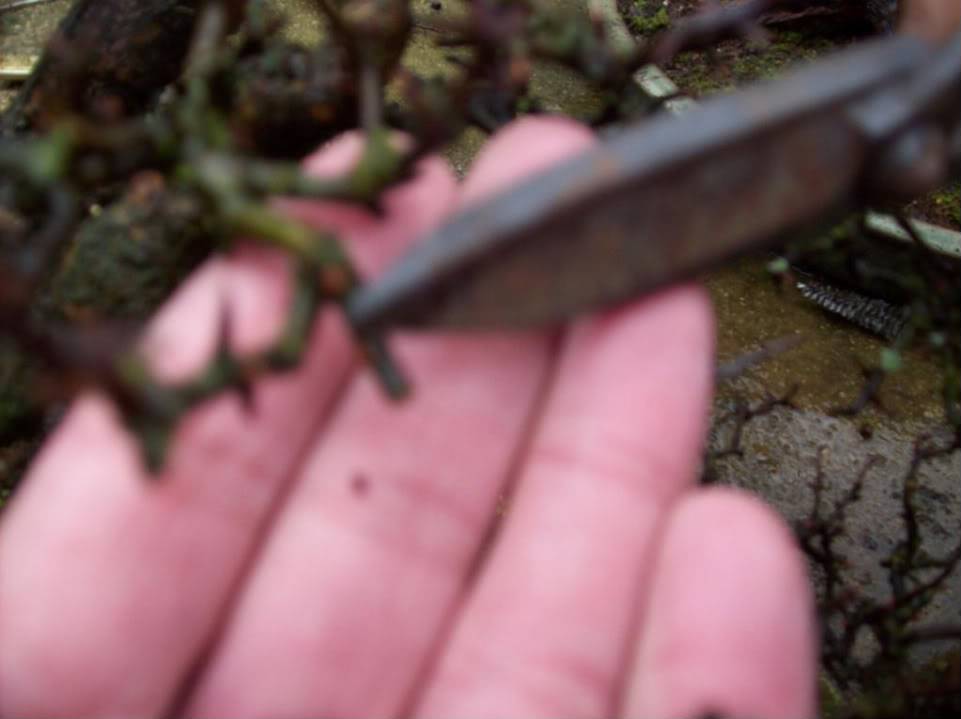
…….and after. Sorry for the poor quality image, but you get the idea.
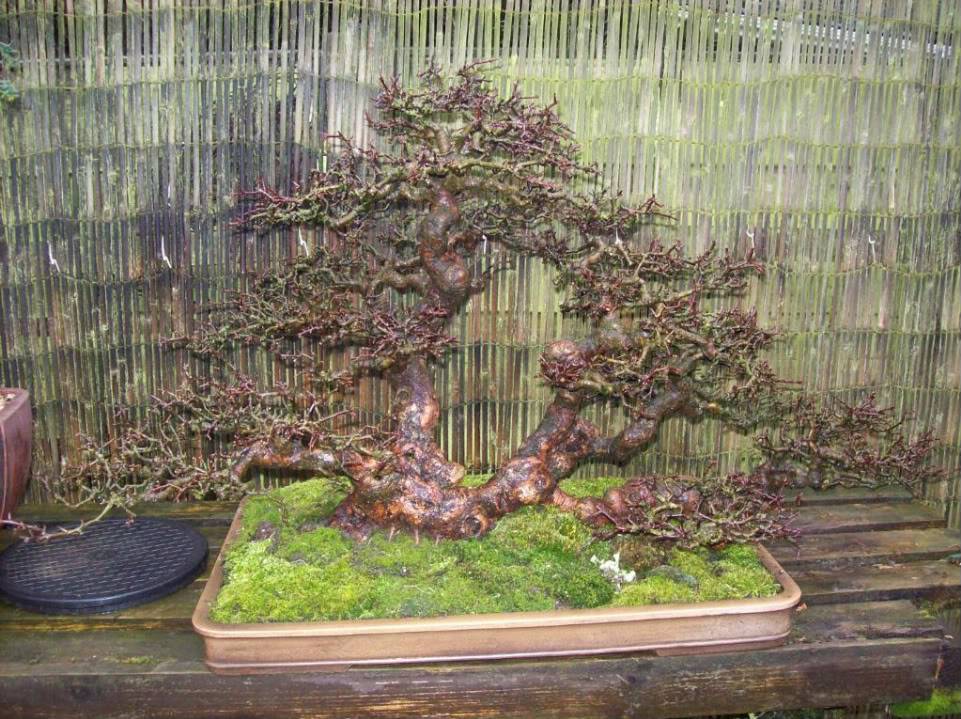
Now, after three hours of hard graft, we stand back and admire the fruits of our labours. Well worth the effort, I’m sure you’ll agree. Compare this picture with the first in the sequence and see the difference.
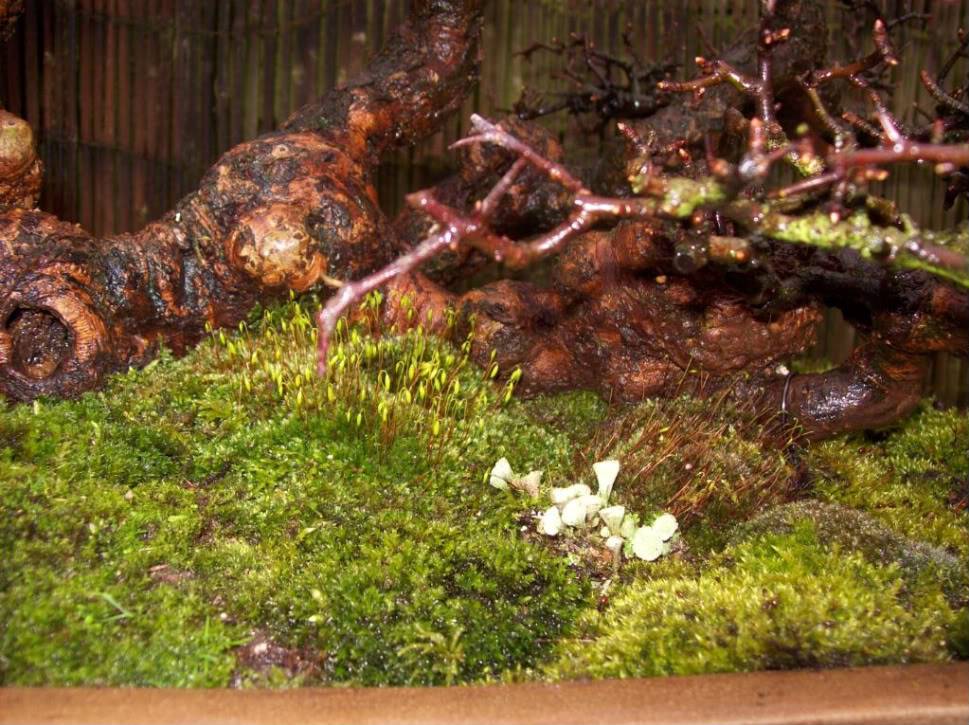
Here’s a close up of some of the new mosses we used.
And here are all three trees drying out on Carolyn’s dining table. He’s got some balls on him, I’ll give him that!

So there you have it, How to prepare a tree for showing in one easy lesson. I hope you found it educational or at least entertaining in some small way.
Coming soon……Preparing The Tall Guy for exhibition at Swindon.
Anyway, when I arrived at Tickle Towers, Stuart was already there, having spent the morning working on a lovely Hawthorn raft he had recently acquired from His Nibbs (I have no doubt we will be seeing that tree appearing at shows in the future.) After a brief pause for an introductory coffee, a plan of action was decided upon and work on the trees began. Tony had already prepared The Fat Guy on Friday, so we were left with just 2 trees to re-pot, root work, re-dress and clip ready to appear in the show 200 miles away that we had to be at by 9am. Easy peesy, lemon squeezy!
I quickly realised that too many cooks get in each others way and decided that my role for the day would be to document events step-by-step in the hope that this post may be of use to anyone who hasn’t done this kind of thing before, or for those who have done it before it will allow you to share in the experience of working on these famous trees.
As pretty much the same process was carried out on both The Tall Guy and The Raft, I have decided to concentrate this first post on The Raft as it presented us with the more interesting challenge, and because it is a tree everyone knows. I shall post a separate photo-sequence with notes for The Tall Guy later.
First, for those of you who haven’t seen The Raft before, or just want the chance to see it again, here is the tree before any work was done.

Not much needs doing there, right? Wrong! The tree had been sitting in that soil for 8 years before we started work, and although it was healthy and growing strongly, it was undoubtedly time for a change. Tony also wanted to change the potting angle slightly, trim the roots, give the tree a slight haircut and redress the fresh soil with new moss.
The first job (as well as the most nerve-wracking) was to remove the tree from its pot. It was at this point that we cleaned the trunk and main branches of moss using old toothbrushes. At least I think they were old ones.....


The more observant amongst you will have noticed that my hands were replaced in the 3rd picture by a set of stunt hands specially flown in for the day. My hands are under contractual obligation not to partake in any activity which may lead to them getting dirty. And believe me, this was going to be one dirty job, as you will see later.
Having manhandled thousands of pounds worth of tree from its pot and unceremoniously dumped it atop Tony’s sacrificial altar, it was time to start work. The first job was to remove all the old moss and comb away as much of the old soil as we could. It soon became clear just how well the tree had been growing for the last 8 years!


There was an unbelievable amount of roots crammed into the shallow pot, and 8 years of fallen leaves, old moss, berries and assorted detritus had rotted down nicely into what appeared to be a never ending supply of nutrient rich organic compound. It was a helluva job to remove it all by hand so Tony drafted in the hosepipe to finish the job.


While the hosepipe was out, the pot was given a good rinsing as well.

After a jetwash and a quick prune and comb, the rootball was looking much neater and instead of two of us straining to lift the tree, Tony was able to hold it easily in one hand.

We now found that there was a thick root growing from the main trunk that hadn’t been there the last time the tree was out of the pot. Normally this wouldn’t be an issue, but it was growing just below the soil surface and followed the direction of the main trunk/branch. As it thickened, there was a danger it could start to lift the tree out of the soil and not only spoil the image, but cause possible root damage by creating an air pocket below the tree. Stuart and I took a step backwards while Tony pondered on the best course of action. Well, wouldn’t you?
In a perfect illustration of the kind of bum-twitching things you get used to when you work with Tony, it took him precisely 2 seconds to whip out his saw and hack the offending root off!

OMG! Did he really just cut off all that root? I've got whole trees with less root than that!

So, after a quick snip at the excess rootage, this is what we were left with. Much tidier, I’m sure you’ll agree. Note how little fine feeder root is actually supporting the far right of the tree. We expected much more than that.


Whilst all the hacking and chopping had been going on, Stuart had busied himself with re-meshing the pot’s drainage holes. Far be it from me to suggest he may be a little on the miserly side, but have you ever seen such perfectly cut mesh? We even had the set-square out when he wasn’t looking and you won’t be surprised to hear that each mesh was perfectly square with the edges of the pot! The guy is an artist, I tell you.

Now we were ready to test fit the tree in the pot to see where the newly trimmed rootball would sit and to allow Tony to decide on the new potting angle. Plenty of room for new growth now!


A layer of freshly prepared soil mix was used to make a bed for the tree, after all the bigger lumps had been removed due to someone neglecting to sieve it, coughTonycough. Don’t forget to leave a mound below where the main trunk will be to allow proper ‘bedding in.’

So, now came the time to put the tree back into the pot, tie her in and add more soil mix. Don’t forget to make sure you fill up all those pesky air pockets! It never ceases to amaze me just how much soil you can cram into such a small space.


Tony was keen that I show you this picture as an illustration of just how much he suffers for his art. Personally, I still think it was ketchup.

After tying the tree into the required position, the lowest branch of the tree (far right) was resting on the rim of the pot (not good). Tilting the tree slightly to the left was a no-no as this entirely changed the image of the tree, and bending the branch upwards with guy wires wasn’t even an option. The solution was quite simple: A small block of wood was placed below the branch to raise it just high enough to clear the pot rim, then a wire was used to pull the tree downwards, thus causing the branch to be forced upwards over the block. Simples! I knew those physics lessons at school would come in handy one day. The block and wire would be hidden by carefully mounded soil and moss.

This next picture is included purely to allow me to say “Here’s Stuart, wiggling his dibber in the soil.”

Actually, for those of you who have never repotted a tree, what he’s doing is using a chopstick (or toothbrush or similar) to push down the soil into those hard to reach places. This is important to remove air pockets that could cause root dieback.
Those of you who have been lucky enough to visit Tony’s garden, or Burrs for that matter, will know that the main attraction is not getting up close and personal with some of the best trees around, nor is it his hilarious jokes and witty repartee. No, what we all go for is Carolyn’s amazing cooking. Especially the homemade soup! It was decided at this juncture that we should partake of said repast before the final dressing of the tree commenced. Well, it was bloody cold out there, tha knows!
Now, being a softy southerner, Stuart’s delicate digestive system isn’t attuned to the man-sized, hearty broths we rufty-tufty northerners consume, and the results were not pretty. Here’s Tony’s reaction to a particularly cacophonous expulsion emanating from Stuart’s nether regions. Notice Stuart’s suitably apologetic visage.

Having consumed our delicious lunch (and opened all the windows), we headed back into the garden/fresh air to finish preparing the tree. Next job up was adding a new covering of freshly collected moss to the soil, courtesy of the local graveyard.
It is worth mentioning at this point that when collecting moss it is a good idea to find as many different types/colours/textures as possible to allow you plenty of freedom of choice when it comes to dressing the soil. Also, where you place each different type of moss can have a dramatic affect on the final image you create, so don’t just shove it on any old how, try different height, colours and textures in different places until you’re happy with the result. If you ever come across a particularly attractive or unusual variety, it’s worth collecting it and keeping it in a small pot or slab on stone for use later on.
Anyway, here we are redressing the tree. The first sheet you see going on covered over half the soil surface in one go and with very little trimming! Tony reckoned he did that on purpose. Yeah, right!


Finally, Tony went round the tree with his scissors removing any ‘stars’. This is where several small branches have formed around the site of an old cut and are growing in all directions. If left in place, these will not only spoil the image of the tree, but they will eventually form a large lump where they emerge from. Not nice. Best to deal with them straight away.
A star before……….

…….and after. Sorry for the poor quality image, but you get the idea.

Now, after three hours of hard graft, we stand back and admire the fruits of our labours. Well worth the effort, I’m sure you’ll agree. Compare this picture with the first in the sequence and see the difference.

Here’s a close up of some of the new mosses we used.

And here are all three trees drying out on Carolyn’s dining table. He’s got some balls on him, I’ll give him that!

So there you have it, How to prepare a tree for showing in one easy lesson. I hope you found it educational or at least entertaining in some small way.
Coming soon……Preparing The Tall Guy for exhibition at Swindon.
Last edited by Harleyrider on Sun Mar 06, 2011 9:26 pm; edited 1 time in total
Harleyrider- Member
 Re: Repotting and preparing The Raft for exhibition at Swindon 2011
Great work on a great Tree. 


jupp- Member
 Re: Repotting and preparing The Raft for exhibition at Swindon 2011
Nice educational report. Thanks. Oh! And great tree, too!

JimLewis- Member
 Re: Repotting and preparing The Raft for exhibition at Swindon 2011
Great Tree! A well coordinated effort. Nothing like a light-hearted session with friends. Thanks for sharing!

bonsapien- Member
 Re: Repotting and preparing The Raft for exhibition at Swindon 2011
A lovely story Harley,
The trees were certainly well appreciated at the show. It certainly looked like you all enjoyed the repot and got wet and dirty in the process, can't wait to see what you will be doing for the 2012 show?????
Paul
The trees were certainly well appreciated at the show. It certainly looked like you all enjoyed the repot and got wet and dirty in the process, can't wait to see what you will be doing for the 2012 show?????
Paul
![Paul B [Swindon]](https://2img.net/u/2614/30/78/28/avatars/2719-67.jpg)
Paul B [Swindon]- Member
 Re: Repotting and preparing The Raft for exhibition at Swindon 2011
Ahh, that would be telling! I know, but I'm sworn to secrecy.

Harleyrider- Member
 Re: Repotting and preparing The Raft for exhibition at Swindon 2011
That is one BEAUTIFUL composition! Who made that wonderful pot?

Russell Coker- Member
 repotting and preparing the raft
Good to see friends working togather....a good lesson with the repot..the trees look great have fun take care john
moyogijohn- Member
 Re: Repotting and preparing The Raft for exhibition at Swindon 2011
great illustration of potting....

peter keane- Member
 Re: Repotting and preparing The Raft for exhibition at Swindon 2011
Very good job guys. 


Gretings Pavel


Gretings Pavel

Pavel Slovák- Member
 Re: Repotting and preparing The Raft for exhibition at Swindon 2011
It`s great when you see a true masterpiece on display, but its great when you see all the hard work that goes with it. this tree is now a real masterpiece of european bonsai having been in training after collection for about 20 years. It was shown at the 1st ever Gingko show many years ago were I think i`m right in saying it won an award. I too have had the pleasure of working on this tree on numerous occasions and it just gets better every time I see it. By the way the pot was made by the late Derek Aspinall a master craftsman if ever there was one.
Cheers
Ian.
Cheers
Ian.
Ian Warhurst- Member
 Re: Repotting and preparing The Raft for exhibition at Swindon 2011
Great set of Photos, thanks for posting. What's the make up of the potting mix? Is that Kanuma in there? Hard to tell from the pics.

Ian Young- Member
 Re: Repotting and preparing The Raft for exhibition at Swindon 2011
Hello Steve. Thankyou for sharing the repotting of this British masterpiece. What a privilege.
Guest- Guest
 Re: Repotting and preparing The Raft for exhibition at Swindon 2011
I'm glad everyone seems to be enjoying this post. I'm sure that Tony will be happy to answer any questions you may have regarding the tree, pot, soil mix etc, just as soon as he realises that the post is here 

Harleyrider- Member
 Re: Repotting and preparing The Raft for exhibition at Swindon 2011
thanks very much for the lesson on how to repot a great tree 
stephen clarke- Member
 Re: Repotting and preparing The Raft for exhibition at Swindon 2011
Thanks for a complete photo report. It is very instructive.
Regards.
Xuan
Regards.
Xuan
xuan le- Member
 Re: Repotting and preparing The Raft for exhibition at Swindon 2011
Wonderful, simply wonderful. May I say how much once again I enjoyed the commentary from Steve? It was hugely entertaining; as was of course Tony's face during lunch: Priceless … even though Steve used a bit of artistic licence I fancy 
Mike
Mike

Mike Jones- Member
 Re: Repotting and preparing The Raft for exhibition at Swindon 2011
Muddy hell 
Great job and report - a fantastic raft it is.
Regards
Morten
Great job and report - a fantastic raft it is.
Regards
Morten
Guest- Guest
 Re: Repotting and preparing The Raft for exhibition at Swindon 2011
An educational n entertaining report of a group of friends having a nice time repotting an important bonsai.
Tnanks n Cheers.
CJ
http://newzealandteatreebonsai.blogspot.com/
Tnanks n Cheers.
CJ
http://newzealandteatreebonsai.blogspot.com/

newzealandteatree- Member
 Thanks Steve
Thanks Steve for a very 'informative' filled with artistic license post...
The soil mix is: 30% Acadama 30% Kyodama (or sharp sand) 30% Cat Litter and 10% Kanuma
The Pot is indeed a wonderful Derek Aspinall creation made specifically for the tree.
Morten: It was a MUDDY affair due to the Acadama having broken down into dust, but the timing was perfect to repot just as the buds were beginning to swell. The tree is sat in the greenhouse and is just coming into leaf.
Note: If your timing is good you can be quite ruthless with the work on a Hawthorn, this tree will be VERY vigorous this season and it will be a task maintaining the silhouette.
Last edited by tony on Mon Mar 07, 2011 11:49 am; edited 1 time in total
Guest- Guest
 Re : Repotting and preparing The Raft for the exhibition at Swindon 2011
Fantastic post Steve.Well done.Looks like you had a Great day.Wish I could have been there.I was however on a collecting trip up North..Cant wait for you Fat guy report.!!.


Bob Brunt- Member
 Re: Repotting and preparing The Raft for exhibition at Swindon 2011
One of my favourite bonsai still going strong and one that got me interested in Hawthorn many years ago when I first saw it.
Harry Harrington- Member
 Re: Repotting and preparing The Raft for exhibition at Swindon 2011
Great detailed work with the camera. Thanks.......
Also,
I'll have to say...... even the moss looks awesome!
Also,
I'll have to say...... even the moss looks awesome!

DangerousBry- Member
 Re: Repotting and preparing The Raft for exhibition at Swindon 2011
Hi Tony
With a good work you have to eat well.
And no one takes offense when you sleep after eating
With a good work you have to eat well.
And no one takes offense when you sleep after eating

jupp- Member
Page 1 of 2 • 1, 2 
 Similar topics
» Repotting the Hawthorn Raft
» New Dawn images "Swindon 2011"
» 2011, 9th Swindon 'Winter Image' Show pictures
» Exhibition of bonsai in Moscow, May 28-June 5, 2011
» 2011 85th KOKUFU BONSAI EXHIBITION
» New Dawn images "Swindon 2011"
» 2011, 9th Swindon 'Winter Image' Show pictures
» Exhibition of bonsai in Moscow, May 28-June 5, 2011
» 2011 85th KOKUFU BONSAI EXHIBITION
Page 1 of 2
Permissions in this forum:
You cannot reply to topics in this forum


