


b. Tutorial on posting pics
2 posters
Page 1 of 1

 b. Tutorial on posting pics
![]() JimLewis Tue Feb 24, 2009 1:10 pm
JimLewis Tue Feb 24, 2009 1:10 pm
And now, how to post a picture. This tutorial covers three different ways of posting an image depending on where you keep your photos (host location):
Index
1. Posting images held on your own computer
2. Posting images held on Photobucket
3. Posting images held on Flickr
4. Posting images from other photo sites
5. Posting images using an Android smartphone
BEFORE GOING ANY FURTHER CAN WE ASK YOU PLEASE TO MAKE SURE YOUR PICTURES ARE CORRECTLY ORIENTATED IN YOUR HOST LOCATION.
Many of our members find standing on their heads quite difficult
JimLewis- Member

Posting images held on your computer
![]() fiona Wed May 02, 2012 10:44 pm
fiona Wed May 02, 2012 10:44 pm
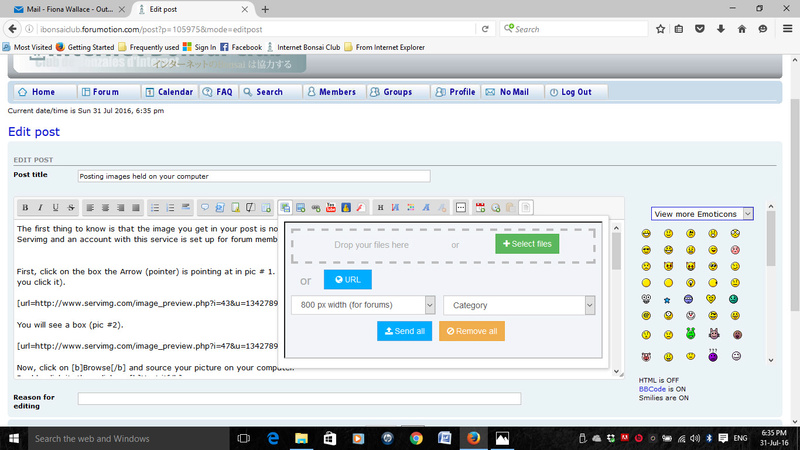
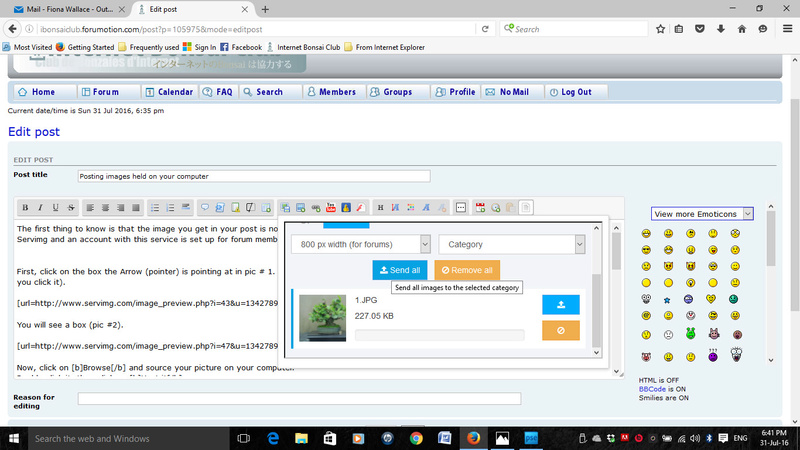
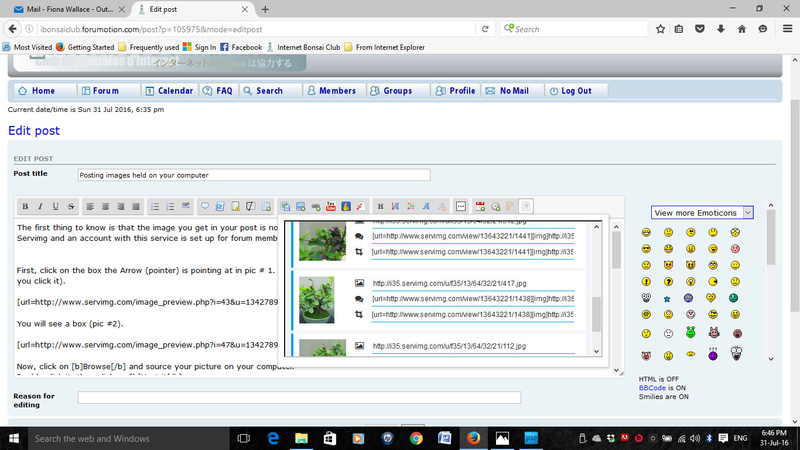
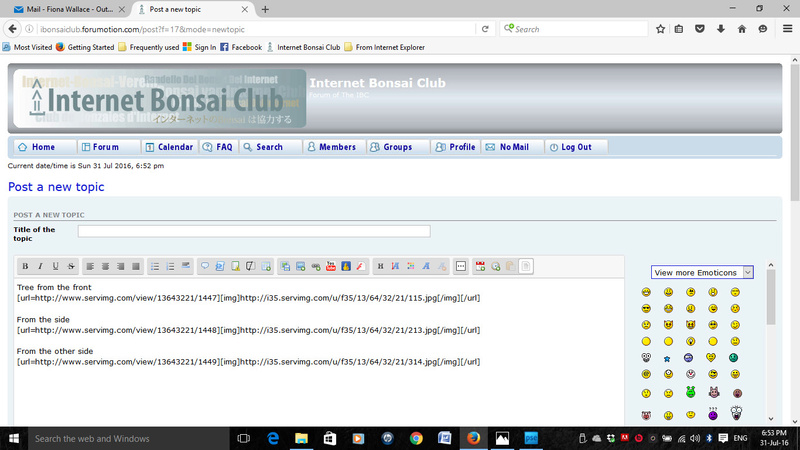
The first thing to know is that the image you get in your post is not directly linked to IBC from your computer. The system uses a hosting service called Servimg and an account with this service is set up for forum members the first time they post an image.
First, click on the box the Arrow (pointer) is pointing at in pic # 1. (You should get a legend saying Host an Image when you hover over the icon before you click it).

You will now see this box:
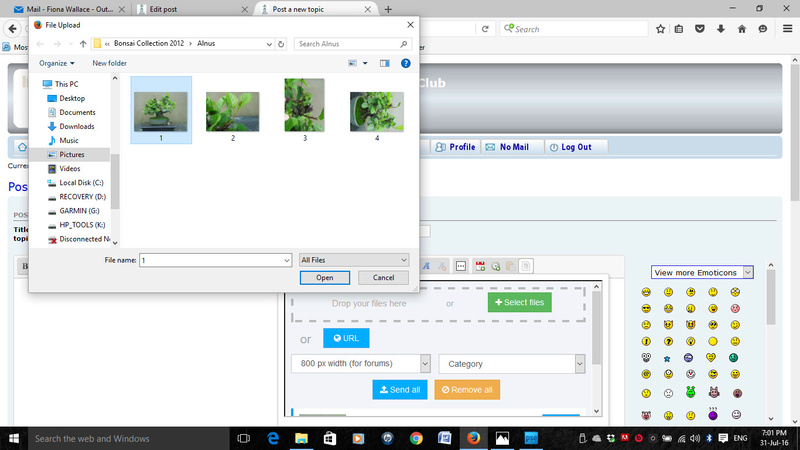
Click Select File. This allows you to select an individual picture for uploading. You should select your image from whatever location you have it stored in. Then click Open on your location folder.
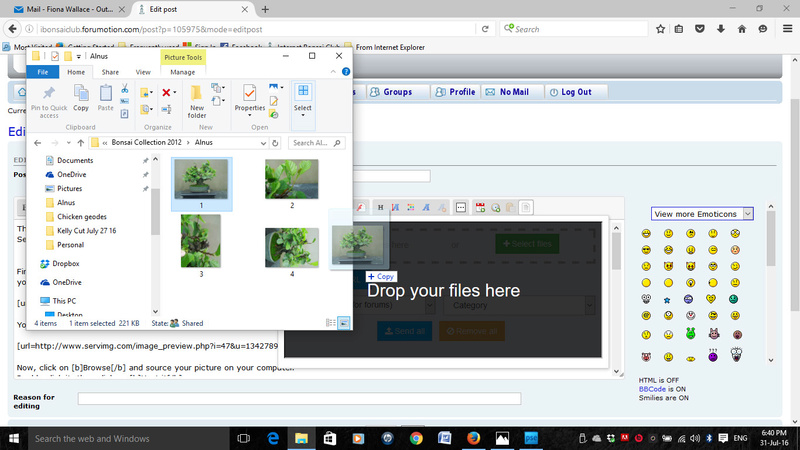
Alternatively, you can use the Drag and Drop facility. Just select your image from its location and drag and drop it into the dialogue box liek this:
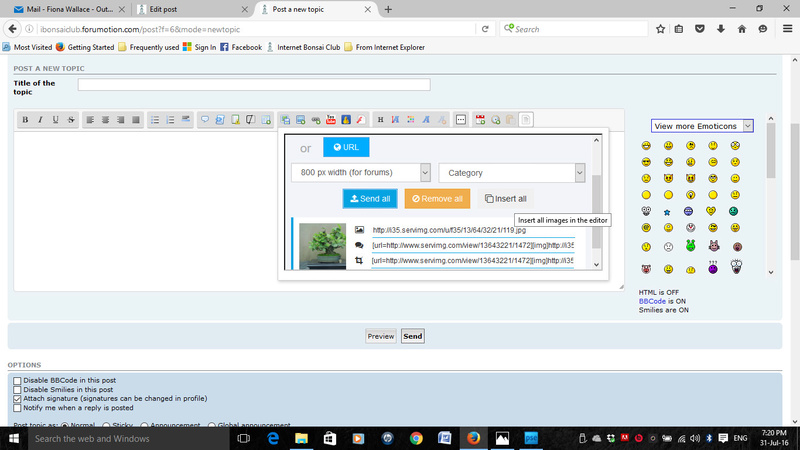
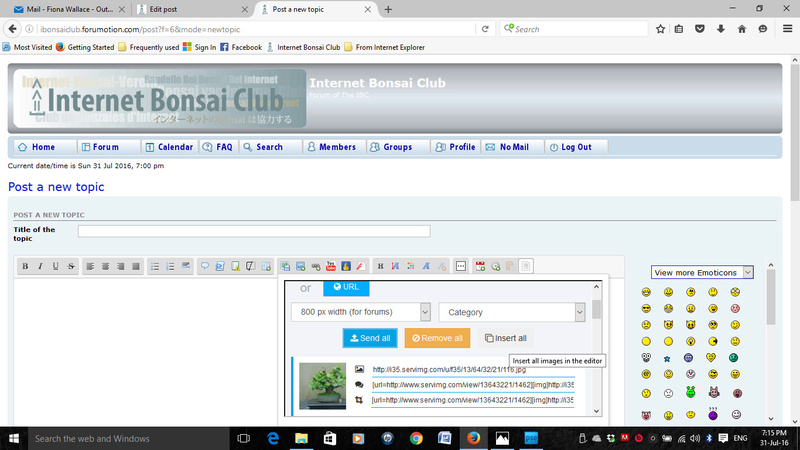
Whichever you do, it adds the image to the dialogue box as per the next picture. Now click Send All.
Now you will see a new command appearing - Insert All. Click on this.
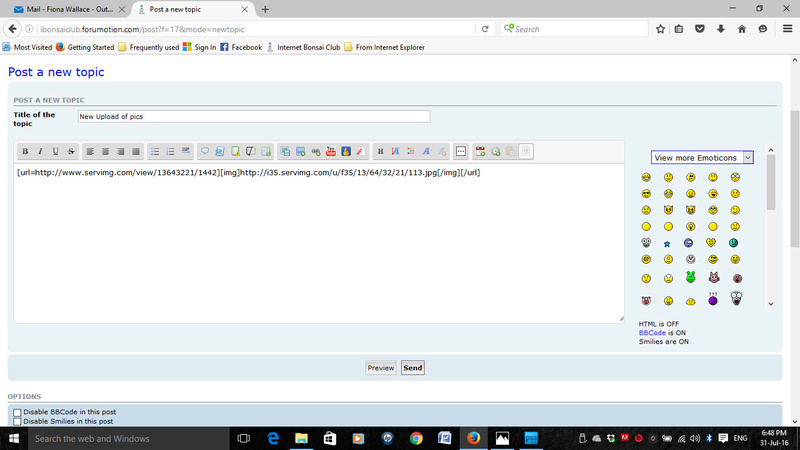
This automatically sends the image to your post. Look at your post and you will see this:
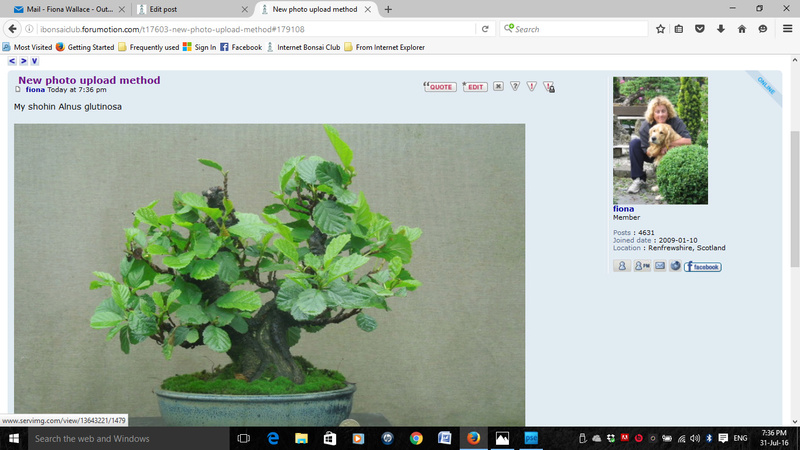
You can go into the post at this time and add captions and other text. Just click on your post where you want to add your text and write away.
Once you hit Send at the end of your post as per normal, your image will appear in your post with whatever text you have added.
Now for the sweet bit.
You can now upload multiple images without having to repeat the upload action over and over.
Here's how.
Let's go back to here:

This time, I'm going to select all four images. I can either select all four and press Open as we did for the single image. But far more simple is to highlight them then drag and drop them into the box as shown.
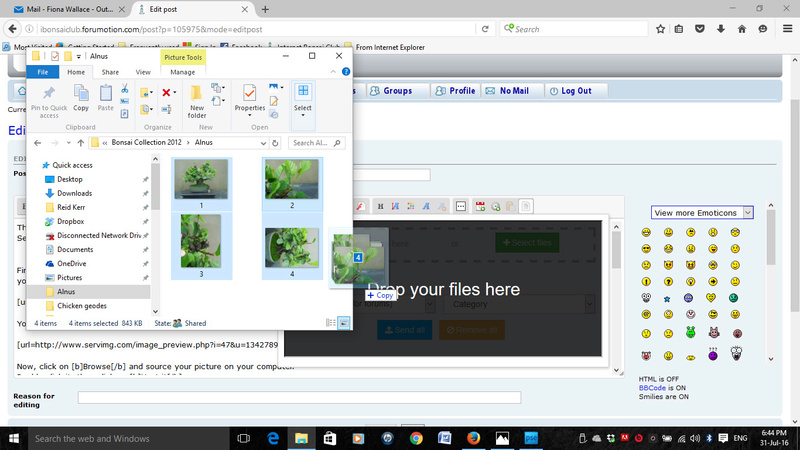
Then I click Send All again. The four images will appear in a list.
The Insert All command will appear again. Click on this and all of the images will upload at the one time.
What you will see in your post is this:
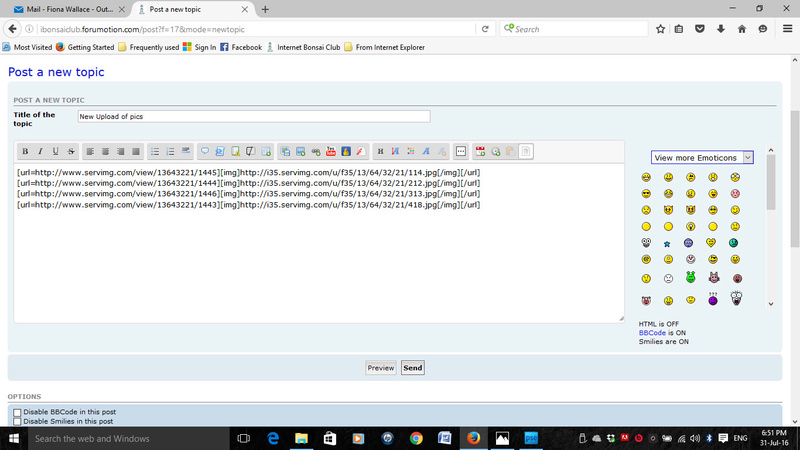
At this point you can click your cursor on to your post and add whatever explanatory text you want to each image. We recommend that you also add a space in between images so it isn't as hard on the eye for the viewer.
First, click on the box the Arrow (pointer) is pointing at in pic # 1. (You should get a legend saying Host an Image when you hover over the icon before you click it).
You will now see this box:
Click Select File. This allows you to select an individual picture for uploading. You should select your image from whatever location you have it stored in. Then click Open on your location folder.
Alternatively, you can use the Drag and Drop facility. Just select your image from its location and drag and drop it into the dialogue box liek this:
Whichever you do, it adds the image to the dialogue box as per the next picture. Now click Send All.
Now you will see a new command appearing - Insert All. Click on this.
This automatically sends the image to your post. Look at your post and you will see this:
You can go into the post at this time and add captions and other text. Just click on your post where you want to add your text and write away.
Once you hit Send at the end of your post as per normal, your image will appear in your post with whatever text you have added.
Now for the sweet bit.
You can now upload multiple images without having to repeat the upload action over and over.
Here's how.
Let's go back to here:
This time, I'm going to select all four images. I can either select all four and press Open as we did for the single image. But far more simple is to highlight them then drag and drop them into the box as shown.
Then I click Send All again. The four images will appear in a list.
The Insert All command will appear again. Click on this and all of the images will upload at the one time.
What you will see in your post is this:
At this point you can click your cursor on to your post and add whatever explanatory text you want to each image. We recommend that you also add a space in between images so it isn't as hard on the eye for the viewer.
Last edited by fiona on Sun Jul 31, 2016 7:38 pm; edited 14 times in total

fiona- Member
Posting images held on Photobucket
![]() fiona Wed May 02, 2012 10:56 pm
fiona Wed May 02, 2012 10:56 pm
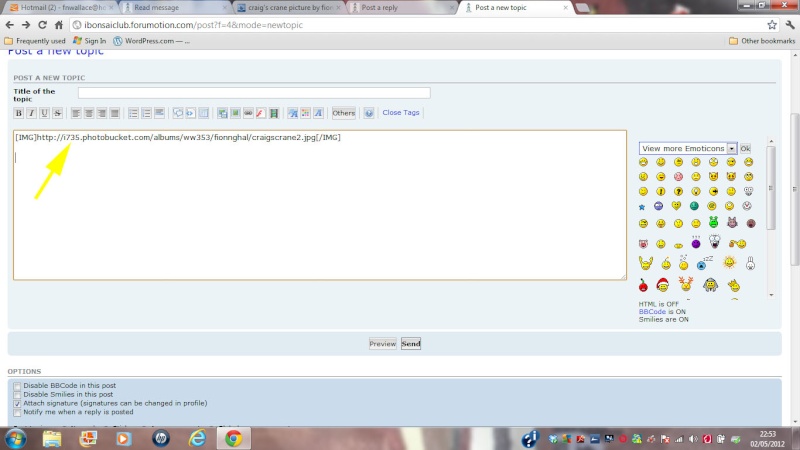
If you already have a load of your bonsai images on Photobucket and don't want to move them, then you can link to them using the following method:
In Photobucket, load the image you want to use then click on the image (IMG) Code. This should automatically copy it.
Now just click in the text pane of your post at the spot you want your image to appear, and paste the image code. You will see it appear like this:
Then just click SEND and that should be it - your image will appear in the published post.
You can also use the Link button and paste the IMG code into the drop down box then press OK, but it really only does the same thing.
Thanks to Will Baddelely for working this out for me
Last edited by fiona on Wed May 02, 2012 11:08 pm; edited 1 time in total
fiona- Member
Posting images held on Flickr
![]() fiona Wed May 02, 2012 11:07 pm
fiona Wed May 02, 2012 11:07 pm
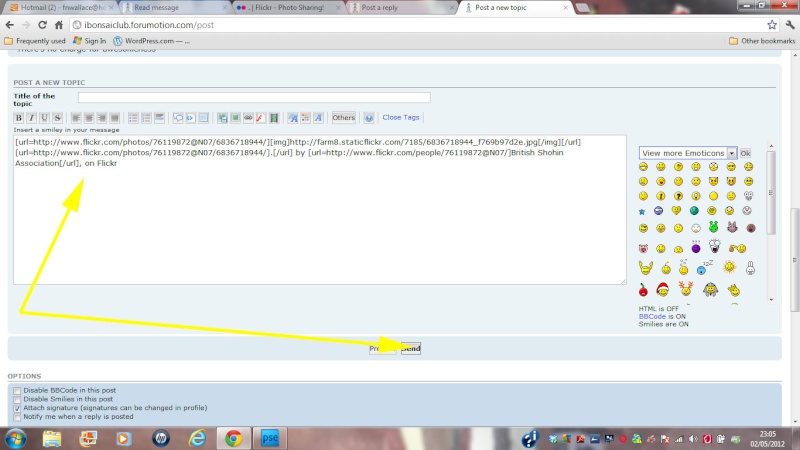
Similar to Photobucket. Open the image you want to use from your Flickr account. At the top left is a button marked SHARE.
Click on this then select the Grab the HTML/BBCode option from the drop down box.
Select the BBCode radio button and a piece of code appears in the window. Highlight and Copy this.
Then simply click your cursor into the text box of your post where you want the image to go and Paste in the code. It should look like this:
Again, simply click SEND and bob's your uncle.
Thanks to Will Baddelely for working this out for me
fiona- Member
A plea regarding using external photohosting sites
![]() fiona Thu May 03, 2012 11:31 am
fiona Thu May 03, 2012 11:31 am
A plea to the users of Flickr, Photobucket or other external photohosting sites:
1. Remember, if you subsequently remove an image from your photohosting site, it will also be deleted from IBC. For this reason, we prefer members to use the internal system.
2. Sometimes people post their images as links to their external photohosting site (e.g. https://2img.net/h/i735.photobucket.com/albums/ww353/fionnghal/Buxusonslab.jpg) This works of course, but it means the readers then have to follow that link away from the post. Some members don't have any problem with this but others find it a bit distracting - especially when there is some text related to the picture back on the post and you are having to toggle between the two.
As we saw in the previous two posts, it's so easy to link your images from Flickr etc directly into the post text pane, so this would be our preferred method if you are posting images using an external photohosting site.
Last edited by fiona on Fri May 04, 2012 8:57 pm; edited 1 time in total
fiona- Member
Other photohosting services
![]() fiona Fri May 04, 2012 5:04 pm
fiona Fri May 04, 2012 5:04 pm
We'll try to establish how you do this as and when we come across other services.
imgur:
Under your image click Get Embed Codes then over on the pane that appears on the right, click the Copy icon under BBCode (message boards and forums). Simply then paste that into the text pane on your post where you want the image to appear.
A word of caution; if your original on imgur is a big file, click on Large Thumbnail (it's one of the size options under the embed codes) to get the image a reasonable size above, otherwise the original might take up the whole page and overwhelm the readers.
fiona- Member
Posting images using an Android Smartphone
![]() JimLewis Wed Apr 22, 2015 11:52 am
JimLewis Wed Apr 22, 2015 11:52 am
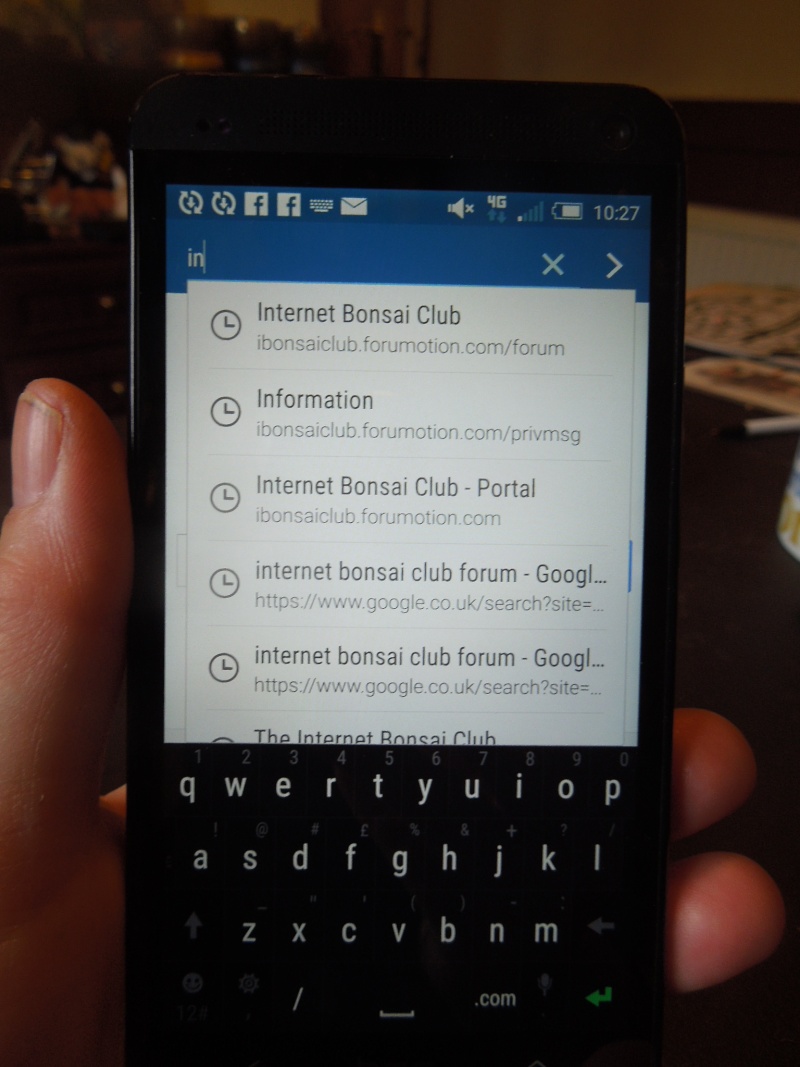
1. First, search for the Internet Bonsai Club on your phone's internet browser.
2. It seems easier to use the Classic version of the forum for uploading images so switch to that if your phone hasn't defaulted to it.
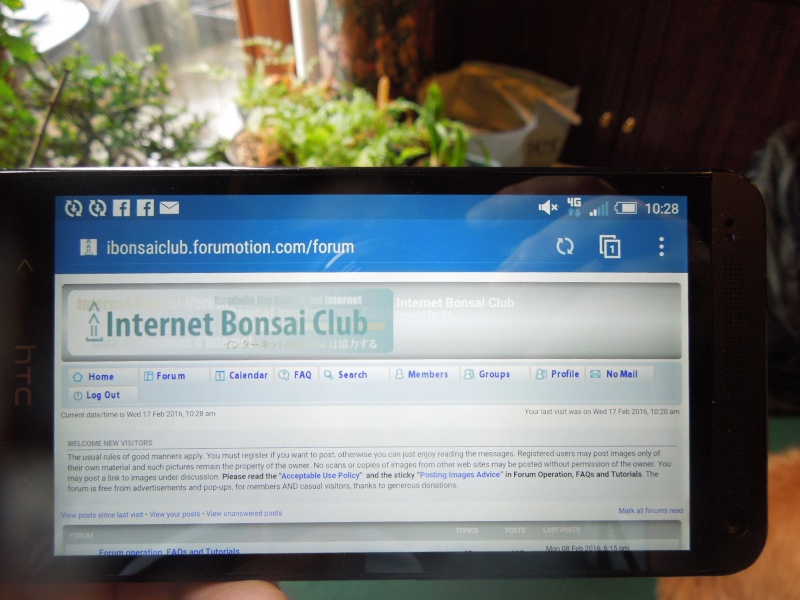
You then need essentially to follow the steps as if you were posting from a computer:
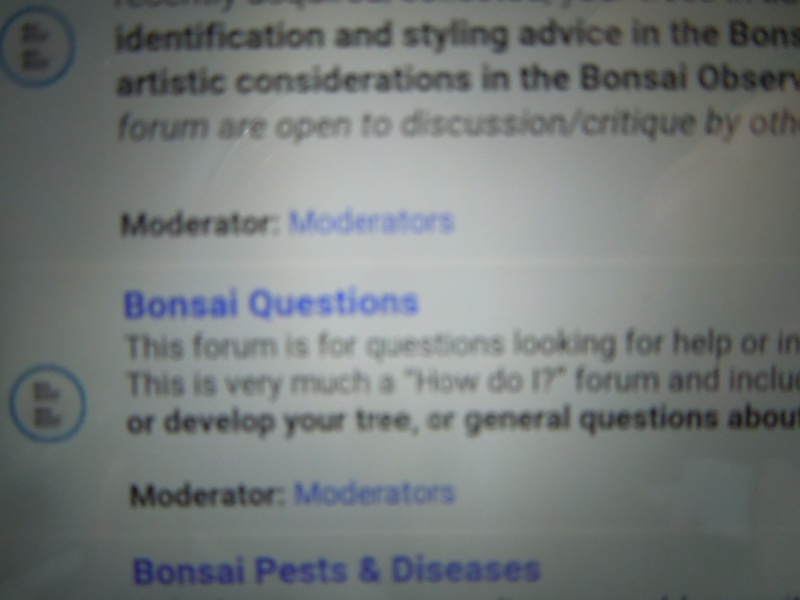
3. First, select (or create) the thread you want to post to. I'm going to post a Reply to a thread in Bonsai Questions.
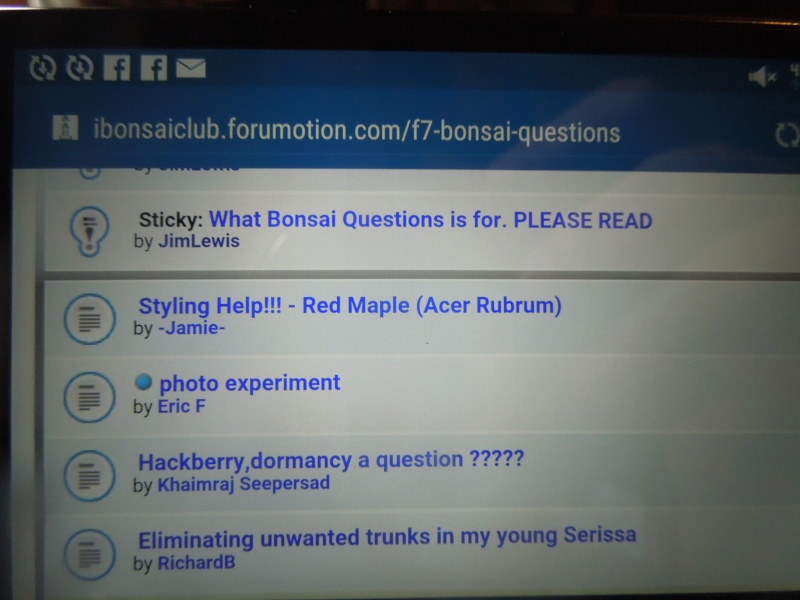
I've located the thread so I will now tap Post Reply
The reply window opens as per normal
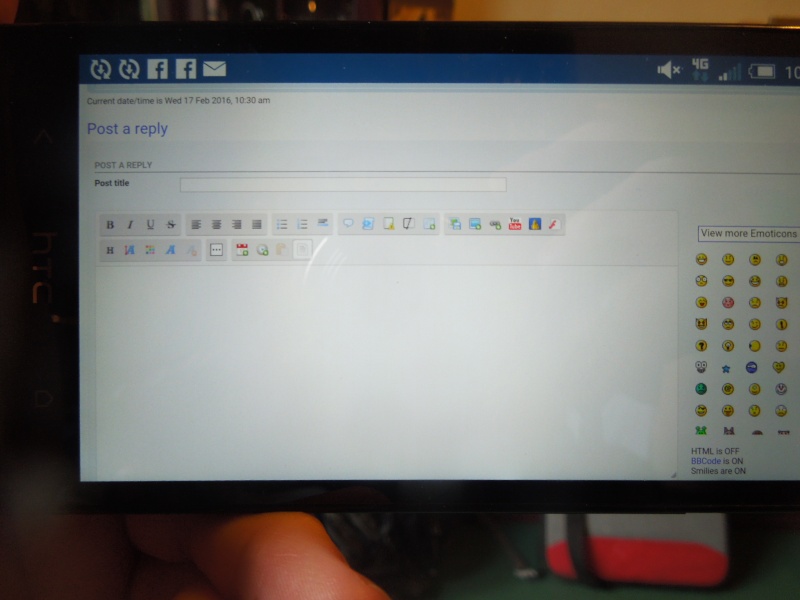
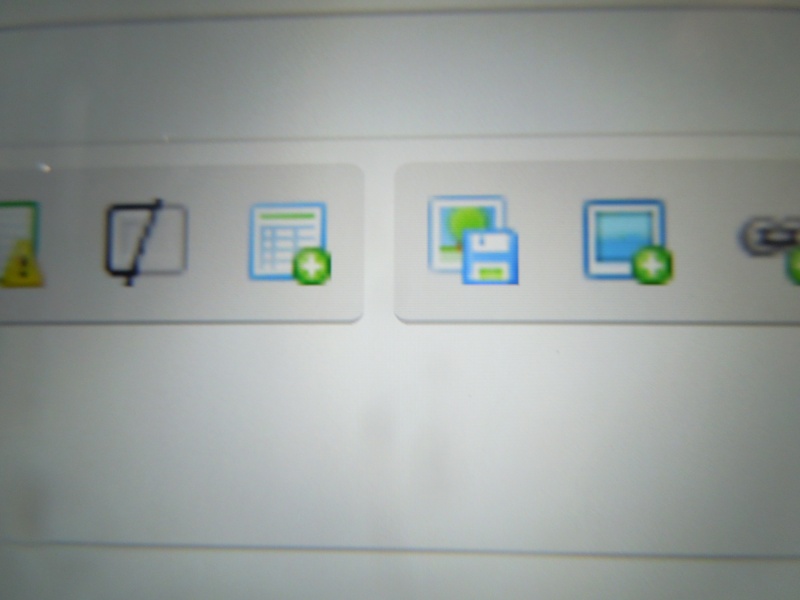
4. Then, go to the photo posting icon. That's the middle of the three blue ones.
5. Touch it and you should get this:
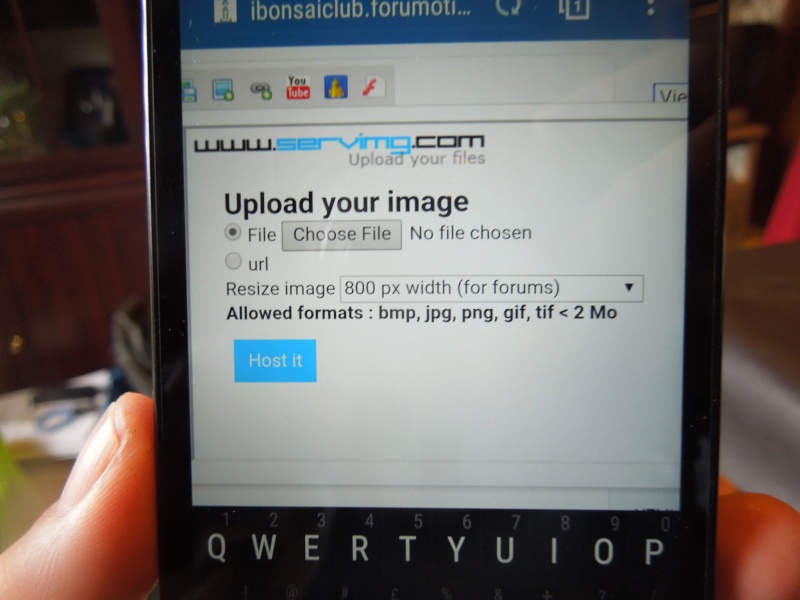
Essentially what you are doing is eactly as you would for posting from a computer
6. Now click on Choose File and you should get this option:
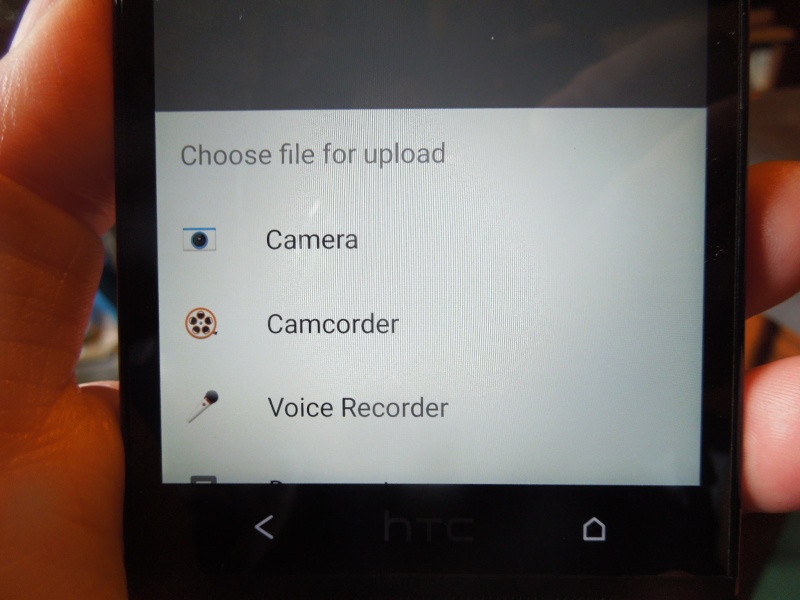
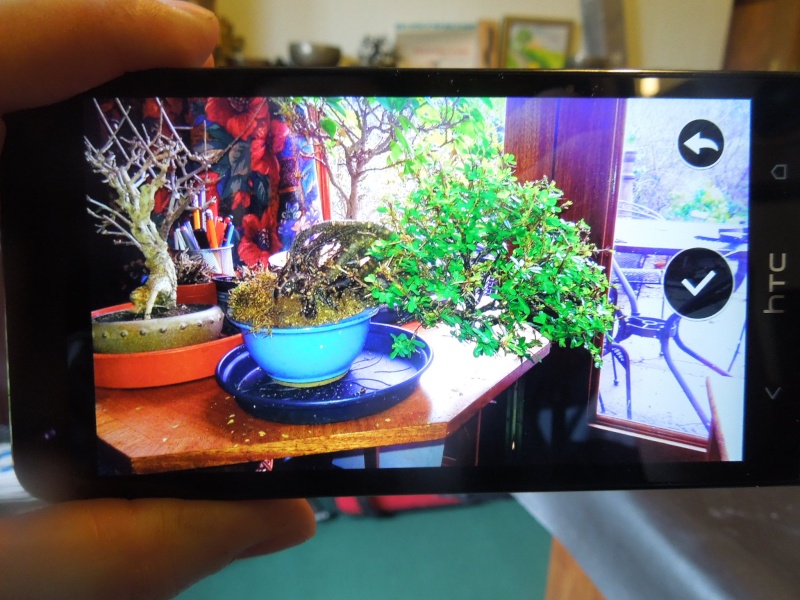
7. Click Camera and then take your picture. On my phone it looks like this after the photo has been taken. I then click on the tick:
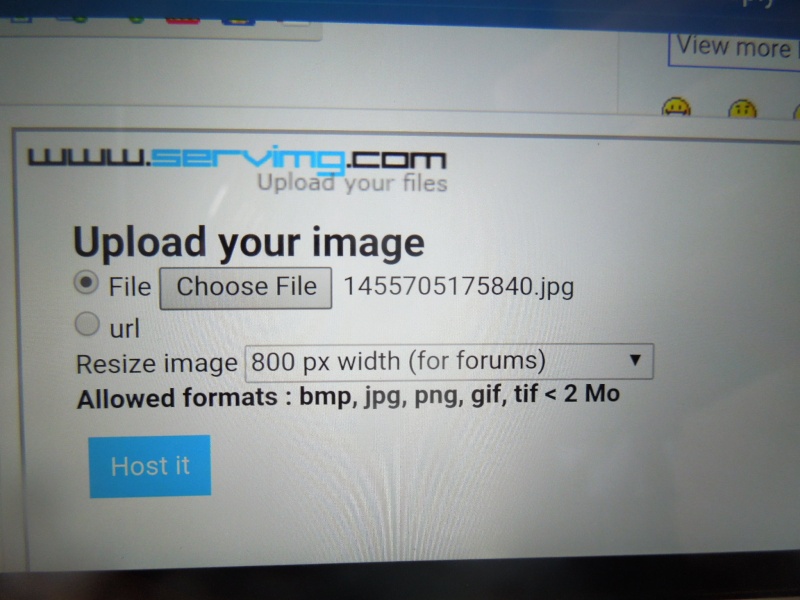
8. You will then get the Host it screen:
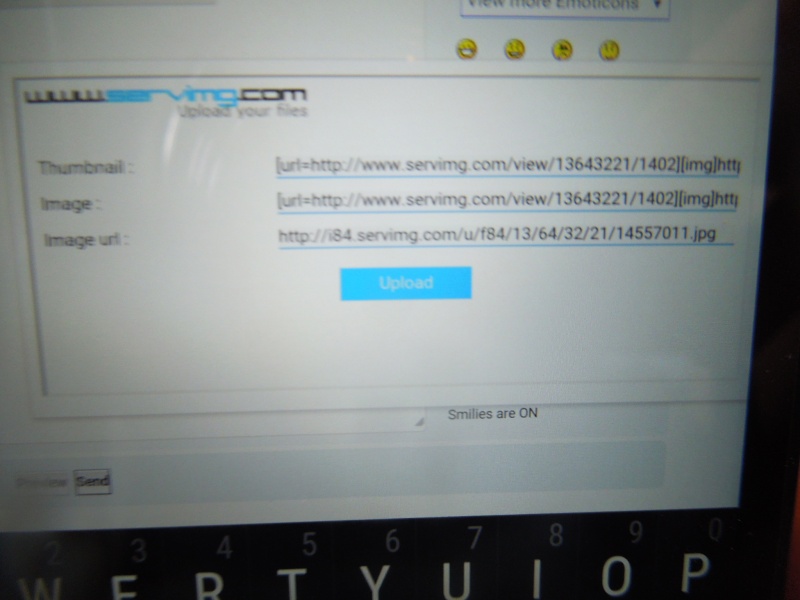
9. Click Host it, and you will get this:
10. Now comes the tricky bit. You need to know how to call up the sliders that allow you to highlight text on your phone. On mine, all I do is touch and hold. It is the middle line you want. It looks like this:
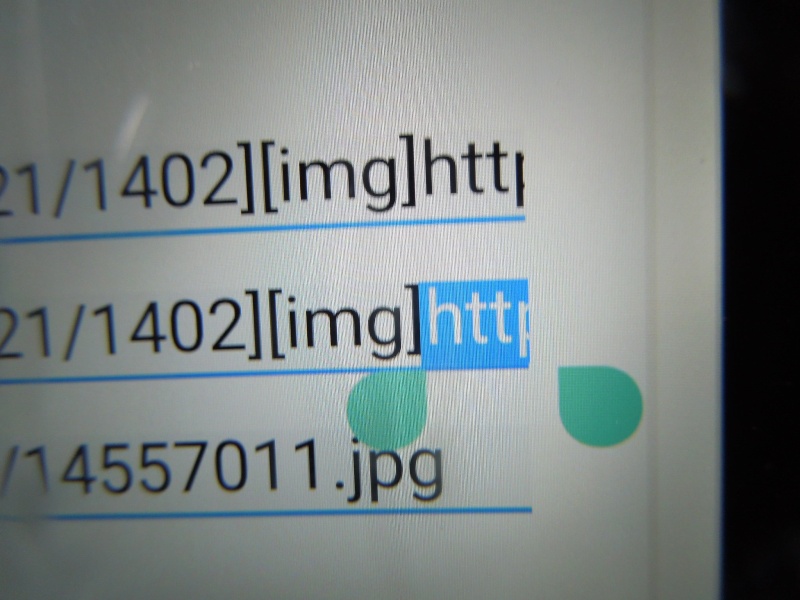
At the top of my screen now is a line of commands. The first one I click is Select All:
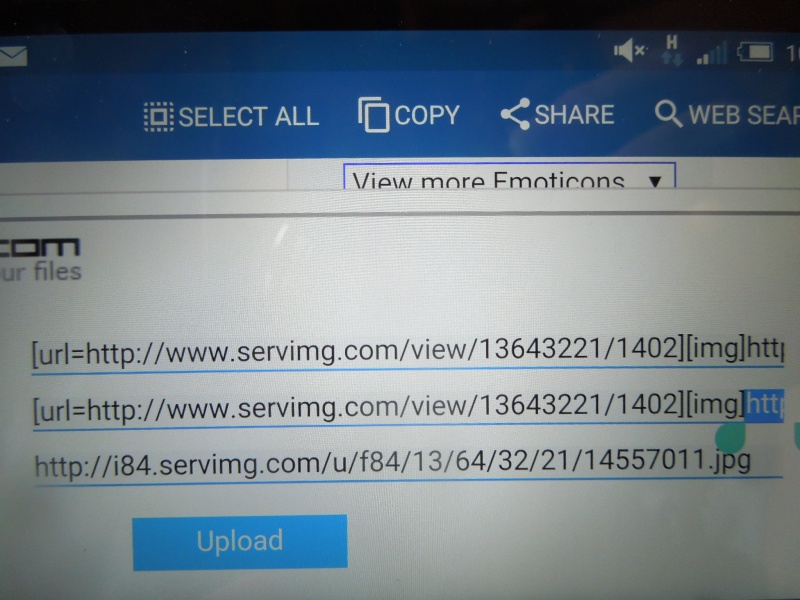
11. The text now should have been highlighted (remember it's the middle line you want). Then I touch Copy:
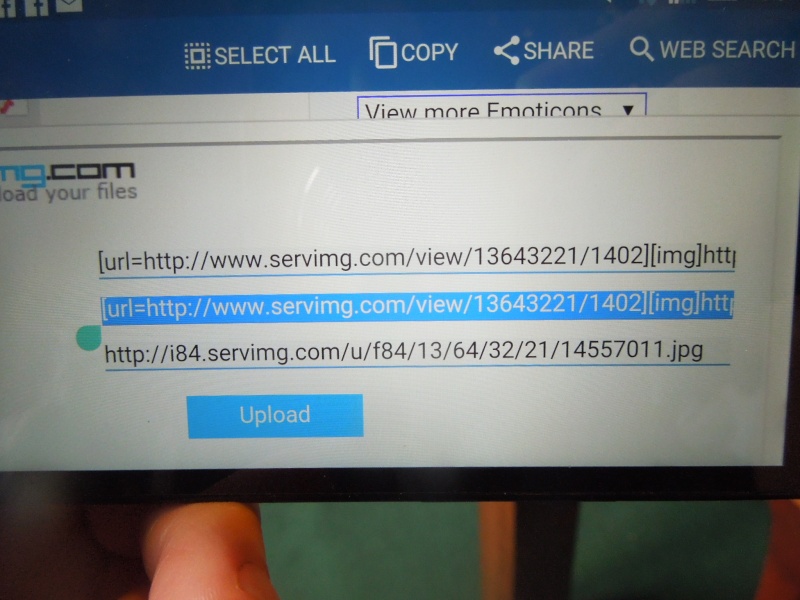
12. Once I have touched Copy, I move over to the text pane where I want the image to go. I tap and hold for a few seconds and I get the Paste icon appearing:
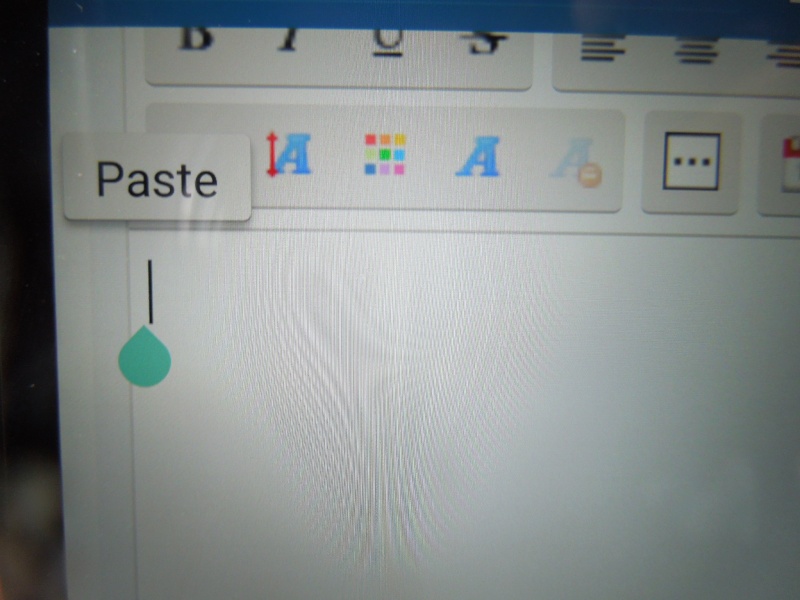
13. Tap on that and you should now see the image code appearing:
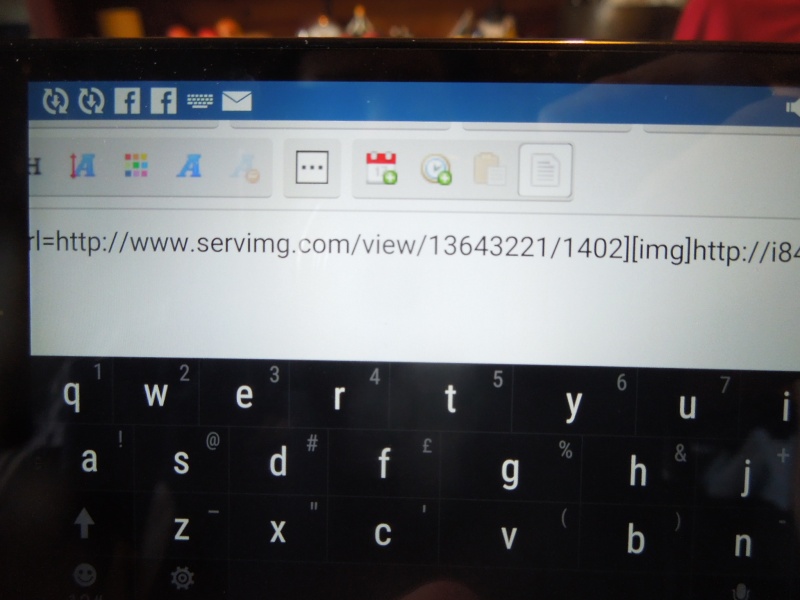
14. Now all you have to do is go to the bottom of the message window and hit SEND.
You should then have your image on the screen.
Voila!
And thanks to GreenLarry for the suggestion for how to post right-side-up pictures from your phone:
Go into your phone's settings and turn off Auto rotate. If you take a photo on a phone when its held upright the image is rotated to landscape portrait by default.
(This assumes (on my part) that all phone cameras have that setting).
2. It seems easier to use the Classic version of the forum for uploading images so switch to that if your phone hasn't defaulted to it.
You then need essentially to follow the steps as if you were posting from a computer:
3. First, select (or create) the thread you want to post to. I'm going to post a Reply to a thread in Bonsai Questions.
I've located the thread so I will now tap Post Reply
The reply window opens as per normal
4. Then, go to the photo posting icon. That's the middle of the three blue ones.
5. Touch it and you should get this:
Essentially what you are doing is eactly as you would for posting from a computer
6. Now click on Choose File and you should get this option:
7. Click Camera and then take your picture. On my phone it looks like this after the photo has been taken. I then click on the tick:
8. You will then get the Host it screen:
9. Click Host it, and you will get this:
10. Now comes the tricky bit. You need to know how to call up the sliders that allow you to highlight text on your phone. On mine, all I do is touch and hold. It is the middle line you want. It looks like this:
At the top of my screen now is a line of commands. The first one I click is Select All:
11. The text now should have been highlighted (remember it's the middle line you want). Then I touch Copy:
12. Once I have touched Copy, I move over to the text pane where I want the image to go. I tap and hold for a few seconds and I get the Paste icon appearing:
13. Tap on that and you should now see the image code appearing:
14. Now all you have to do is go to the bottom of the message window and hit SEND.
You should then have your image on the screen.
Voila!
And thanks to GreenLarry for the suggestion for how to post right-side-up pictures from your phone:
Go into your phone's settings and turn off Auto rotate. If you take a photo on a phone when its held upright the image is rotated to landscape portrait by default.
(This assumes (on my part) that all phone cameras have that setting).
JimLewis- Member
» c. Posting Video Tutorial
» Re-posting pics.
» Introduction
» posting pics from tablet
» Posting pics from iPad iPhone.
» Re-posting pics.
» Introduction
» posting pics from tablet
» Posting pics from iPad iPhone.
Page 1 of 1
Permissions in this forum:
You cannot reply to topics in this forum|
|
|