


Juniper Shimpaku - getting the angle right
+4
Jesse McMahon
Sam Ogranaja
stavros
marcus watts
8 posters
Page 1 of 1

 Juniper Shimpaku - getting the angle right
![]() marcus watts Fri Apr 13, 2012 9:04 pm
marcus watts Fri Apr 13, 2012 9:04 pm
Hi.
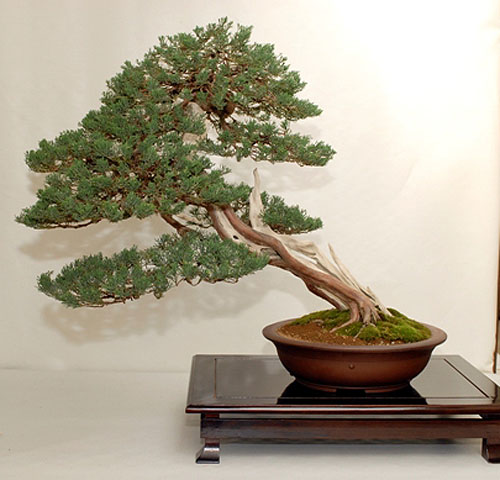
Pictures of this tree are dotted about here and there on the forum but I've bought them all together in this thread along with a few little tricks thrown in that may help with junipers and potting in general.
The tree was a japanese import that arrived in the Uk via Ginko Bonsai center in Belgium in July 2008

It arrived at Newstead Bonsai in Yorkshire and was part of the owners tree collection - I have pictures from 2009 and 2010

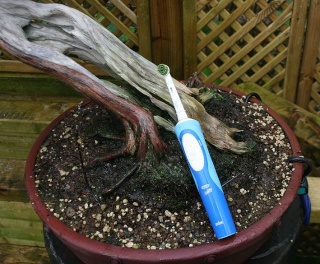
I aquired the tree in January 2012 and first job was to preserve the trunk base to protect from further rot. Firstly the green algae and old lime sulphur was cleaned from the lower trunk using an electric toothbrush
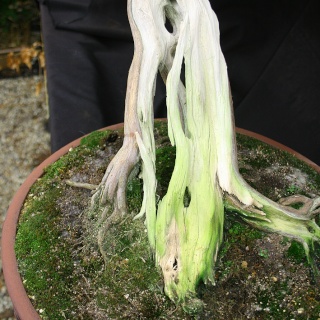
Then a wire brush was used to remove soft wood, making sure the brush followed the grain to enhance the natural grooves, and importantly the soil was scraped back to expose the dead wood that was buried - this is the most likely place the rot starts.
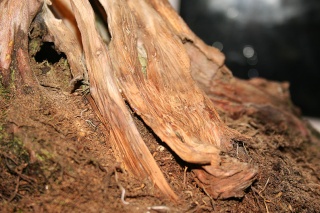
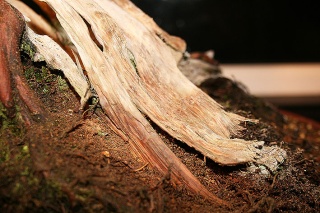
i find it needs a proper product to truely protect wood rather than just LS so I bought this exterior wood furniture protector as it dries clear with a mat finish. The tree was bought in for a few days to dry out before two coats of sealer were painted on the interior hollow trunk and the lower exterior bits

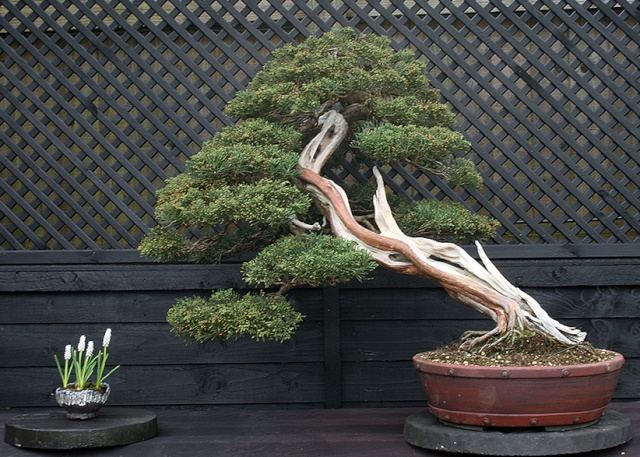
All the deadwood was treated with diluted lime sulphur 50/50 and allowed to dry properly before putting the tree outside for the winter. It sailed through the winter left fully exposed on the bench and in early spring started to flower heavily - combined with the dark green scale foliage this tends to suggest the tree is juniper chinensis sergenti - the wild collected variety called 'sergents juniper'.

The foliage was basically one big mass ready for a little defining and over easter weekend I spent about 6 hours placing pads and making spaces between them. With this done all shoots that were pointing or hanging down were cleaned off too, and the wiring exposed the upper trunk, so just before dark i started carving it, creating a hollow down to the heartwood and deeper in places, making a few hollows right through.
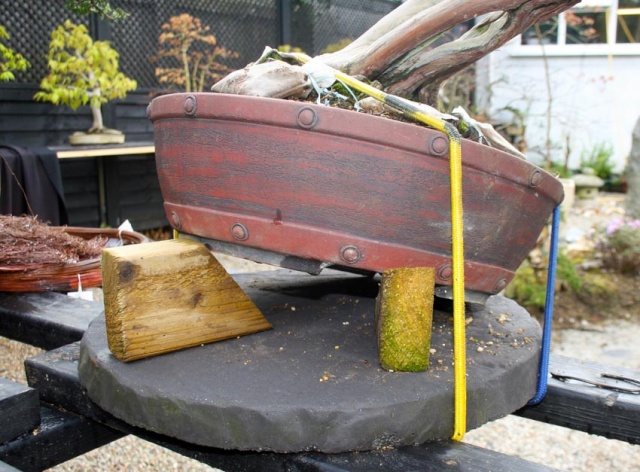
An observation by Rob was the upper tree was disappearing away from the viewer which was due to an abrupt curve where I had carved the new section so I had a play about with a couple of wedges to try out a few new angles. A couple of bunji cords held the tree tightly in place while I tried several options
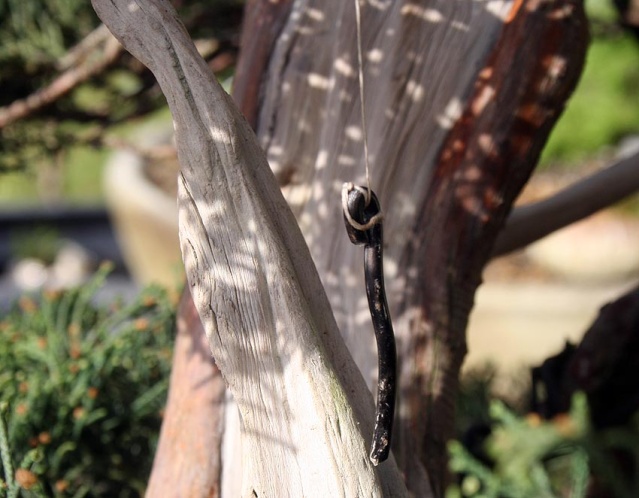
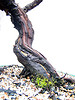
once a more favourable angle was found I used a handy little trick that can be used on any tree - a thin cotton and a wire 'needle' was hung from an upper branch so that it touches a point lower down on the trunk. This acts like a pointer hanging straight down, showing the exact angle of the the tree on the wedges.

Now I could remove the tree, comb out some roots from the front and add a wedge of new soil to the back of the pot so that the tree would sit at the new angle - this was also a perfect time to get the pot correctly lined up - the drum rivets and feet show the exact front. Once the tie wires were tightened the tree is tweaked and twisted until the hanging pointer was in the original position - showing the tree now sat at the exact angle it was on the blocks
The pads need a little re-adjusting to balance with the new trunk angle but now we have the tree sat properly in the pot - and the new angle makes the trunk base far better, showing off more of the width and the hollows.
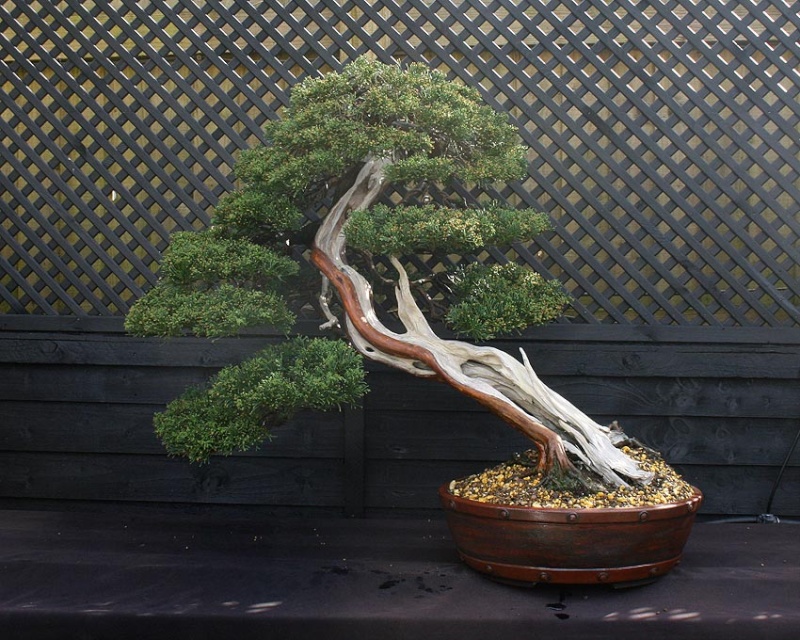
Now the top section is more upright and the 'vanishing point' aspect of the tree has gone.............until the next tweak
cheers
Marcus
Pictures of this tree are dotted about here and there on the forum but I've bought them all together in this thread along with a few little tricks thrown in that may help with junipers and potting in general.
The tree was a japanese import that arrived in the Uk via Ginko Bonsai center in Belgium in July 2008
It arrived at Newstead Bonsai in Yorkshire and was part of the owners tree collection - I have pictures from 2009 and 2010
I aquired the tree in January 2012 and first job was to preserve the trunk base to protect from further rot. Firstly the green algae and old lime sulphur was cleaned from the lower trunk using an electric toothbrush
Then a wire brush was used to remove soft wood, making sure the brush followed the grain to enhance the natural grooves, and importantly the soil was scraped back to expose the dead wood that was buried - this is the most likely place the rot starts.
i find it needs a proper product to truely protect wood rather than just LS so I bought this exterior wood furniture protector as it dries clear with a mat finish. The tree was bought in for a few days to dry out before two coats of sealer were painted on the interior hollow trunk and the lower exterior bits
All the deadwood was treated with diluted lime sulphur 50/50 and allowed to dry properly before putting the tree outside for the winter. It sailed through the winter left fully exposed on the bench and in early spring started to flower heavily - combined with the dark green scale foliage this tends to suggest the tree is juniper chinensis sergenti - the wild collected variety called 'sergents juniper'.
The foliage was basically one big mass ready for a little defining and over easter weekend I spent about 6 hours placing pads and making spaces between them. With this done all shoots that were pointing or hanging down were cleaned off too, and the wiring exposed the upper trunk, so just before dark i started carving it, creating a hollow down to the heartwood and deeper in places, making a few hollows right through.
An observation by Rob was the upper tree was disappearing away from the viewer which was due to an abrupt curve where I had carved the new section so I had a play about with a couple of wedges to try out a few new angles. A couple of bunji cords held the tree tightly in place while I tried several options
once a more favourable angle was found I used a handy little trick that can be used on any tree - a thin cotton and a wire 'needle' was hung from an upper branch so that it touches a point lower down on the trunk. This acts like a pointer hanging straight down, showing the exact angle of the the tree on the wedges.
Now I could remove the tree, comb out some roots from the front and add a wedge of new soil to the back of the pot so that the tree would sit at the new angle - this was also a perfect time to get the pot correctly lined up - the drum rivets and feet show the exact front. Once the tie wires were tightened the tree is tweaked and twisted until the hanging pointer was in the original position - showing the tree now sat at the exact angle it was on the blocks
The pads need a little re-adjusting to balance with the new trunk angle but now we have the tree sat properly in the pot - and the new angle makes the trunk base far better, showing off more of the width and the hollows.
Now the top section is more upright and the 'vanishing point' aspect of the tree has gone.............until the next tweak
cheers
Marcus

marcus watts- Member

Re: Juniper Shimpaku - getting the angle right
![]() stavros Fri Apr 13, 2012 9:22 pm
stavros Fri Apr 13, 2012 9:22 pm
nice little trick there with the needle and the line!
the tree looks fantastic
thanx for sharing
the tree looks fantastic
thanx for sharing
stavros- Member
Re: Juniper Shimpaku - getting the angle right
![]() Sam Ogranaja Fri Apr 13, 2012 11:08 pm
Sam Ogranaja Fri Apr 13, 2012 11:08 pm
I agree with Stavros. Thanks for sharing Marcus.
Have a great weekend!!!
Sam
Have a great weekend!!!
Sam

Sam Ogranaja- Member
Re: Juniper Shimpaku - getting the angle right
![]() Jesse McMahon Sat Apr 14, 2012 1:39 am
Jesse McMahon Sat Apr 14, 2012 1:39 am
Love the progression. That tidbit about the needle will definitely be something that goes in the 'toolbox'. Thanks for sharing, Marcus...makes a youngblood like myself all the more keen to keep at it.
Jesse McMahon- Member
Re: Juniper Shimpaku - getting the angle right
![]() cbobgo Sat Apr 14, 2012 1:58 am
cbobgo Sat Apr 14, 2012 1:58 am
very nice!
I had been told in the past that when using a wood protector like you did, that you have to use the lime sulfur first, as the protector/sealer will keep the lime sulfur from being taken up by the wood. But this is apparently not true?
- bob
I had been told in the past that when using a wood protector like you did, that you have to use the lime sulfur first, as the protector/sealer will keep the lime sulfur from being taken up by the wood. But this is apparently not true?
- bob

cbobgo- Member
Re: Juniper Shimpaku - getting the angle right
![]() crust Sun Apr 15, 2012 3:40 pm
crust Sun Apr 15, 2012 3:40 pm
Thank you for taking all the effort to post such a great pictorial progression of applied techniques. It really shows not only the process and level of detail but also reveals the considerable time it all takes to maintain high quality mature trees.
crust- Member
Re: Juniper Shimpaku - getting the angle right
![]() tmmason10 Mon Apr 16, 2012 5:07 am
tmmason10 Mon Apr 16, 2012 5:07 am
Excellent write up and pictures. Stunning tree thanks for sharing.
tmmason10- Member
Re: Juniper Shimpaku - getting the angle right
![]() marcus watts Mon Apr 16, 2012 6:50 am
marcus watts Mon Apr 16, 2012 6:50 am
cbobgo wrote:very nice!
I had been told in the past that when using a wood protector like you did, that you have to use the lime sulfur first, as the protector/sealer will keep the lime sulfur from being taken up by the wood. But this is apparently not true?
- bob
Hi Bob
It nearly is true and I had heard similar - but I had a little experiment as to work properly I guessed the wood treatment needed to be on the actual bare wood rather than on top of the lime. To trap the LS underneath would also result in the colour fading more on the normal trunk and staying bright on the treated section.
After 2 coats of treatment had dried there was a smooth 'slightly coated' appearance to the wood. Using my water diluted 50/50 LS solution as normal resulted in the LS sitting in droplets on top ! so I gently rubbed my finger tip over the treated area and it 'roughed' the smooth finish, giving a key to paint on - then using neat LS got it behaving like normal and covering as we are used to.
Cheers for the other comments - it is time consuming once you get to the refining stage of detailing the trees, thats the main reason why I drastically reduced my collection 2 years ago. Now I have about 12 being detailed and the same number being 'formed' still, and with varied species the work is spread across the year. This is the trick really - having trees with proper 'seasons' to wire, prune, pinch etc means each tree gets worked on at the right time, and other trees get to rest at the same time too.
cheers Marcus
marcus watts- Member
Re: Juniper Shimpaku - getting the angle right
![]() Tona Tue Apr 17, 2012 3:43 pm
Tona Tue Apr 17, 2012 3:43 pm
Beautiful work Marcus. I love the tree.
Tona
Tona

Tona- Member
» Shimpaku juniper
» Shimpaku juniper
» Shimpaku Juniper Shohin
» Shimpaku Juniper - is it dead?
» Shimpaku Juniper Tanuki
» Shimpaku juniper
» Shimpaku Juniper Shohin
» Shimpaku Juniper - is it dead?
» Shimpaku Juniper Tanuki
Page 1 of 1
Permissions in this forum:
You cannot reply to topics in this forum|
|
|