


Root grafting
4 posters
Page 1 of 1

 Root grafting
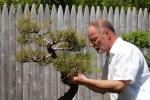
![]() peter keane Thu May 12, 2011 8:18 pm
peter keane Thu May 12, 2011 8:18 pm
Here's a series on root grafting for a scots pine clump. This is my first root grafting project. I wanted the trunks to start from roots rather than the single stump on this tree. So, I chose to graft scots pine roots closer to the trunks to solve this problem. The method of grafting used is called "tongued-approach grafting". A slice is made in the scion wood that is inserted into a slot on the clump created by a grafting chisel. It's important to shave the bark off the outer side of the scion wood, since this is the part that is going to be in contact with the scots trunk. It's also important to make the cut into the scion wood as close to the roots as possible. If the graft is made higher up on the scion trunk (away from the roots), you'll have the appearance of aerial roots which is quite unattractive. Finally, I was not able to place the scion roots into pots because of the tight space. So, I made a bag of netting to hold a bed of sphagnum, loose soil, and more sphagnum. I should be able to remove the scion foliage above the graft union in two years.


peter keane- Member

Re: Root grafting
![]() Orion Fri May 13, 2011 12:32 am
Orion Fri May 13, 2011 12:32 am
Is it possible just to graft surface roots at the base?

Orion- Member
Re: Root grafting
![]() Todd Ellis Fri May 13, 2011 12:48 am
Todd Ellis Fri May 13, 2011 12:48 am
Thanks for sharing yourproject. I hope they "take"!
Todd
Todd

Todd Ellis- Member
Root grafting
![]() Guest Fri May 13, 2011 1:50 am
Guest Fri May 13, 2011 1:50 am
Great stuff Peter. I've been looking to graft roots on one of my Pines for ages. Have you any more detail on the union? I've not done anything other than approach....PLEASE 
Guest- Guest
Re: Root grafting
![]() peter keane Fri May 13, 2011 3:56 am
peter keane Fri May 13, 2011 3:56 am
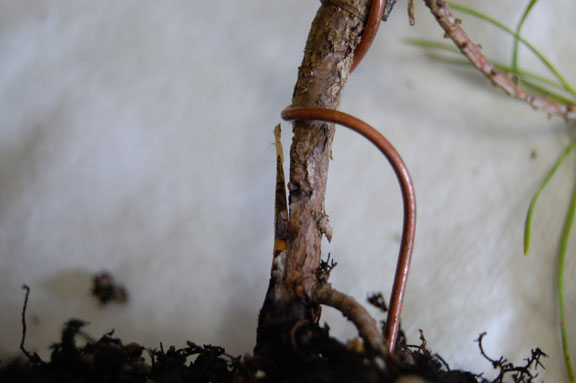
hi Will. As I had did not have an extra set of hands with this project, I don't have additional photos of the graft union prior to taping everything shut. What you do is bend the scion stalk to open the "tongue" wide enough for fitting into the flap in the picture above it. The copper wire in my picture is just to keep the tongue opened enough for shooting it. Wasn't used in the graft procedure itself. I've attached four sets of roots to the trunk. One of the images shows a staple for tying the polytape. I've had to make strategic placements of staples to prevent the polytape on the different grafts from interfering with each other.
When you cut the flap in the trunk (with a grafting chisel), make sure it's shallow and long so as to have enough "wood" to grab the scion tongue when it's inserted. If you can have help, your assistant can pack damp moss onto the scion stalk as you tie it together with grafting tape. The moss will give extra holding power for the graft and prevent dessication at the union. It's also a good idea to tie the scion stalk at a nearby point above the graft to the main tree so it doesn't toss around in the wind..
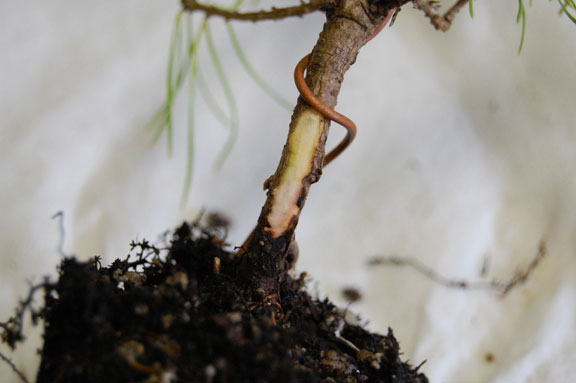
Here's a "tongued" approach graft of scots to ponderosa pine for changing foliage. This graft was done two years ago. Over time the seam will disappear. I'm hoping that the graft union for roots will look cleaner than this. I've seen this procedure in a juniper bonsai book I have. But, shows the start, not the finished result.

When you cut the flap in the trunk (with a grafting chisel), make sure it's shallow and long so as to have enough "wood" to grab the scion tongue when it's inserted. If you can have help, your assistant can pack damp moss onto the scion stalk as you tie it together with grafting tape. The moss will give extra holding power for the graft and prevent dessication at the union. It's also a good idea to tie the scion stalk at a nearby point above the graft to the main tree so it doesn't toss around in the wind..
Here's a "tongued" approach graft of scots to ponderosa pine for changing foliage. This graft was done two years ago. Over time the seam will disappear. I'm hoping that the graft union for roots will look cleaner than this. I've seen this procedure in a juniper bonsai book I have. But, shows the start, not the finished result.
peter keane- Member
Re: Root grafting
![]() peter keane Fri May 13, 2011 4:06 am
peter keane Fri May 13, 2011 4:06 am
Orion wrote:Is it possible just to graft surface roots at the base?
Gotta leave the scion foliage to draw sap up the trunk while the union heals. You can do a google search on "tongued approach graft" for more information. I have "The Grafter's Handbook" (Royal Horticultural Society) as a guide.
peter keane- Member
Re: Root grafting
![]() peter keane Mon Mar 12, 2012 2:59 am
peter keane Mon Mar 12, 2012 2:59 am
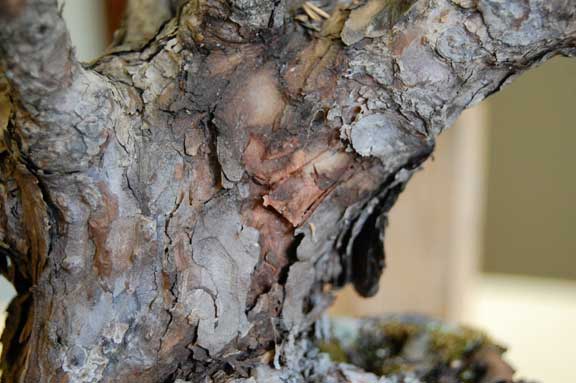
It's a year later and I thought I would follow up on the progress of this project. Today, I removed the screen to see if the whips had grafted as I intended.
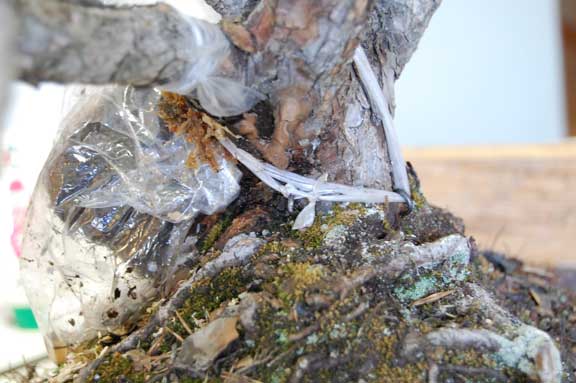
All four of last year's placements were successful! I'm only showing one as it was the most clear for photography. The third image shows the gap between placements. I attached a fifth scots shoot today. I was not able to get into that tight area with a grafting chisel as would be required to perform another tongued approach graft. So, I opted for an inlay where a groove was cut using a dremel tool with an appropriate wheel. upholstery tacks hold the shoot in place prior to applying sphagnum moss and grafting tape. The final image shows where I want the soil line to be in a few years.


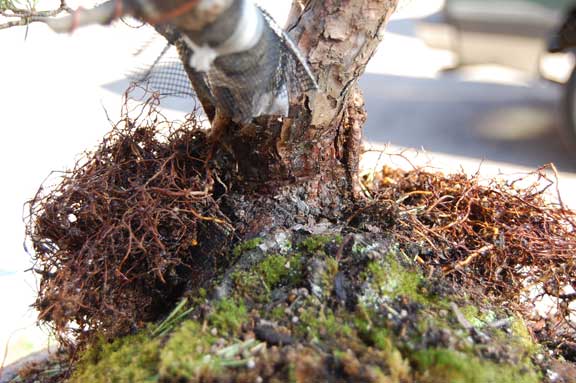


All four of last year's placements were successful! I'm only showing one as it was the most clear for photography. The third image shows the gap between placements. I attached a fifth scots shoot today. I was not able to get into that tight area with a grafting chisel as would be required to perform another tongued approach graft. So, I opted for an inlay where a groove was cut using a dremel tool with an appropriate wheel. upholstery tacks hold the shoot in place prior to applying sphagnum moss and grafting tape. The final image shows where I want the soil line to be in a few years.
peter keane- Member
Re: Root grafting
![]() marcus watts Mon Mar 12, 2012 6:55 am
marcus watts Mon Mar 12, 2012 6:55 am
it is good to see how much healthier the tree looks too - better folliage colour and density etc - due in part to all the extra roots feeding the tree at the moment.
nice to see the progression too, it will be a very natural clump style.
good grafting
cheers Marcus
nice to see the progression too, it will be a very natural clump style.
good grafting
cheers Marcus

marcus watts- Member
» Trident Maple front and back views
» Dragon Workshop
» Grafting bonsai: Prunus mume
» Itoigawa grafting
» Grafting Pine Branches
» Dragon Workshop
» Grafting bonsai: Prunus mume
» Itoigawa grafting
» Grafting Pine Branches
Page 1 of 1
Permissions in this forum:
You cannot reply to topics in this forum|
|
|