


Making a daiza by Sandro Tschudin.
+2
landerloos
furuya
6 posters
Page 1 of 1

 Making a daiza by Sandro Tschudin.
![]() furuya Wed Nov 25, 2009 5:29 pm
furuya Wed Nov 25, 2009 5:29 pm
Hello Everyone,
I would like to present here a file on daiza made by Sandro Tschudin, a Swiss Friend. Let me know if you like please:
The Daiza by Sandro Tschudin
Hello with everyone, I would like to present a series of photographs to you on making a daiza. I wanted to do it for two reasons:
First because the beginners can benefit from my experiment and learn an effective method on the way of manufacturing a very precise base without spaces between the stone and wood.
Secondly because it would be very useful and interesting to discuss thoroughly with you the problems related to that and of course to divide the opinions of each one. Profit and do not hesitate to give me your opinions and your secrecies, thank you.
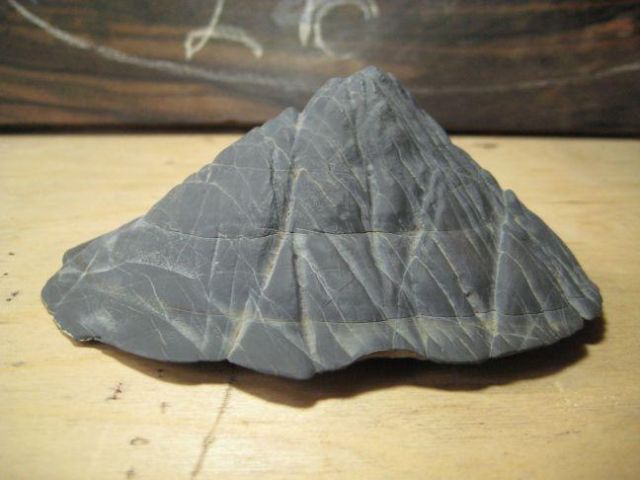
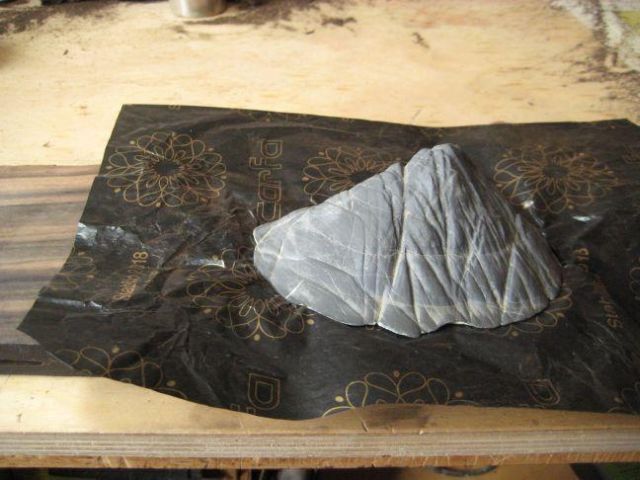
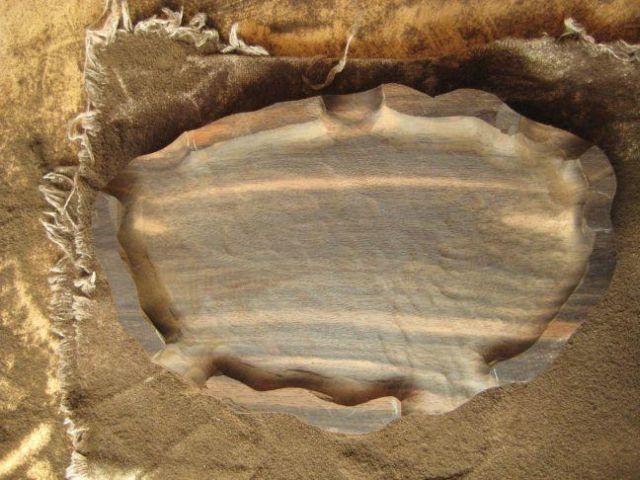
I chose a rather simple stone, with a bearing surface very flat, a typical “palombino”. In the photograph you can see that the medium of the stone is higher than the remainder, which poses minor problems.
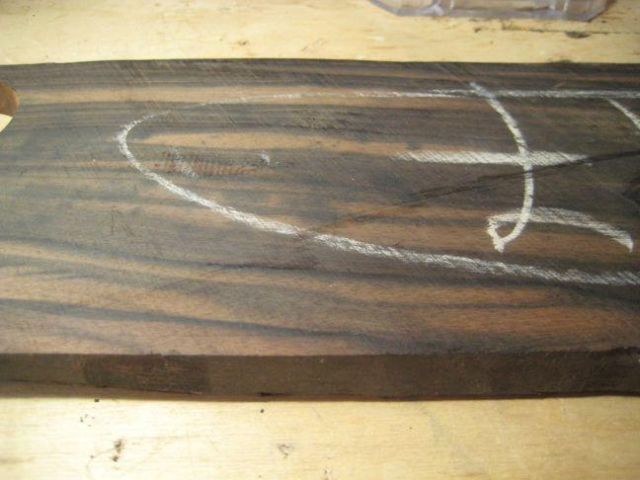

Selected wood is ebony macassar: its granulation and its color go very well with the stone. Wood is very dense (110kg/m3) so I can obtain a surface glossed in polishing.
I think that it is absolutely important to make a sketch of the project. This one is my eighteenth daiza. I wanted to do something of traditional, form simple, only one edge in top and for esthetic reasons an ornament which links the feet, shares the height of the daiza and points out the veins of the stone.
I start then with a very pointed colored pencil, I trace a line of the edge of the stone around: where the stone touches wood (level 0) this line is vertical (a great help is to wet the pencil a little).
Where the stone does not touch wood, I fold the pencil under it obliquely, like that I do not risk to draw it too outside: it remains in a “safe” zone. Afterwards, when the stone is lowered and touches wood, this part will become it-also on level “ 0 “, and I will start again to trace a vertical line.


Here is the exact contour of my stone

With the chisel I remove very quickly most wood. Caution: never work too close to the drawn line!

While working with the chisel I attach the board with a clamp.

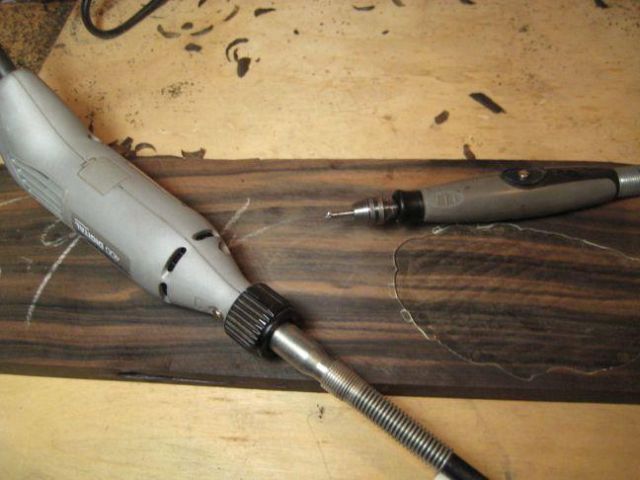
Then to have a regular depth, I use the dremel. I mill exactly with the drawn line. It is very important to mill in a precise way, especially where the line marks “the true” contour of the stone (where I had drawn vertically).

For this work, I use the dremel like milling machine.
The drills, which are necessary for wood dense, are made of hard metal, very different from the drills of Dremel (made tool steel and very quickly worn: only after 5cm of work, they burn!) hard metal on the contrary are made to work steel and remain sharp really a long time. With only one part I carried out three daiza, and with only 30 euro each I think this money is well spent.

We are now at the point, where the stone returns already a little in wood. All the places where I must still dig a little, I make signs. They are an indication where I can make faults and where I must stop.
Thus the procedure is repeated. Where the stone touches wood, I redraw the line and I start again to dig.
Of course it arrives the moment, in which invisible parts of the stone touch wood.

Between bracket:
It often happens that one correctly does not put the stone in his site, to avoid this situation, it is imperative to create a point of reference, as a line which crosses whether wood or the stone at the same place.

For the problems of the invisible parts, I have two solutions: initially I make a model of stone site with clay, not so practical because by pressing it, clay becomes deformed a litle.
I would like to present here a file on daiza made by Sandro Tschudin, a Swiss Friend. Let me know if you like please:
The Daiza by Sandro Tschudin
Hello with everyone, I would like to present a series of photographs to you on making a daiza. I wanted to do it for two reasons:
First because the beginners can benefit from my experiment and learn an effective method on the way of manufacturing a very precise base without spaces between the stone and wood.
Secondly because it would be very useful and interesting to discuss thoroughly with you the problems related to that and of course to divide the opinions of each one. Profit and do not hesitate to give me your opinions and your secrecies, thank you.
I chose a rather simple stone, with a bearing surface very flat, a typical “palombino”. In the photograph you can see that the medium of the stone is higher than the remainder, which poses minor problems.
Selected wood is ebony macassar: its granulation and its color go very well with the stone. Wood is very dense (110kg/m3) so I can obtain a surface glossed in polishing.
I think that it is absolutely important to make a sketch of the project. This one is my eighteenth daiza. I wanted to do something of traditional, form simple, only one edge in top and for esthetic reasons an ornament which links the feet, shares the height of the daiza and points out the veins of the stone.
I start then with a very pointed colored pencil, I trace a line of the edge of the stone around: where the stone touches wood (level 0) this line is vertical (a great help is to wet the pencil a little).
Where the stone does not touch wood, I fold the pencil under it obliquely, like that I do not risk to draw it too outside: it remains in a “safe” zone. Afterwards, when the stone is lowered and touches wood, this part will become it-also on level “ 0 “, and I will start again to trace a vertical line.
Here is the exact contour of my stone
With the chisel I remove very quickly most wood. Caution: never work too close to the drawn line!
While working with the chisel I attach the board with a clamp.
Then to have a regular depth, I use the dremel. I mill exactly with the drawn line. It is very important to mill in a precise way, especially where the line marks “the true” contour of the stone (where I had drawn vertically).
For this work, I use the dremel like milling machine.
The drills, which are necessary for wood dense, are made of hard metal, very different from the drills of Dremel (made tool steel and very quickly worn: only after 5cm of work, they burn!) hard metal on the contrary are made to work steel and remain sharp really a long time. With only one part I carried out three daiza, and with only 30 euro each I think this money is well spent.
We are now at the point, where the stone returns already a little in wood. All the places where I must still dig a little, I make signs. They are an indication where I can make faults and where I must stop.
Thus the procedure is repeated. Where the stone touches wood, I redraw the line and I start again to dig.
Of course it arrives the moment, in which invisible parts of the stone touch wood.
Between bracket:
It often happens that one correctly does not put the stone in his site, to avoid this situation, it is imperative to create a point of reference, as a line which crosses whether wood or the stone at the same place.
For the problems of the invisible parts, I have two solutions: initially I make a model of stone site with clay, not so practical because by pressing it, clay becomes deformed a litle.
furuya- Member

Re: Making a daiza by Sandro Tschudin.
![]() furuya Wed Nov 25, 2009 5:46 pm
furuya Wed Nov 25, 2009 5:46 pm


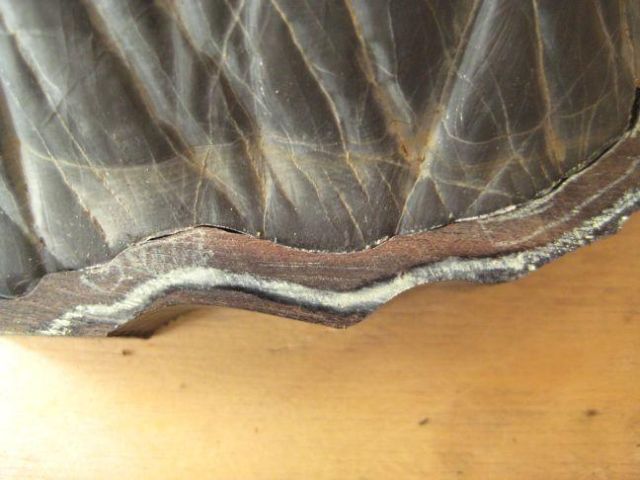
Here, you can see from copy how the bed should be carved.
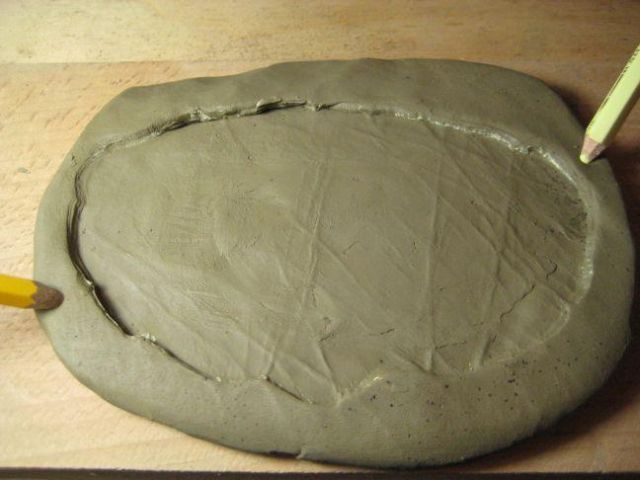
The two pencils mark the place where the stone should be inserted more in wood.
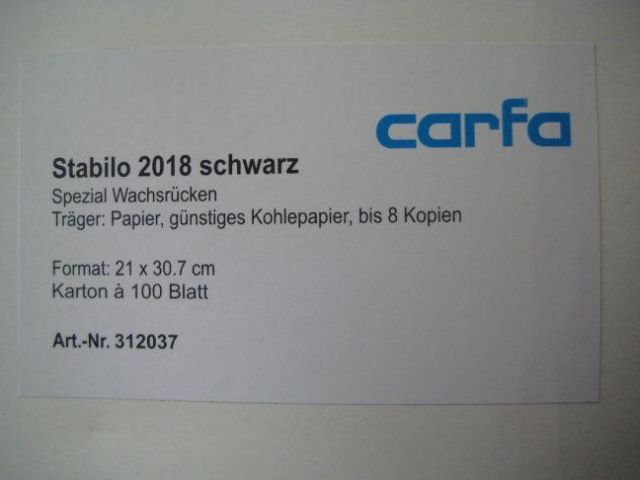
How to transmit this information to wood? Our goal is to give to the stone the narrowest possible place, one cannot arrive there with the eyes, on the other hand the carbon paper makes our deal very well.
Simple application: I place a sheet of paper carbon on wood, I force the stone in his site and by removing stone and sheet, they remain to me black spots which give me the indication where I will have to mill. Caution: because of its own thickness, the sheet always leaves traces on the edge interior and external of the daiza with the limit of the danger zone; for this reason here I dig delicately and only after having controlled the base of the stone without sheet of paper carbon.
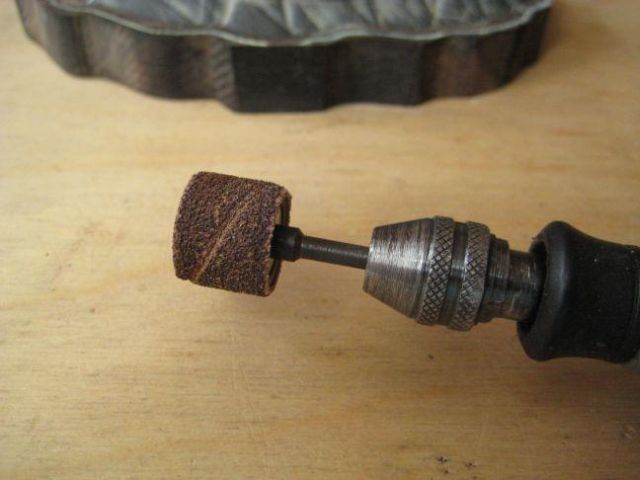
When the parts to be dug become increasingly small, I often use the flexible arm (see photo) and a spherical drill with hard metal.
Little by little and with patience, this quite monotonous work will have a good performance.
The daiza enters a second state then.
furuya- Member
Re: Making a daiza by Sandro Tschudin.
![]() furuya Wed Nov 25, 2009 6:25 pm
furuya Wed Nov 25, 2009 6:25 pm

Since the stone can return in wood up to the wished level, I can now draw a line parallel with the first at a distance from 1 cm: this line repeats the contour of the stone exactly. Now I can cut all wood external with this line with a band saw.
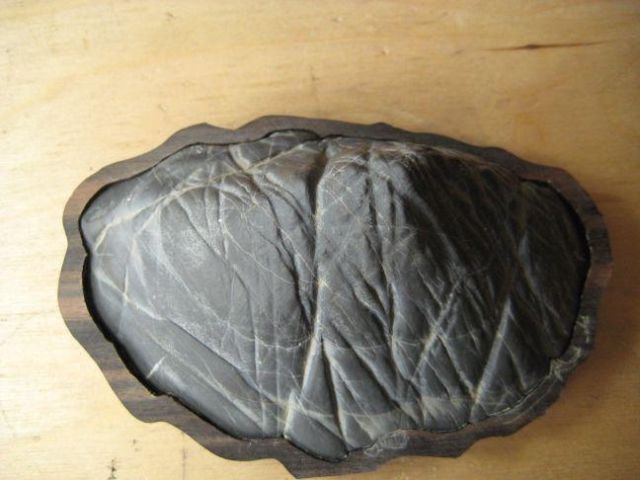
Here is how the project arises now: one sees very well where the stone was inserted more in wood.
In any part of the daiza you will find broad slits between stone and wood.


It is always a great satisfaction when the stone holds like that in wood, which wants to say that I worked well.
Of course the daiza still has the coarse air, it is necessary to redraw the line around the stone with good more precision, as that it can especially become more elegant if I regain the shapes of contour in a meticulous way.
In Switzerland one says: “The Love hides in the details”.
With this tool I will sharpen the contour to the line. It is important that all dimensions are quite vertical, because after the next steps will be much simpler.
Don’t forget to protect you! The dust of certain wood is toxic! For instance yew, the jarrah, mahogany.

Here is the result. Already much more balanced. The vertical sides.
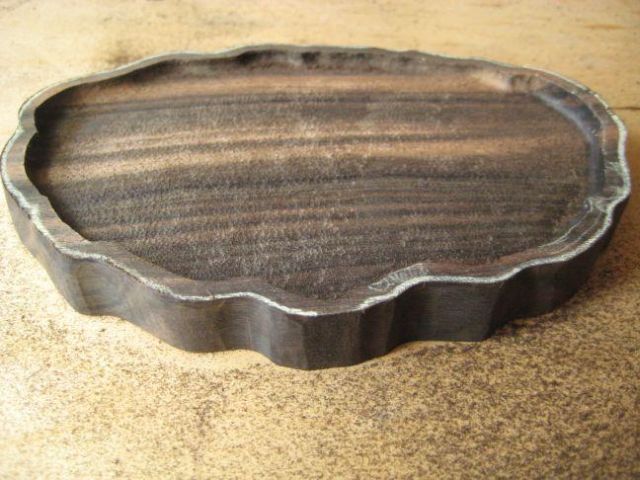
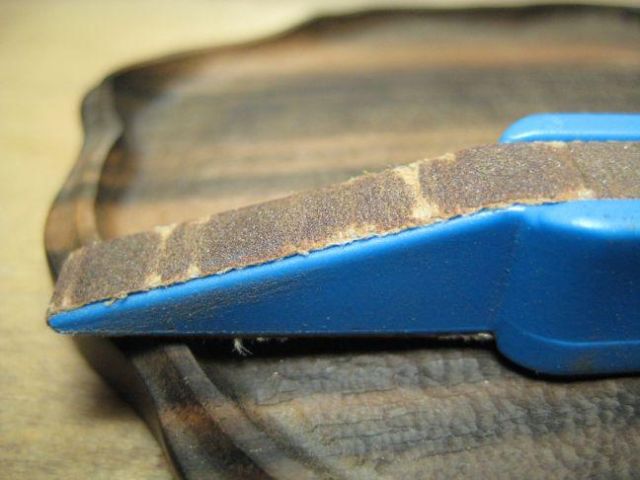
One approaches more pleasant and creative work! Initially one draws a second-row forward, which marks the first edge which touches the stone. I want that it is quite light and fine: not more approximately than 1-1,15mm thickness. The second-row forward is directed by the outside line.

It is necessary to dig with precaution up to level 0 of the stone with a rather small spherical drill (see photo). The edge will not be on the same level everywhere.


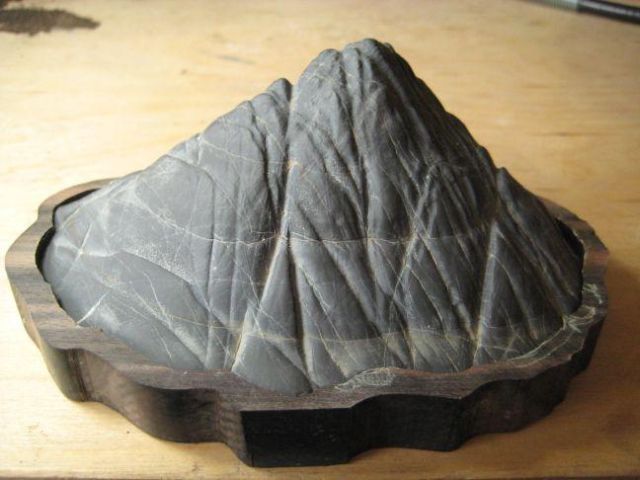
You see here like the first edge is well adapted worthy of contour of the stone. It is a decision of personal taste how much one must leave height. In the traditional Japanese daiza there isn’t a transition between the stone and wood, with or without edge, so it will create an aspect of unit between the two parts. Look at the details on the photograph.

The line on the face of the daiza will determine the thickness of the daiza without the feet.
It is made like that:

Here a picture of the project from top:

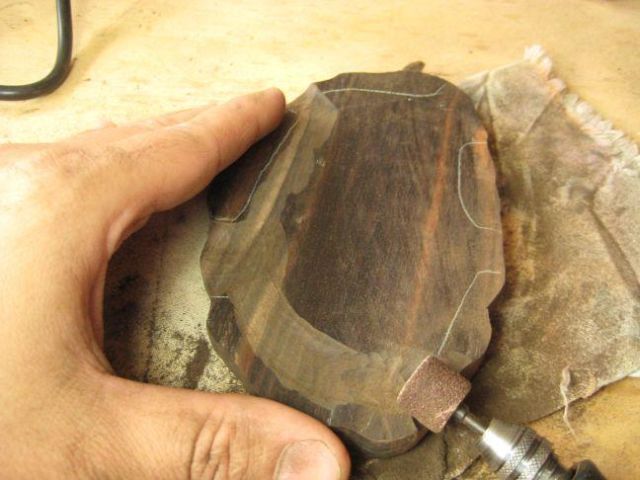
Here the possible feet, they are arranged on the bulges of the stone and carry the weight visually. It is recommended that their number is odd, in my example they are still too numerous, I will remove two from them; the three which remain will be slightly increased.

The ahead foot is on the left, look at the tool.
After much of work: here the result, the feet aren't you yet with their right height, Look you various heights of the first edge?
Here are, feet with their correct height and their elaborate backs.


In this moment I sandpaper for the first time, particle size 240, I use a very powerful Japanese product. The sheets are in flax and the very abrasive surfaces, bought at “www.dick.biz “

Here the result after 3 hours.… you can already foresee the brilliance a little…


The whole was sandpapered with particle size 400.

The ornament of decoration is quickly made, much longer sandpapering…
I had initially drawn it on wood, and then I dug it with a very fine drill.

Total sight:
(Did you note that the stone became much more elegant once worked the daiza?)
Here my tool to sandpaper the corners difficult to reach: it is an instrument with abrasive paper around, it is also called “variolappe”, bought him at” www.dick.biz”


Here a detail:
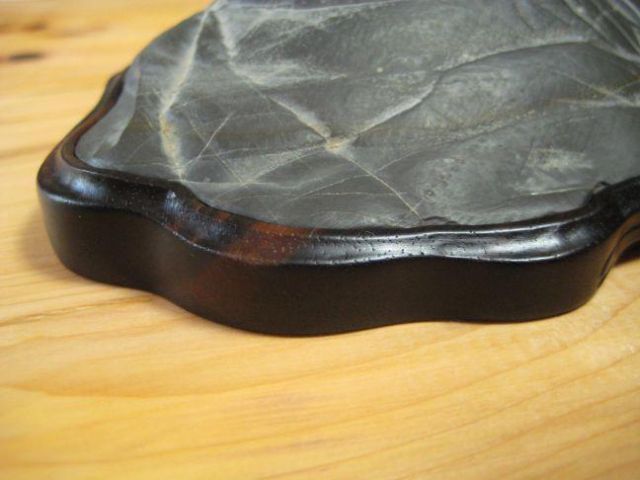
Here is the daiza after sandpapering with 400,600,1000 and 1600. For the completion I use steel wool 000 and 0000 (finest). I find that this brilliance is increasingly more beautiful than a varnish.

The steel wool (of rakso):

Still two steps… First the seal


Photo and finally the oil. it is a mixture of tung oil (Chinese nut), oil of camellia and orange at 10:2: 1, the whole bought at www.dick.biz.
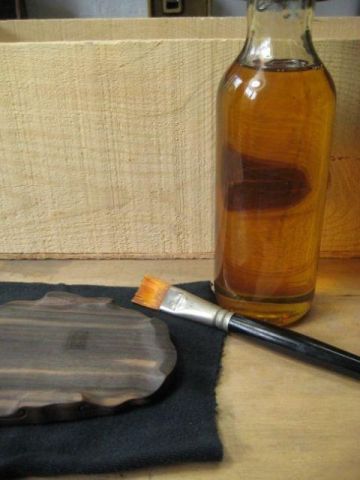
To leave oil during 10 h, afterwards with a fine cotton rag, you remove the surplus by polishing the daiza.


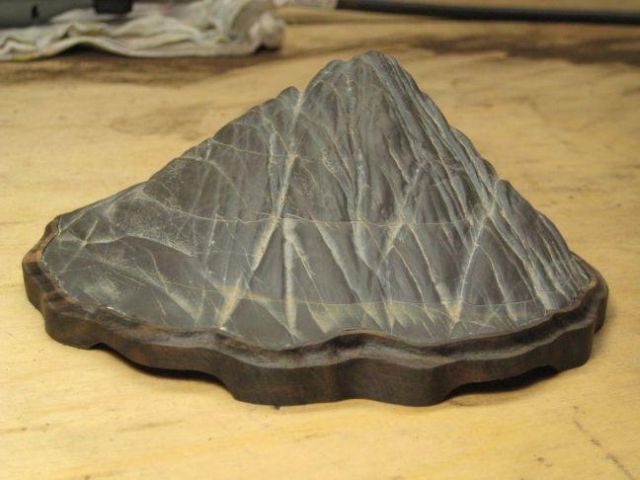
It is the dessert: look at the colors!!! Wood becomes even darker. After 45 work hours, the project is finished (damage for shade which shows thicker the daiza…)

Details where the veins are visible:
Another work of art which will survive me.


I hope it will be helpful for you,
marco
furuya- Member
Re: Making a daiza by Sandro Tschudin.
![]() landerloos Wed Nov 25, 2009 6:35 pm
landerloos Wed Nov 25, 2009 6:35 pm
Marco, very nice explenation.
And the result is faboulus
Gives me courage to try it myself
Peter
And the result is faboulus
Gives me courage to try it myself
Peter

landerloos- Member
Re: Making a daiza by Sandro Tschudin.
![]() gman Wed Nov 25, 2009 7:22 pm
gman Wed Nov 25, 2009 7:22 pm
Impressive,.....looks great and wow 45 hours of work......... can you actually recovery a true value of your time..... eg. at $20/hour that's $900 or approx. 560 euros!
G
G
gman- Member
Re: Making a daiza by Sandro Tschudin.
![]() anttal63 Wed Nov 25, 2009 8:36 pm
anttal63 Wed Nov 25, 2009 8:36 pm
brilliant marco ! thanks for taking the time to share this. i too have the courage to have a go now. only problem is to find the time 


anttal63- Member
Re: Making a daiza by Sandro Tschudin.
![]() Kev Bailey Wed Nov 25, 2009 9:06 pm
Kev Bailey Wed Nov 25, 2009 9:06 pm
Absolutely fantastic photo documentary Marco. Please pass on our thanks to Sandro Tschudin. A very impressive talent.
This is an instant "Archive" post for the new website.
This is an instant "Archive" post for the new website.
Kev Bailey- Admin
Re: Making a daiza by Sandro Tschudin.
![]() furuya Wed Nov 25, 2009 9:58 pm
furuya Wed Nov 25, 2009 9:58 pm
Hi Peter,Gman,Anttal63 and Kev,
many thanks for Sandro, who is a new fantastic talent and a good collector in Italy (Giacopiane Lake): do you remember Chris?
He is simple nice and generous man, we are in contact frequently and I'm proud to know him.
Kev,
if you want I can send to you a PDF file with pctures and text to put here like post-it and surely like Archive, because
you have all suggestions to make a daiza with any difficult: follow only these steps.
Best wishes,
marco
furuya- Member
Re: Making a daiza by Sandro Tschudin.
![]() John Quinn Wed Nov 25, 2009 10:56 pm
John Quinn Wed Nov 25, 2009 10:56 pm
Thanks very much for all the effort involved in putting forth this very educational piece. An excellent result and an excellent addition to the forum!

John Quinn- Member
Re: Making a daiza by Sandro Tschudin.
![]() furuya Wed Nov 25, 2009 11:20 pm
furuya Wed Nov 25, 2009 11:20 pm
John,
that was my purpose, an educational piece for all Suiseki newbies all around the world, in French Forum we had it from one month.
I think there isn't a file so fine in pictures and explanations and the big merit is that Sandro loves natural wood without warnishes or
paints.
Certainly you must work hard, but not necessarily all days: this work can be accomplished along weeks with one or two hours/day,
nothing are pressing, but the result will be fun.
marco
furuya- Member
» to daiza or not to daiza...
» Literati hawthorn summer installation
» Making my first yamadori
» making slabs
» making Scrolls
» Literati hawthorn summer installation
» Making my first yamadori
» making slabs
» making Scrolls
Page 1 of 1
Permissions in this forum:
You cannot reply to topics in this forum|
|
|